
5 Expert Tips for Dialing in Your Bikepacking Setup
So you want to start bikepacking? Awesome! I first got into bikepacking a few years ago and now it’s one of my absolute favorite ways to travel and explore the world on two wheels.
But where do you start?
If you’re new to bikepacking, figuring out your bikepacking setup can be intimidating and confusing. How do you fit everything onto your bike? What kind of bags do you need? Where does everything go?
I’ve been there – I was a beginner once too, but now that I have a number of bikepacking trips under my wheels, I feel a lot more confident about my bikepacking setup.
In this post, I share my top 5 tips for helping you dial in your bikepacking system and provide 5 real bikepacking examples to help you get out the door and onto the trail.
Let’s roll!
5 Bikepacking Setup tips
1. Focus on the big 3
If you’ve been looking at different bikepacking setups and systems, you’ve probably seen the big three:
- A seat post bag
- A frame bag
- A handlebar roll
These three bags are the bread and butter of your bikepacking system because they can carry the most gear. Also, when packed correctly, they allow you to spead out the weight across the length of your bike.
Seat post bag
Seat post bags attach to your seat post and extend out over your rear tire. They can range in size from just a few liters to over 10 L.
Here are a few considerations when choosing your seat post bag:
What to pack in your seat post bag
You don’t want to carry anything too heavy in your seat post bag because you don’t want it to sag down toward your rear tire.
Here is what I typically pack in my seat post bag:
- Clothes
- Toiletries
- Wet wipes
- Headlamp
Frame bag
Frame bags fit within the main triangle of your bike. The problem is, no two bikes will have the exact same frame triangle dimensions.
You can buy ‘universal’ frame bags that are designed to ‘generally’ fit ‘most’ bikes, but if you plan on doing a lot of bikepacking I recommend investing in a custom-made frame bag that is specific to your bike’s dimensions.
If you’re crafty, you can also go the DIY route and make your own frame bag.
What to pack in your Frame bag
Because they are centered on your bike, frame bags are a great place to carry heavier items:
- Food
- Stove & cookware
- Tools
Handlebar roll
Handlebar rolls attach to your handlebars and are a great place to pack lightweight items like your tent and sleeping bag.
Like seat post bags, handlebar rolls can be fixed to your bike or you can get a harness-style system that allows you to remove the dry bag from the bike.
Keep reading to see which system I prefer 🙂
What to pack in your handlebar roll
Pack lighter gear in your handlebar roll to keep the front of your bike as lightweight and maneuverable as possible:
- Tent & poles
- Sleeping pad
- Sleeping bag
- Jackets

2. Harnesses are the way
The first set of bikepacking bags I owned were fixed bags, meaning the handlebar roll and the seat post bag were fully attached to the bike. This is how most bikepacking bags were designed until a few years ago when harness-style systems came out.
After using both systems, I definitely prefer harnesses over fixed bags. Harnesses allow you to remove your dry bags from the bike without taking the whole thing off.
Harnesses make it so much easier to pack and unpack your gear and allow you to customize your system based on what kind of trip you’re doing, which brings me to my next tip…

3. Think modular
As much as I’d love for there to be one bikepacking setup that works best for all trips, it’s just not the case.
Instead, think of your setup as modular. What you use for an overnight trip will be different than what you use for a multi-day adventure.
For example, I prefer to use my Osprey Mira backpack for short singletrack-focused trips so I can keep my bike light and nimble.
On the other hand, if I’m doing a multi-day bikepacking trip with long days in the saddle, I’ll try to carry as much of my gear in bags attached to the frame.
In short, don’t try to dial in the one perfect bikepacking system. Instead, view your gear as modular and change your setup based on the trip you’ll be doing.
4. Everything should have a place & a purpose
It’s easy to overpack. When I biked across Washington, I carried a pound of nuts the entire way without even opening it (and then raccoons got into them last night…)
You may be tempted to pack more than you need because you have the space, but believe me, pedaling a 70 lb bike isn’t easy!
Everything you pack should have its own place for organization and a well-defined purpose. Plan out your meals and water so you don’t carry excess food and ditch the “I might need this” items.
Of course, if you’re just starting out you may not know what you might need or what is important. Head over to my bikpacking gear list post for a checklist on what to pack.
5. Don’t overthink it
Lastly, don’t overthink your bikepacking setup. It can be paralyzing to try to get everything just right and it can even keep you from setting out on your first bikepacking trip altogether.
Your first few adventures probably won’t go as smoothly as you’d like, but once you get a feel for what gear you need and how you want to load your bike, it will get easier.
Bikepacking Setup Examples
There are a lot of ways bikepackers can set up their bikes. Here are five examples based on the type of trip, budget, and style of bike.
The Budget Bikepacking Setup
If you’re looking for a budget bikepacking setup, you’re in luck. You actually don’t need to go out and buy hundreds of dollars of gear when you’re just getting started with bikepacking.
You can do a lot with voile straps and dry bags.
That being said, a budget bikepacking setup can only take you so far. If you do find that you really enjoy it and want to continue doing overnight adventures, you will want to eventually upgrade to more customized and bikepacking-specific gear.
Here’s a sample budget bikepacking setup:
backpack
Hydration Pack
Chances are you already have a backpack. If you have a hydration pack, even better. I actually prefer to carry my water on my back because I stay better hydrated and I have more options to organize my gear on my bike frame.
For shorter bikepacking trips, I’ll use my Osprey Mira 32 L to carry most of my gear and water. Read my full review here. (It’s not exactly budget, but you can use any backpack that has good support).
>> Shop Osprey Mira:
frame bag
DIY or Moosetreks frame bag
You have two good options for a budget frame bag: a DIY frame bag if you have the time, patience, and skill, or a cheap universal frame bag like the Moosetreks Frame Bag, which comes in three sizes.
I used this frame bag for several trips when I was first starting out. It’s not the best quality, but it’s a good starter option.
>> Shop Moosetreks Frame Bag:
ADDITIONAL options
Voile Straps & Dry Bags
You’ll be surprised at how well voile straps and simple dry bags work for carrying gear. You can use them for your handlebar roll (8 – 20 L), seat post bag (5-8 L), on your bike frame (3-5 L), or on your fork legs (3 L).
If you go this route, be sure to pack several spare voile straps because your system will probably need some tweaking as you ride.
>> Shop Voile Straps:
>> Shop Dry Bags:
The Versatile Bikepacking Setup
If versatility is your main goal for a bikepacking setup, check out the Aeroe bikepacking system.
I haven’t tried these racks and bags myself, but they look really interesting and really functional.
The Spider Rear Rack can carry up to three cradles for three different dry bag mounting options. Only going out on a short trip? Use one cradle. Need to carry more gear? Fix two more cradles onto the sides of the rack. It’s a clever system that would work well for a lot of different adventures from singletrack trips to backroad gravel grinders.
Aeroe also has a handlebar cradle that allows you to attach a dry bag up front.
Aeroe definitely isn’t the cheapest option (if you got the full setup with racks, cradles, and bags, it would be over $600), but you can use your own dry bags and start with just one or two cradles at first.
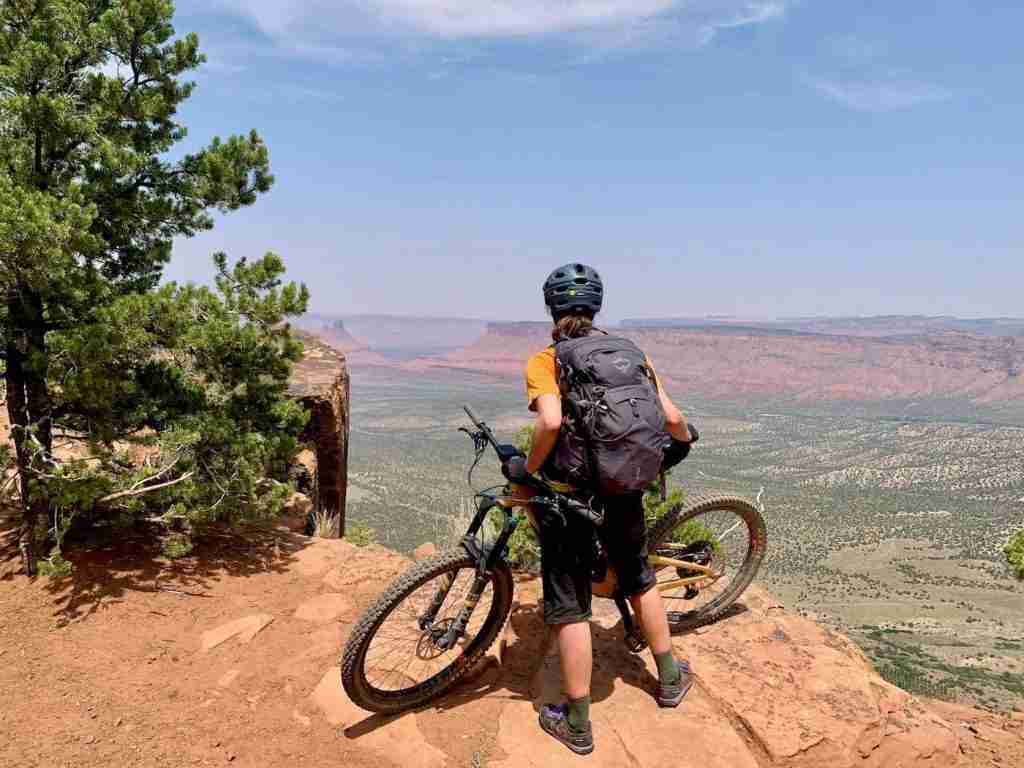
The Mountain Biker Bikepacking Setup
This is me! I’m a mountain biker at heart, so singletrack and rugged bikepacking trips are what I gravitate toward.
This means I want my bikepacking setup to be lightweight and minimal and allows me to maneuver my bike down fast, narrow, and sometimes technical trails.
The best bikepacking setup I’ve found is Rogue Panda. I have their frame bag, handlebar roll, and seat post bag – all of which are meticulously designed to be highly durable, stable, and functional.
Seat post bag
Rogue Panda Ripsey
Unlike most seat post bags, the Rogue Panda Ripsey works with dropper posts, which most mountain bikers have on their bikes.
It’s also a harness, which, if you read the tips above, you know I favor over fixed bags because they give you more versatility.
>> Shop The Ripsey:
Handlebar roll
Rogue Panda Canelo
For a handlebar roll, the Rogue Panda Canelo harness is a simple yet very stable and secure option. It’s a bit of a pain to put on at first, but once it’s installed you won’t need to touch it for the rest of your trip.
You can use your own dry bag or pair it with the Rogue Panda Gila.
>> Shop The Canelo:
Frame Bag
Rogue Panda custom bags
Again, I love Rogue Panda bags because they are durable, well-made (in Flagstaff, Arizona), and fun!
The custom frame bags are expensive, but they will last you many, many trips and will fit your bike like a glove.
>> Shop custom frame bags:
In addition to these ‘big three’ – the seat post bag, handlebar roll, and frame bag – you can add additional bikepacking bags depending on how long your trip is and how much gear you need to carry.
Additional bags/cages you could include are:
- A top tube bag (great for phone, multi-tool, chain lube, etc…)
- Fork cages for water bottles
- A feed bag for easy-to-reach snacks
The Long-Distance or Really Off-Grid Bikepacking Setup
If you’re heading out on a really long-distance backcountry and off-grid bikepacking trip, you’ll probably need to carry more gear, which means you need a way to carry more gear.
You’ll still want to focus on the big three (handlebar roll, seat post bag, and frame bag), but also consider adding a rear rack.
Rear racks definitely have their pros and cons:
I recommend only adding a rear rack if you really need to or you plan on taking your time and going slow.
Old Man Mountain Racks are great because they are extremely versatile (they can be used as front racks, too) and they’re designed to work with virtually any bike – full-suspension, gravel, road, and even fat bikes.
If your bike doesn’t have eyelet mounts for bike racks, you can get a fit kit that is specifically designed for your bike brand and model.
Old Man Mountain Racks are also designed to work with a variety of panniers.
pannier racks
Old Man Mountain divide
Designed to fit any bike, the Old Man Mountain Divide Rack is one of the best racks for bikepacking.
Fit it on the rear or on the front and carry up to 70 lbs of gear (although I highly recommend against that…)
>> Shop Divide Rack:

The Drop Bar Gravel Bikepacking Set Up
If you plan on doing mostly gravel riding, you’ll probably want a drop bar bike. Drop bars give you more hand positions to keep you comfortable on longer rides and they give you a slight aerodynamic advantage.
However, drop bars have a considerably shorter length, so you’ll need a handlebar roll/harness that fits.
I don’t have any experience with drop bar bikepacking biking (I’m hoping to soon!) but YouTuber David Arthur has a great video on his “perfect” gravel bikepacking setup (see below).
He still has the big three – a seat post bag, frame bag, and handle bar roll – but the frame bag is smaller to accommodate water bottles and the handlebar roll is shorter to fit within the drop bars.
Personally, I’d probably opt for a full frame bag and carry my water in a hydration pack, but that’s just my personal preference because I need to drink a lot of water.
Final thoughts
It’s important to remember that there is no ‘one’ right bikepacking setup. What works best for you may not work for someone else. It really comes down to personal preference, what bike you have, and what kind of adventures you want to go on.
I recommend not investing a ton of money into high-end bags until you have a few trips under your belt and you start to get a sense of how you want to carry your gear.
Remember, the best gear is the stuff you already have. From there, you can start to add more items to your gear closet as you dial in your set up.
Happy trails!
RELATED POSTS
Looking for more bikepacking tips, recommendations, and gear? Check out these related blog posts:
What questions do you still have about bikepacking setups? Do you have a system that works well for you? What is it? What would you do differently? Leave a comment below!


Great post, Becky! I’m also a mtb bikepacker with the same love of all my Rogue Panda gear (frame bag, new Ripsey seat bag, Canelo harness). Question for you: how did your Ripsey and Gila dry bags work in Costa Rica with the rain? I’m guessing well since you’re still recommending both. I ask because I’m mtb bikepacking from the southern coast of England to the Cape Wrath in Scotland this August and am planning for a lot of (not so warm) rain. So, trying to suss out if I need to go with a different set up or double-bag my gear in my seatbag and if I should trust my sleeping quilt in a Gila bag up front. Thanks!
Hi Rich! The Rogue Panda dry bags were awesome in Costa Rica. We got rained on a lot (heavy rain) and everything inside my Gila bag and seat post bag stayed perfectly dry.
Bikepacking the GB Divide is on my bike-it list!
Right on! That’s great to hear. I’m not surprised the bags worked great, but given the “not waterproof if submerged” advisory Nick put on the RP page, figured it would be worth asking for a real-world example. And yeah, the GB Divide looks fun. Hope you’ll do it. 🙂 I’ll be starting my journey near Swanage at the Anvil Point Lighthouse), pedal through Salisbury, Marlborough, Oxford, Hinckley, and then onto Middleton Top to ride the GNT. If I make good time, I’ll ride back to Edinburgh via the new Pictish Trail. Super excited!