When I first got into bikepacking, I had no idea what I was doing—or packing. I brought way too much, forgot a few key things, and learned some lessons the hard way (like why a good sleeping pad really matters).
Over the years, my gear list has gotten a lot more dialed. This post breaks down what I usually pack for multi-day trips, from the essentials that go with me on every ride to a few comfort items that make camp just a little bit nicer.
No matter if you’re getting started or looking to refine your setup, I hope this guide helps make packing feel a little less overwhelming. I’ve also included a bikepacking checklist so you don’t forget anything at home.
Bikepacking Trip Prep Sheets
Heading out on a bikepacking trip? Grab these prep sheets to help you plan and pack so you can enjoy the adventure. You’ll get a day-by-day planner, packing list, and pre-trip checklist.
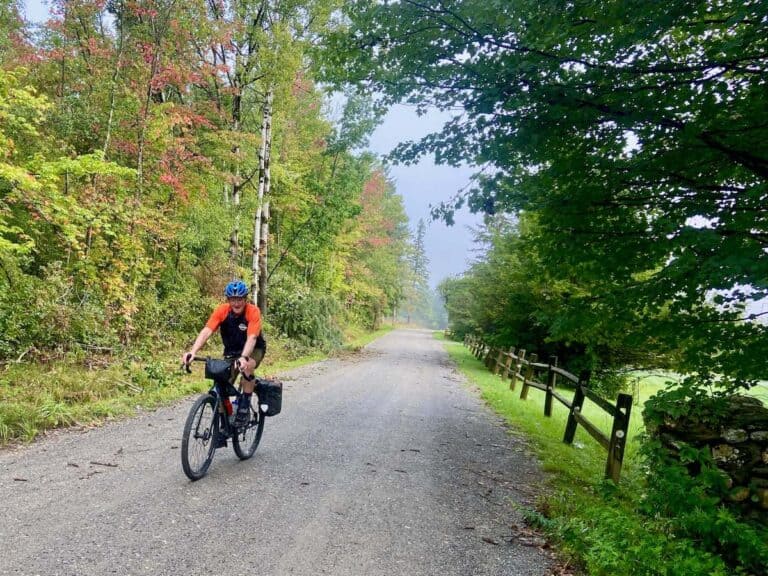
Before diving into gear, let’s talk about your setup. You don’t need a fancy, custom-built bike to go bikepacking, but it does need to be comfortable, reliable, and suited for the terrain you’ll be riding. That might be a gravel bike, hardtail mountain bike, or even a full suspension mountain bike.Make sure it’s in good working order and can carry the gear you need.
Quick guide to bikepacking bags
There are a few different ways to carry your gear:
Frame bag – Great for heavy items like tools, food, or water. It fits inside the main triangle of your bike.
Seat post bag – Straps to your seat post and saddle. This is good for lightweight, bulky items like clothes or your sleeping bag.
Handlebar roll – Perfect for lightweight gear like a tent, sleeping bag, or pad. Helps balance weight up front.
Top tube bag – Handy for snacks, your phone, or anything you want quick access to.
Stem bags / feed bags – Easy-access pockets for water bottles, snacks, or even a compact stove.
If you’re just starting out, you don’t need to buy a full matching set of bikepacking bags. I used dry bags and Voilé straps for my first few trips and they worked just fine. You can also mix in a small rear rack and panniers if your bike supports them, especially for longer or more gear-heavy rides. (Although I don’t recommend panniers for singletrack-heavy trips)
The key is to keep your load secure and balanced so your bike still handles well on the trail or road. Try to pack low and centered, and avoid overloading your handlebars or seat post.
I don’t typically sleep well in a tent (although I got much better at it after three months of camping on the South American Epic). Because of this, one thing I’ve learned from my bikepacking endeavors is that I don’t want to skimp on my sleep set up. That means choosing a roomy tent, a comfy sleeping pad, an actual pillow, and clean clothes to sleep in after a long day in the saddle.
Here are a few pointers and recommendations for choosing your shelter and sleep set up:
Shelter options
Tent: The classic choice for most overnight adventures. Some outdoor brands have even come out with bikepacking-specific tents that feature short-stick poles for easy packing, stuff bags that can attach to your handlebars, and a gear ‘garage’ to store you stuff out of the rain.
Bivy Sack: If you’re going super minimalist or want to cut weight, a bivy sack is basically a waterproof shell for your sleeping bag. It’s small and light but sacrifices space and comfort. I find them very claustrophobic.
Hammock: These can be good for warm weather trips with plenty of trees. Hammocks keep you off the ground and can be more comfortable (debatably…) if you don’t love sleeping on the ground. Just be sure to bring a tarp or rainfly for weather protection.
My Big Agnes Copper Spur tent set up at a remote ‘campsite’ on the Wilson’s Ramble. My NEMO Disco (below) is also in there
Sleeping bag
Choose a sleeping bag that matches the climate and season you’ll be riding in the most. For most three-season trips, a lightweight down or synthetic bag rated around 20–30°F (-6 to -1°C) works well (this is what I have). Synthetic bags handle moisture better but tend to weigh a bit more.
If you’re going ultralight, consider a quilt instead of a full sleeping bag. They are lighter and more versatile but can take some getting used to.
Don’t skimp on your sleeping pad, especially if you’re a light sleeper or, like me, just don’t sleep that well in a tent. Of all the bikepacking gear I bring, this is the one item I’m willing to carry a few extra ounces for if it means staying warm and getting a decent night’s sleep.
I recommend going with an inflatable pad. They tend to be more comfortable and offer better insulation, which really makes a difference on chilly nights. That said, if you’re not too concerned about warmth or comfort (what?), a closed-cell foam pad can work too. Just keep in mind that while they’re often lighter and more durable, they’re also a lot bulkier to pack.
My Sea to Summit Ether light strapped to my handlebars above my handlebar roll
Extras
Depending on how long your trip is or how much comfort you want to pack for, here are some ‘extras’ to consider for your sleep setup:
Pillow: Some bikepackers just stuff some clothes into a dry bag for their pillow, but I prefer having a dedicated inflatable pillow.
My pillow pick: Sea to Summit Aeros Pillow. It secures into place with my Ether Light sleeping pad via the PillowLock system.
Sleep clothes: I always pack a set of clothes to sleep in. I hate the thought of sleeping in something sweaty and dirty. I usually pack leggings (or shorts), a t-shirt, socks, and maybe a thermal long sleeve if the nights will be chilly.
Ear plugs and eye mask: My two secret weapons for good sleep! Unless I’m nervous about where I’m sleeping (doesn’t happen often) I sleep with ear plugs and wear a blackout eye mask.
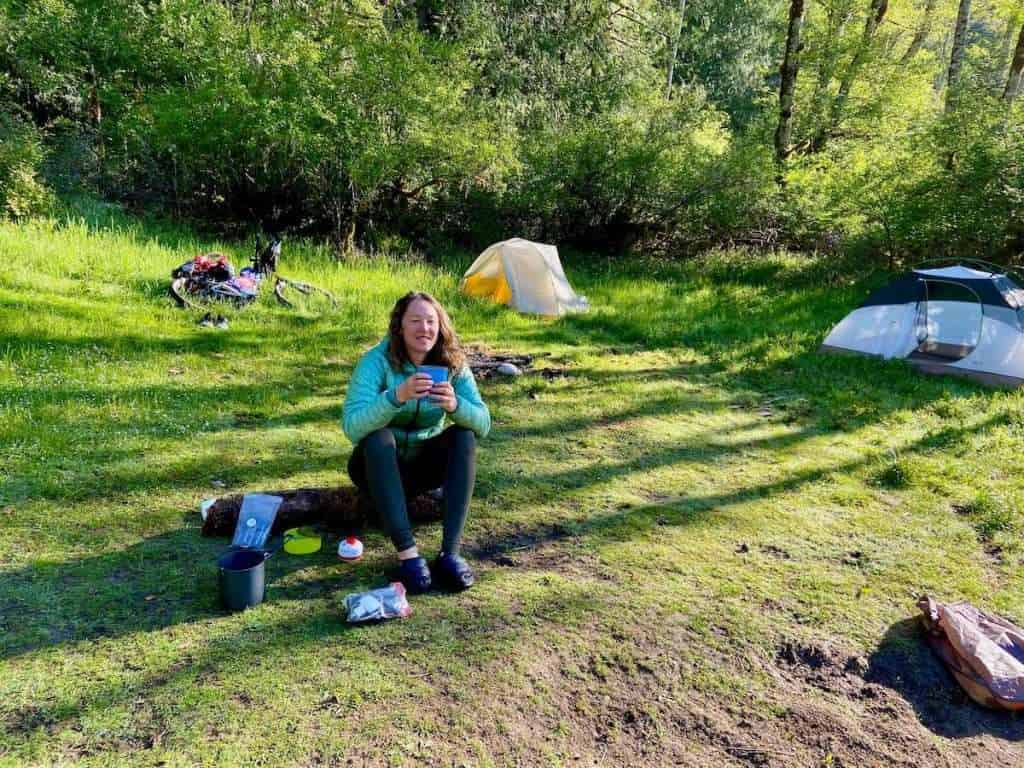
Enjoying morning coffee while still in my ‘sleep clothes’
🍜 Cooking & eating
Having a reliable cooking setup can make your trip a lot more enjoyable regardless of whether you’re planning to cook simple meals or just boil water for dehydrated dinners (or coffee!). What you need really depends on how much you want to cook — or if you want to cook at all.
Stove options
Canister stove: These are lightweight, compact, and super easy to use. They’re great for boiling water quickly or making simple one-pot meals.
Alcohol stove: A popular ultralight option, especially if you’re doing a bikepacking trip somewhere fuel canisters are hard to find. They’re simple and cheap, but slower to cook and can be less reliable in wind or bad weather.
No stove: Yep, this is totally an option! I’ve done stove-less trips in places that have had frequent resupplies (like Slovenia) and on quick trips where I’ve just relied on simple, no-cook meals.
I typically like to keep my meals pretty simple on bikepacking trips: dehydrated dinners, oatmeal, mac & cheese, instant coffee (mixed with hot chocolate!). It’s quick, easy, and there’s minimal cleanup. Check out my post on bikepacking meals for some ideas on how to fuel your trip.
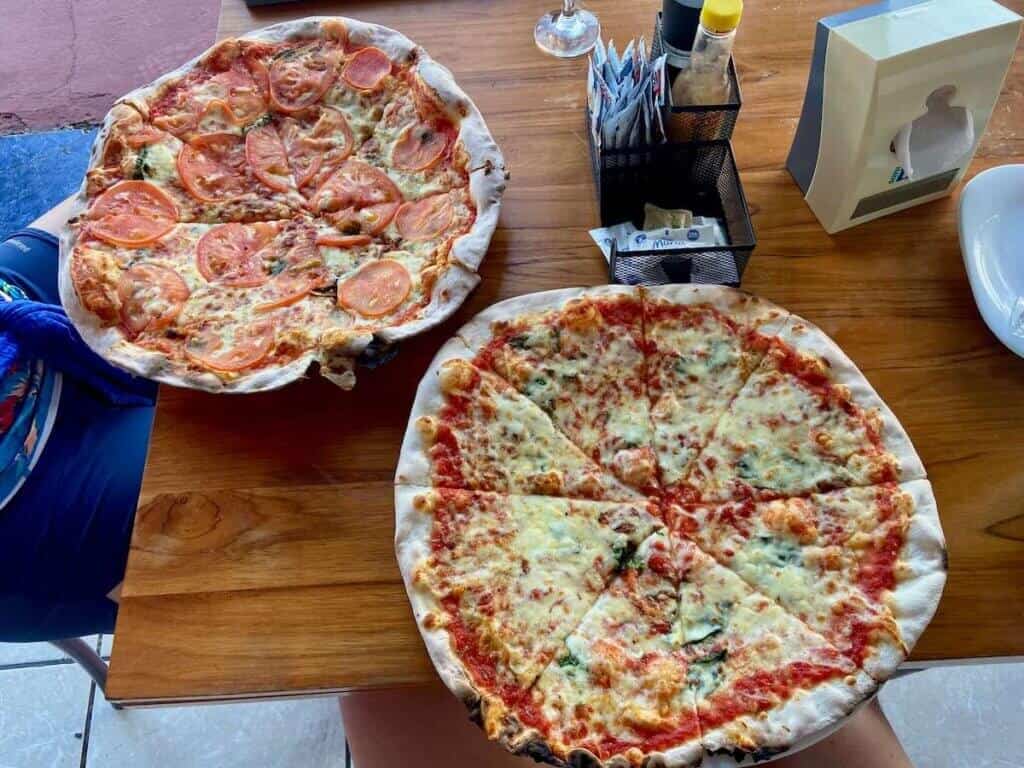
Surprisingly delicious pizza after a long, hot day of bikepacking in Costa Rica! We didn’t bring a stove and cold pizza for breakfast was 👌
Cookware + utensils
Go as minimal and light as you can here.
Pot: One small pot is usually all you need for bikepacking trips.
A spoon or spork: I like long-handled ones because they can reach the bottom of dehydrated meal pouches.
Mug (optional): I like to bring a mug coffee or tea in the morning, but it’s not essential if you’re trying to go super light.
Lighter + backup fire source: Always bring at least two ways to light your stove (like a mini Bic + waterproof matches).
Food storage
Use a small dry bags or plastic bags to keep all your food in one place. I keep my food in my frame bag. In bear country, be sure to follow local regulations for food storage whether that’s a bear canister or hanging system.
When it comes to bikepacking clothes, less is more. You’re out there to ride, not do a fashion show and every extra piece adds bulk and weight. I typically don’t bring more than two of anything: two pairs of chamois, two jerseys or riding tops, two pairs of socks, and maybe a second pair of riding shorts if I have room.
The system is simple: wear one set while the other airs out or gets rinsed and dries. Even a quick rinse in a creek or under a water spigot can make a huge difference in comfort (and smell 😬).
Here’s what I usually pack for riding:
2 chamois: I rotate between them daily.
1 pair of riding shorts: I’m a mountain biker, so I typically feel more comfortable in ‘baggies’ with my chamois underneath.
2 jerseys or tops: Merino is great if you have it. It doesn’t stink and dries quickly.
2 pairs of socks: Same deal – rotate and rinse.
Lightweight windbreaker or rain jacket: A must-have, even if the forecast looks good. I’ll also bring a warm puffy jacket if the temps will be below 50 (especially at night).
Buff or neck gaiter: Super versatile and packs tiny.
You really don’t need much. Prioritize comfort and versatility and go for fabrics that dry quickly and can handle a little sweat and grime.
🔧 Tools & repair kit
A good repair kit can be the difference between a smooth bikepacking trip and a long walk to civilization. You don’t need to carry a full bike shop with you, but you do want to be prepared for the most common mechanical issues like flats, a broken chain, or loose bolts.
Here’s what I typically bring:
A multi-tool: One with a chain breaker and a variety of hex/torx keys is ideal.
Small bottle of chain lube: Just a few drops can go a long way, especially in dusty or wet conditions.
Zip ties + duct tape: These two can fix almost anything in a pinch.
Spare derailleur hanger: Optional, but smart if you’re riding a remote route and your bike has a replaceable hanger.
I typically ride with a hydration pack – even on bikepacking trips – and it’s nice for easy access to my tools and spares
🗺️ Navigation & electronics
Getting lost can be part of the adventure… but it’s way more fun when it’s on purpose. Having a reliable navigation setup helps you stay on track, find water sources, and avoid the dreaded ‘bonus miles’.
Navigation Tools I Use:
Phone with offline maps: I download my bikepacking routes on Ride with GPS. Other apps you can use are Gaia GPS or Komoot. Make sure everything is downloaded ahead of time because you won’t always have service.
GPS device or bike computer: Optional, but very nice to have for longer or more remote trips. I use one for all my bikepacking trips because the battery is better than a phone.
Charging cables: Don’t forget the right ones for each device.
Headlamp and/or bike light: Even if you don’t plan to ride at night, it’s smart to have one for camp or unexpected delays.
Pro tip: Keep your electronics organized and dry in a small waterproof pouch or zippered bag. There’s nothing worse than a dead phone and a wet backup battery.
🧻 Toiletries & hygiene
You don’t need to bring your whole bathroom cabinet, but having a few key items can go a long way toward staying clean, comfortable, and not totally gross by the end of your trip.
Here’s what I usually pack:
Toothbrush + toothpaste: I just use my regular toothbrush and a travel size tube of toothpaste.
Sunscreen + lip balm: These are especially important if you’re riding in exposed places like the desert. I like SPF sticks for easy application.
Bug spray: Optional depending on where you’re going, but it’s a lifesaver in mosquito country.
Small pack towel: Useful for drying off or even as a makeshift shower curtain.
#2 kit: I bring a small trowel, toilet paper or wipes, and a ziplock bag for packing out used TP (yes, really). In some places, you’ll need a wag bag so check local regulations.
Wet wipes: I hate going to bed sticky, so wet wipes are a lifesaver!
Deodorant (optional): I bring a travel-size one. It helps me feel fresh.
Hand sanitizer: Again, you just need a travel-size one.
A note on Leave No Trace: Always follow Leave No Trace practices, especially when it comes to hygiene. That means packing out all used toilet paper and hygiene products, never washing dishes directly in streams or lakes (carry water 200 feet away), and using a small trowel to bury waste at least 6–8 inches deep. These little things help keep wild places wild and open to future riders.
😌 Comfort & extras
These are the little things that aren’t essential for survival or a successful trip, but can make your adventure so much more enjoyable. I try to keep my setup minimal, but I always leave a little room for a few comfort items that make life at camp feel less like “roughing it” and more like a reward after a long day in the saddle.
Camp slippersor sandals: I like to bring a pair of camp footwear – sandals for hot weather trips and slippers for cold weather ones.
Lightweight camp chair or foam pad: So nice to have! If I know I’ll be spending time hanging at camp, a little seat goes a long way.
Book, Kindle, or journal: I don’t always bring one, but it’s nice to have on solo trips. If I’m riding with someone else, I might also bring a deck of cards.
Small first aid kit: Just the basics like bandaids, painkillers, a few alcohol wipes, anti-histamine, etc…
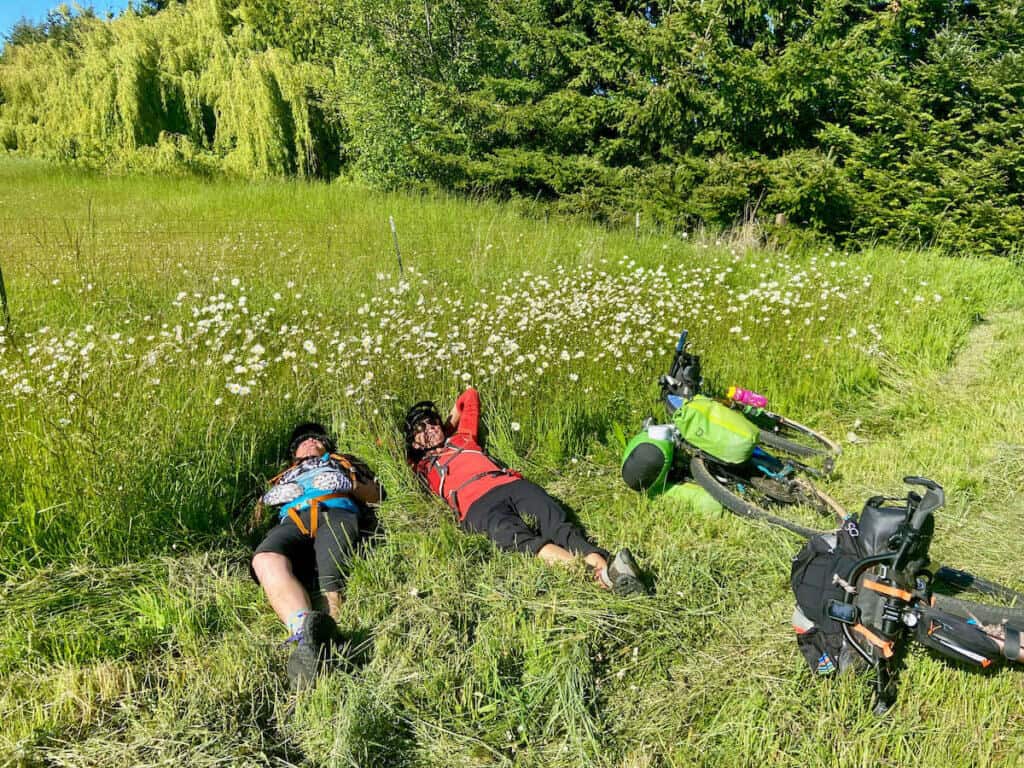
Never pass up an opportunity to take a nap in a field of wildflowers!
That’s my go-to bikepacking gear list—simple, functional, and tested over lots of dusty miles and remote campsites. Everyone’s setup looks a little different and you’ll figure out what works best for you as you go. Start with the basics, add what makes you feel comfortable, and don’t stress too much about getting it perfect the first time. If you haven’t already, be sure to grab the printable checklist I put together to help make packing easier. And happy trails out there!
What are your go-to bikepacking gear favorites? Anything I missed on this list? Leave a comment below!
I'm the creator and founder of the bike blog Two Wheeled Wanderer. I’ve been riding bikes and traveling the world since I was a kid and I like nothing more than enjoying some flowy singletrack or embarking on a multi-day bikepacking adventure. When I'm not blogging, I work on multi-month, cross-continent tours with TDA Global Cycling.
I love hearing from you and appreciate your comments! However, if you leave a rude, unconstructive, or spammy comment, it will be deleted. It’s cool to be kind. Have an awesome day!
7 Comments
That is an excellent article, thank you! I’m a life long hiker & backpacker, but not experienced in bike packing and I picked up a LOT of good ideas in your article, AND thank you for the very nice Chamois Butt’r mention!
Thanks for this list. I’m just getting back into touring on my bike. (During my tour of the Maine coast, I forgot chamois buttr and had to make an emergency stop at LL Bean cycle shop.) I’ve had a hard time finding chamois buttr in the past so I started using Bag Balm (another great Vermont product). It works great, has some medicinal uses and doubles as a lip balm. Thanks again,
Want to know where my two-wheeled travels are taking me? Sign up for my newsletter to get personal updates AND a list of my favorite bike trip planning apps, websites, and more.


That is an excellent article, thank you! I’m a life long hiker & backpacker, but not experienced in bike packing and I picked up a LOT of good ideas in your article, AND thank you for the very nice Chamois Butt’r mention!
There are definitely similarities between backpacking and bikepacking, but also lots of differences. Glad you found this post helpful!
protein bars/dried fruit and extra sun glasses . Drink mixes . Just drinking water get old real fast.
And I’m equally a fan of Darn Tough socks…they seem to out last Smartwool.
They’re the best!
Thanks for this list. I’m just getting back into touring on my bike. (During my tour of the Maine coast, I forgot chamois buttr and had to make an emergency stop at LL Bean cycle shop.) I’ve had a hard time finding chamois buttr in the past so I started using Bag Balm (another great Vermont product). It works great, has some medicinal uses and doubles as a lip balm. Thanks again,
Thanks for the tip! I grew up in Vermont, so I Bag Balm was a staple 🙂 Hope you had a great trip!