
Bikepacking Through Costa Rica: Around Lake Arenal & Along the Nicoya Coast


Costa Rica may not be the first country that comes to mind when deciding on a bikepacking destination, but when my friend sent me a link to the La Gira de Costa route on bikepacking.com I was immediately in. No matter the fact that I don’t typically do well in hot weather, I hate being sticky, and I’m not really a beach person. It still sounded ‘fun’.
I’d visited Costa Rica many times before (I used to work on National Geographic cruise ships and I spent many weeks sailing back and forth between Costa Rica and Panama). My family and I also did a trip to Costa Rica when I was in high school, but biking through Costa Rica was a new adventure that I couldn’t turn down. It’s a beautiful country and I wanted to see it from the seat of my bike.
This was also Michelle and I’s first international bikepacking trip. Turns out that Costa Rica is a perfect destination for first-time out-of-country bikepackers. It’s safe, people are so friendly and helpful, you can drink the water, and the country is set up for tourism – meaning it’s a relatively easy place to travel through.
If you’re thinking about doing a bikepacking trip through Costa Rica or you just want to live vicariously, read on to learn how our trip went, tips for planning your adventure, and more!
The Route
There are several different routes and itineraries for bikepacking in Costa Rica on Bikepacking.com. The ‘main’ route is called the Gira de Costa, which circumnavigates the Rincón de la Vieja Volcano and then makes its way south to the Nicoya Peninsula.
Other versions of the route add a loop around Lake Arenal, cut off half the Nicoya Peninsula, or extend even farther north into the Vida Silvestre Caño Negro National Reserve.
There are lots of options to choose from.
La Gira de Costa Route Versions
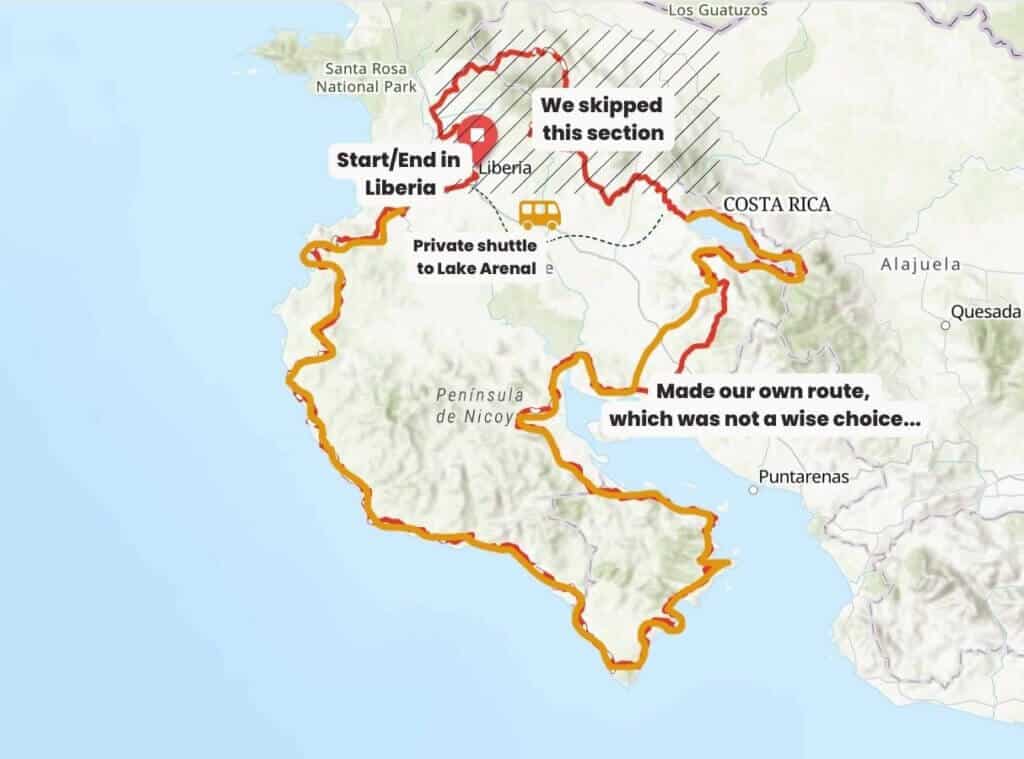
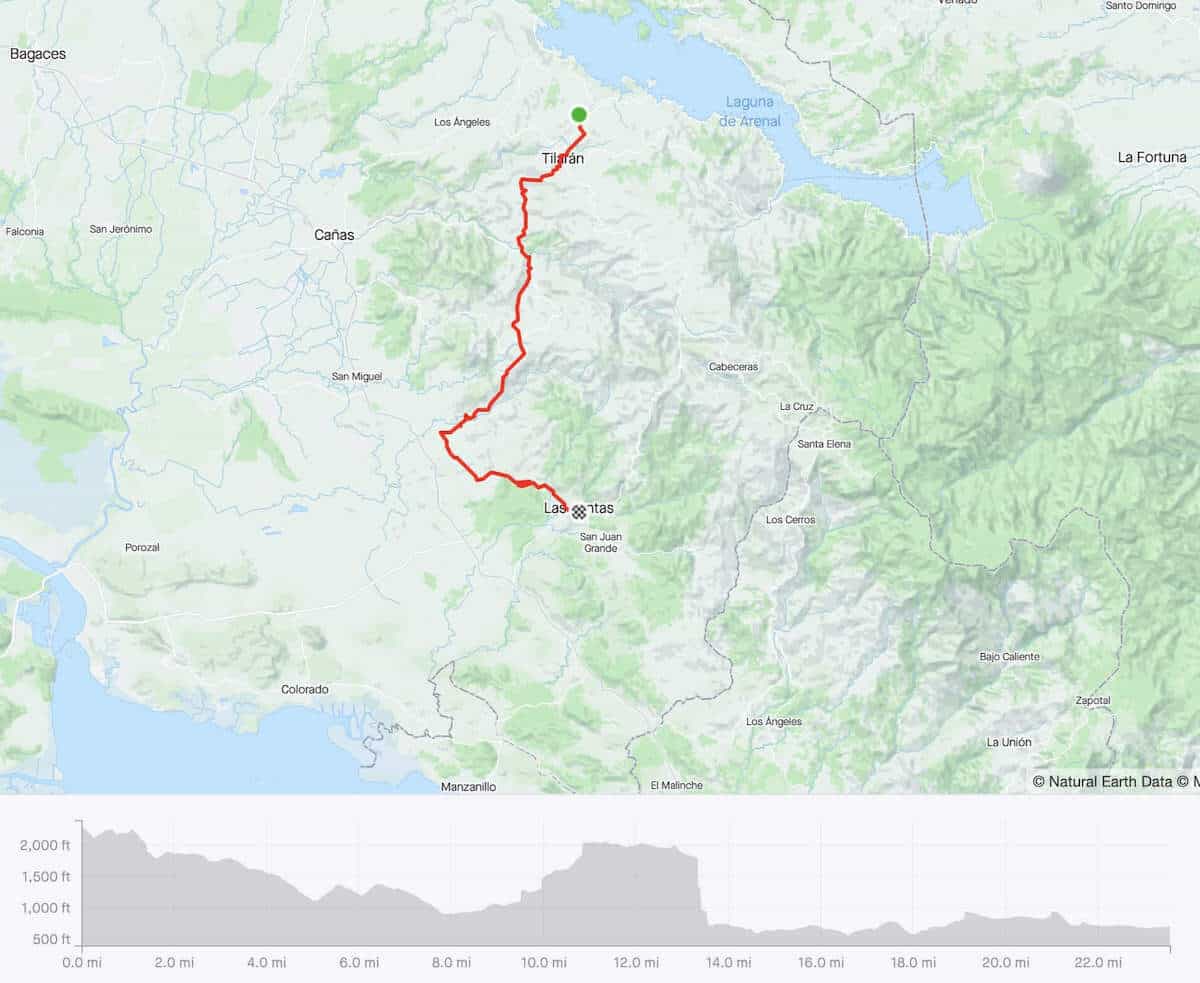
Ultimately, we chose to mostly follow Loop 3, but we skipped the Rincón de la Vieja Volcano section (and we also made our own route for day 3, which kind of turned into a disaster…)
Here is the route we followed. We got a private taxi to take us (and our bikes) to Lake Arenal from Liberia. You can read more about our day-to-day itinerary below.
Costa Rica Bikepacking Highlights
Costa Rica is an amazing country. There is so much to see and do from viewing wildlife to exploring cloud forests to relaxing on white-sand beaches. Every trip to Costa Rica will be different, but here are a few highlights from my bikepacking trip:
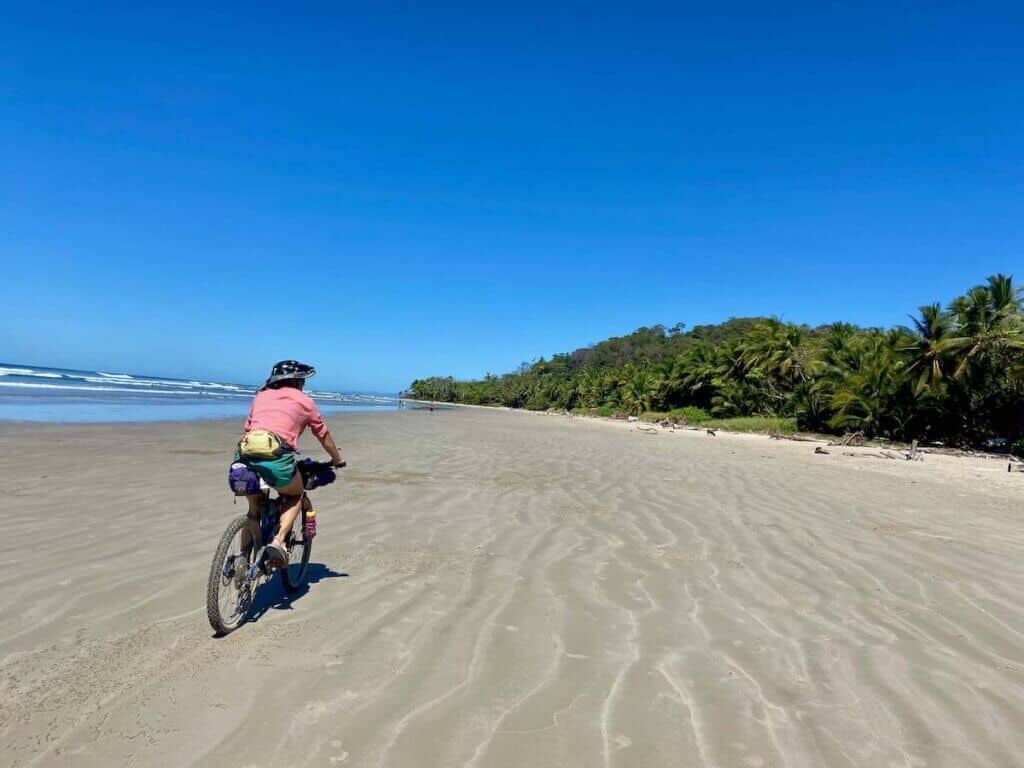
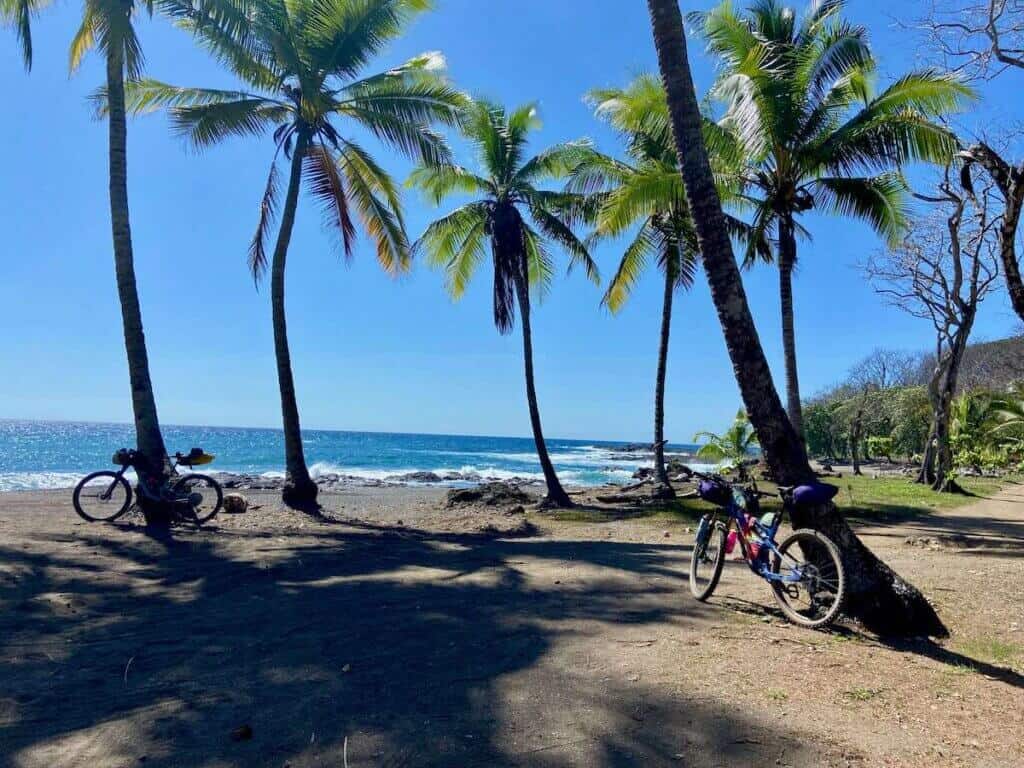
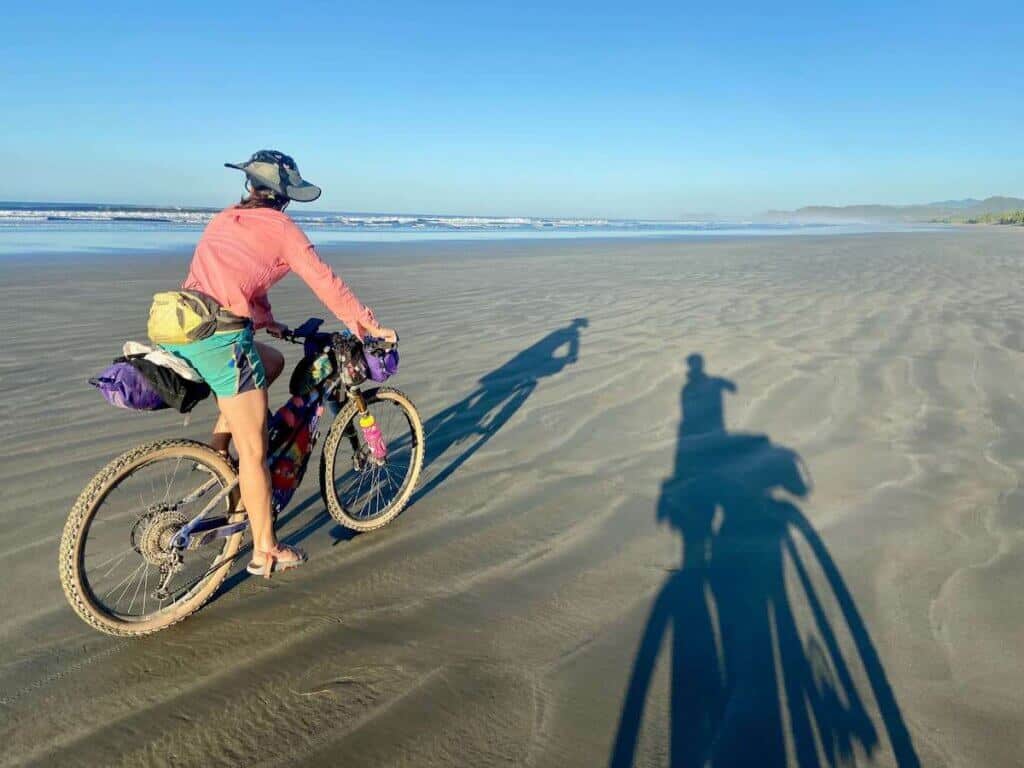
🏝️ Beach riding! There are long stretches of hard-packed beach riding on the Nicoya Peninsula. If you’ve never ridden your bike on the beach, it’s a cool experience.
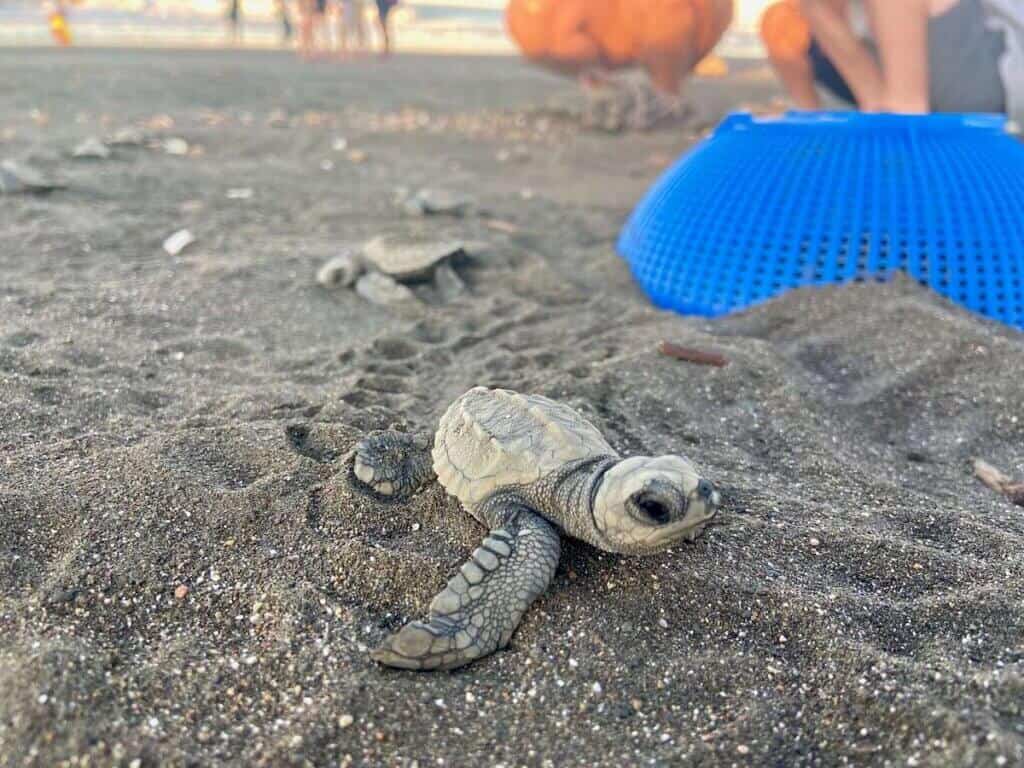
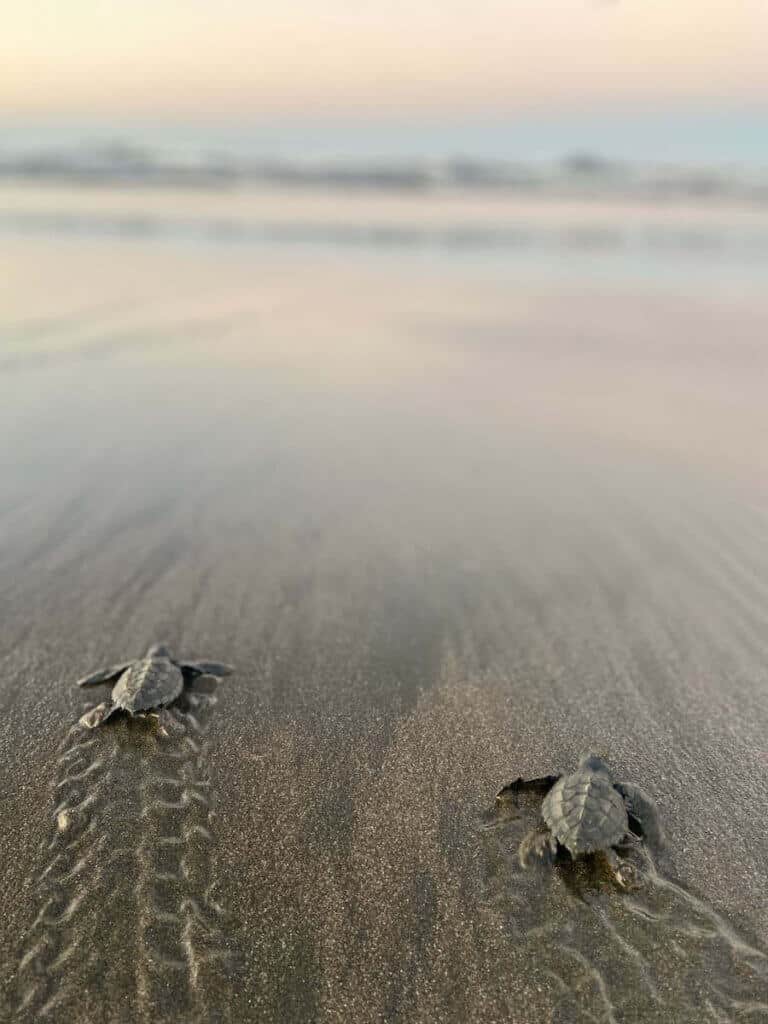
🐢 Baby turtles. We got to see baby turtles hatch at Ostional Wildlife Reserve. SO cool!
👴🏽 Tico hospitality. Everyone we met was so helpful and friendly. Costa Ricans are the best!
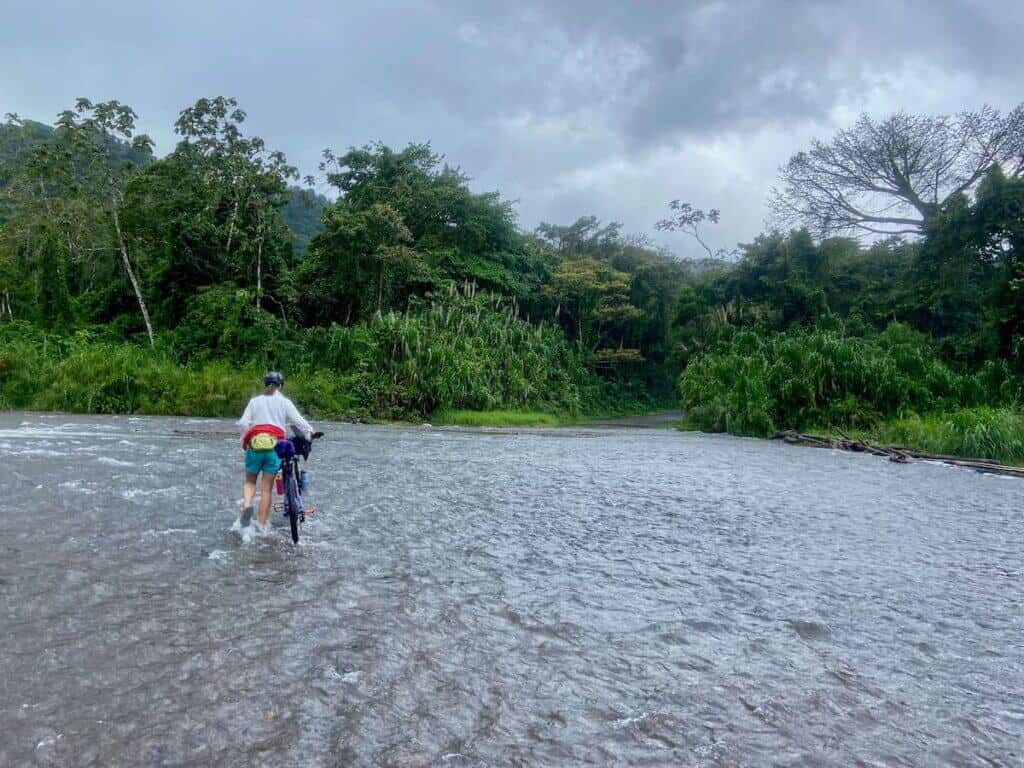
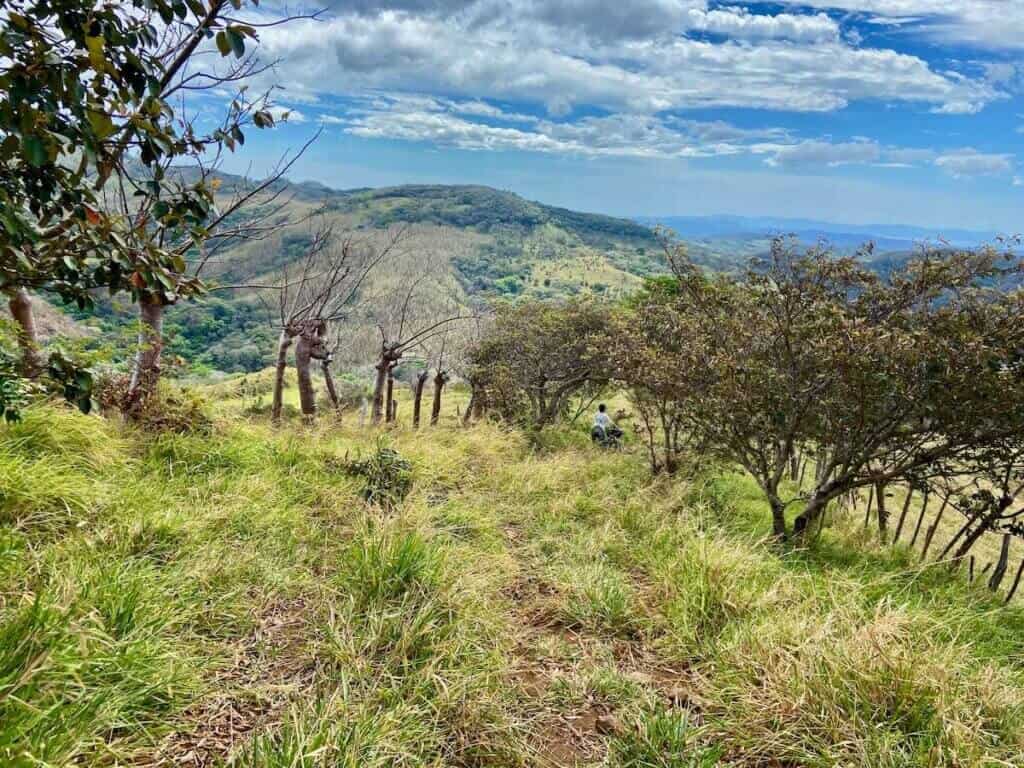
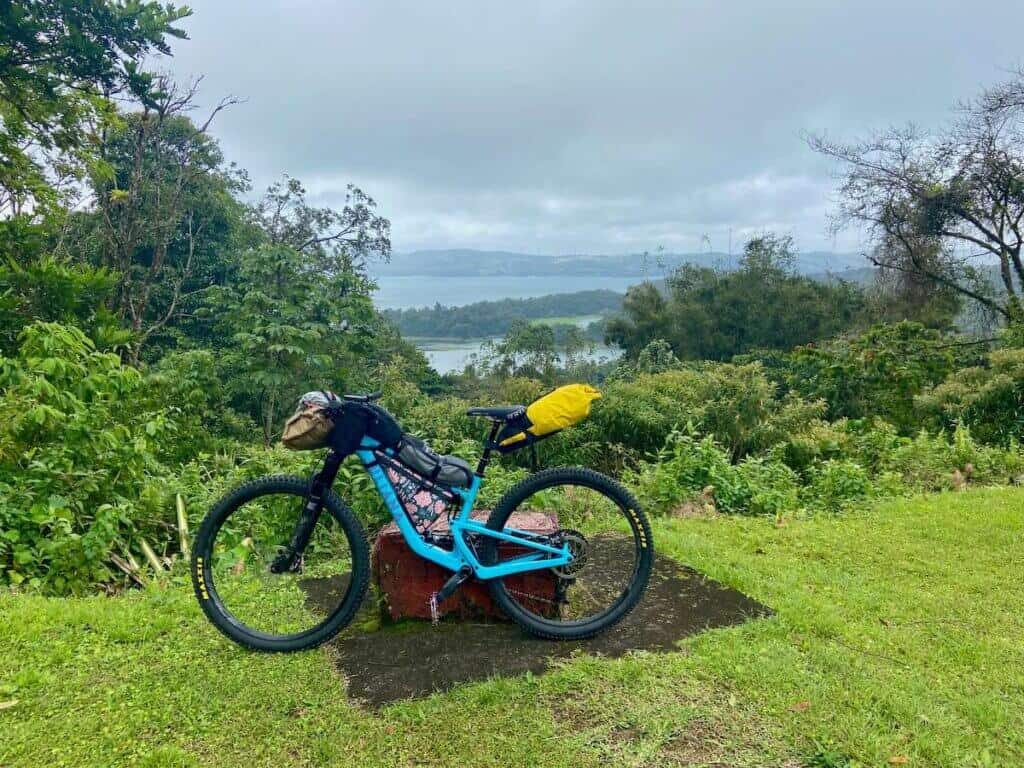
🌿 The south shore of Lake Arenal. This was one of my favorite stretches. It’s undeveloped with lots of river crossings, dense forest, and very little traffic.
🚰 Potable water. Pretty much all tap water in Costa Rica is safe to drink, which meant we didn’t have to waste plastic or filter any water.
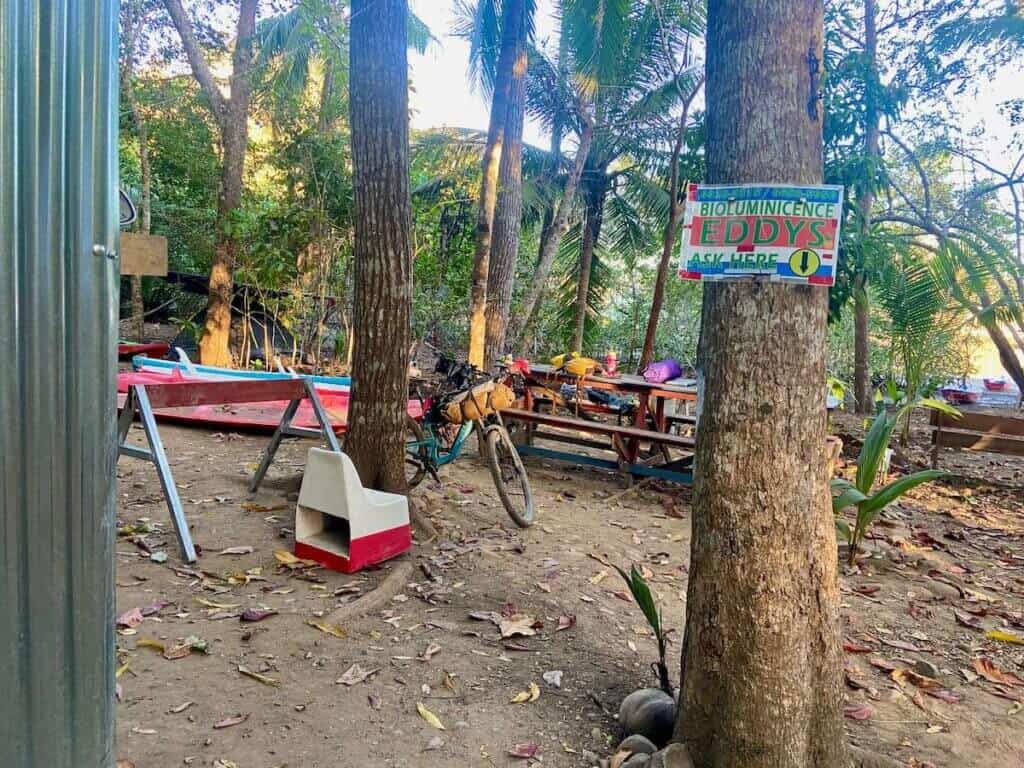
🌌 Bioluminescence. We made a side trip to do a night bioluminescence boat tour, which was really cool and magical (see day 6 below).
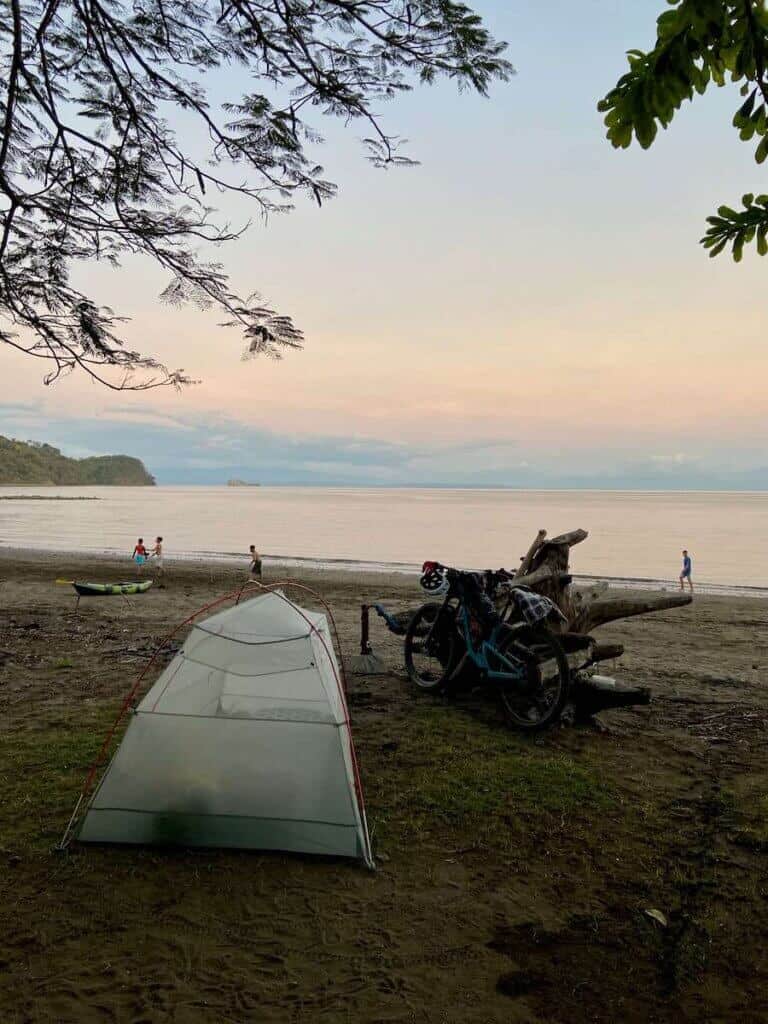
⛺️ (Mostly) great camping opportunities. We stayed at campgrounds most nights, all of which had showers, potable water, and flat spots for our tents. My favorite place to camp was Restaurant Erika (see day 5).
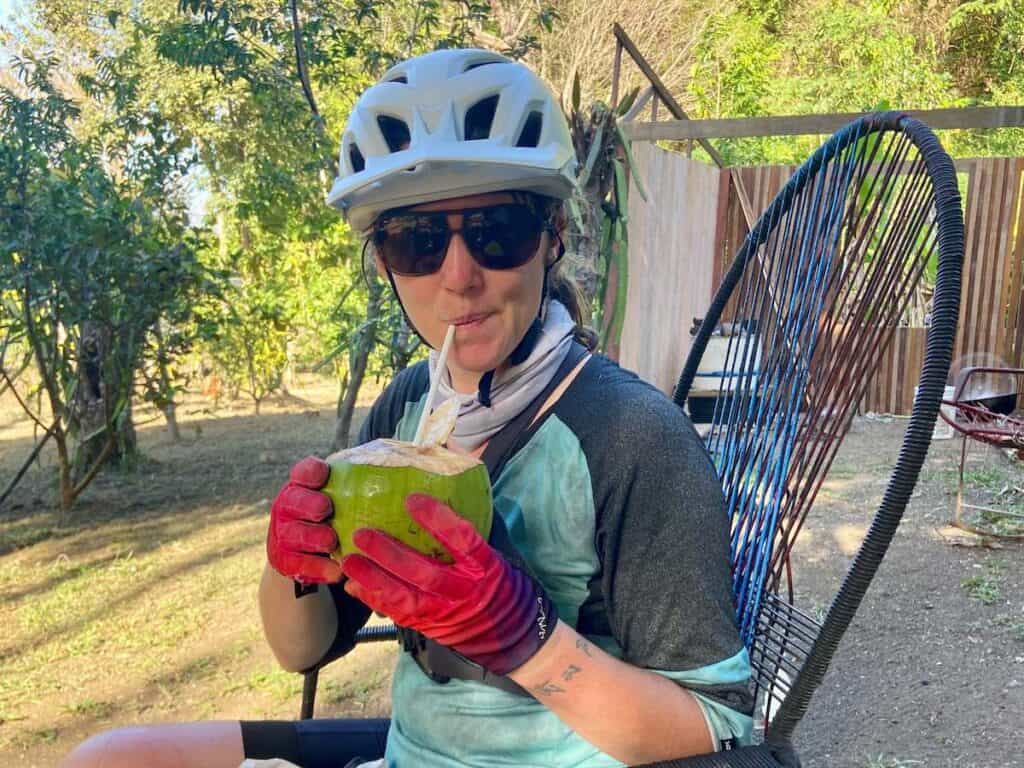
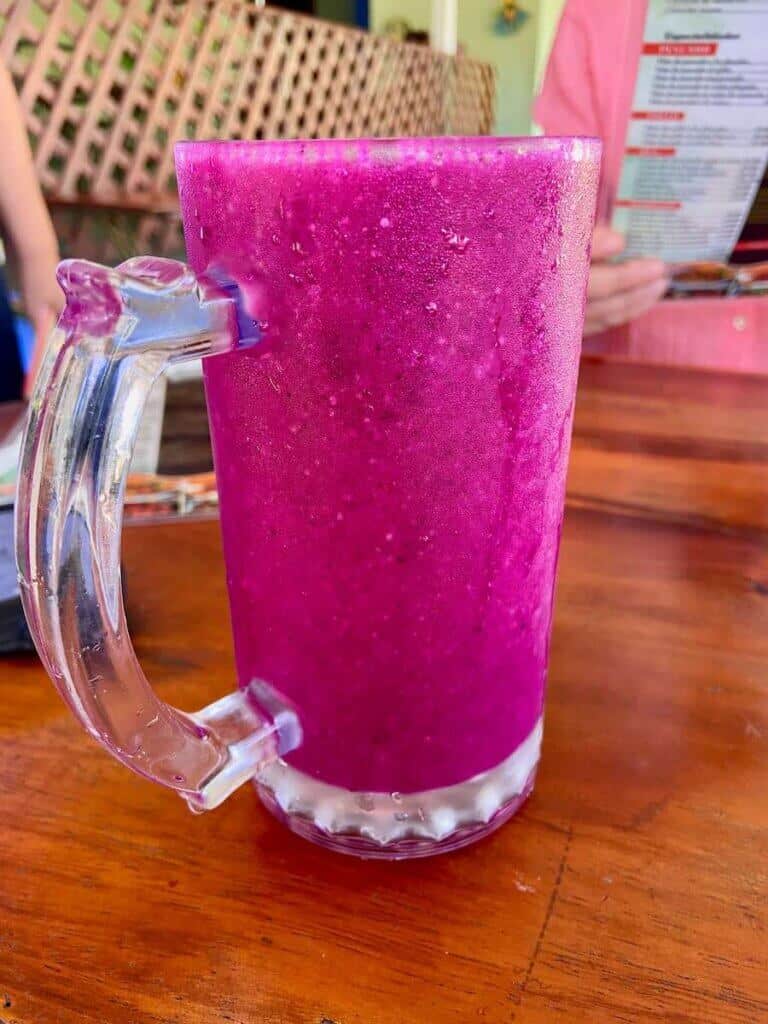
🍹 Batidos! These are basically Costa Rican smoothies, which you can get pretty much everywhere. A dragonfruit (pitahaya) and passionfruit (maracuya) batido = heaven.
Costa Rica Bikepacking Lowlights
Of course, bikepacking isn’t all sunshine, flat roads, and tailwinds. Here are a few less pleasant realities from our trip.
🌬️ The wind!!! We battled some pretty strong headwinds throughout the route, but we were also rewarded with some great tailwinds 🙂
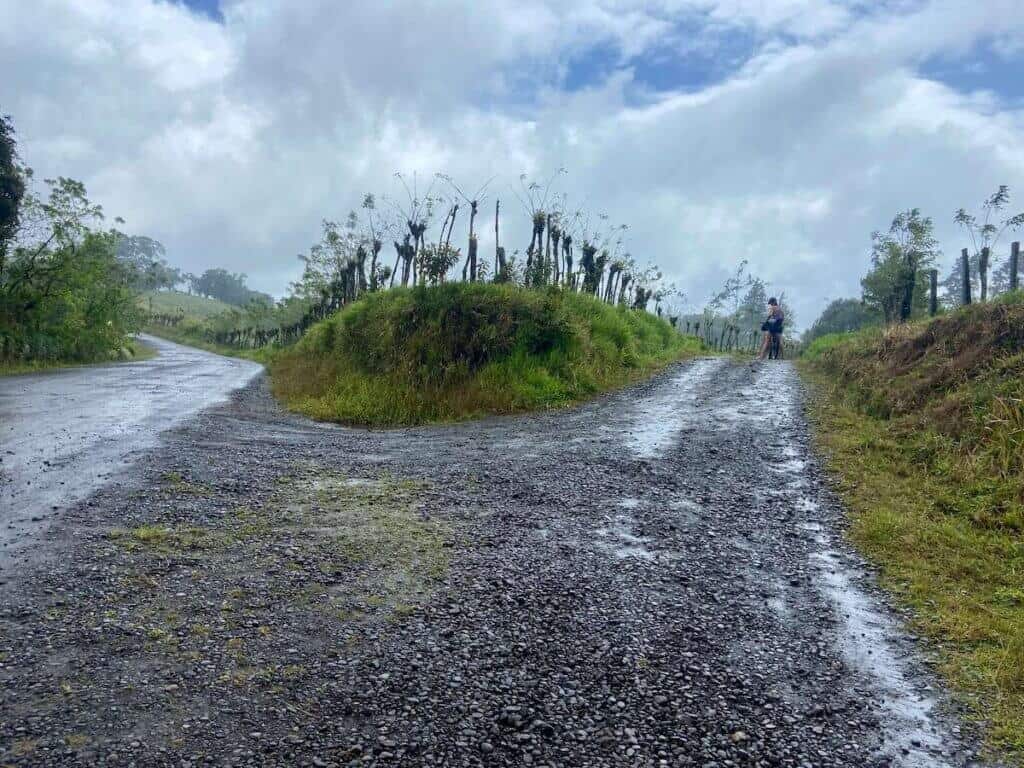
💧 Rain. The first three days of our trip around Lake Arenal were pretty rainy, which meant that we didn’t actually get to see the volcano… At least it was warm rain!
🚗 Traffic. There is quite a bit of riding on busy roads no matter what route you choose. For the most part, drivers are very courteous and I never felt unsafe, but riding in traffic still sucks.
🥵 The heat. Costa Rica is hot no matter what time of year you visit, but if you visit in the dry season, be prepared for 90-degree+ days. Thankfully, there are lots of ways to cool yourself off – see tips for staying cool in the ‘planning your trip’ section below.
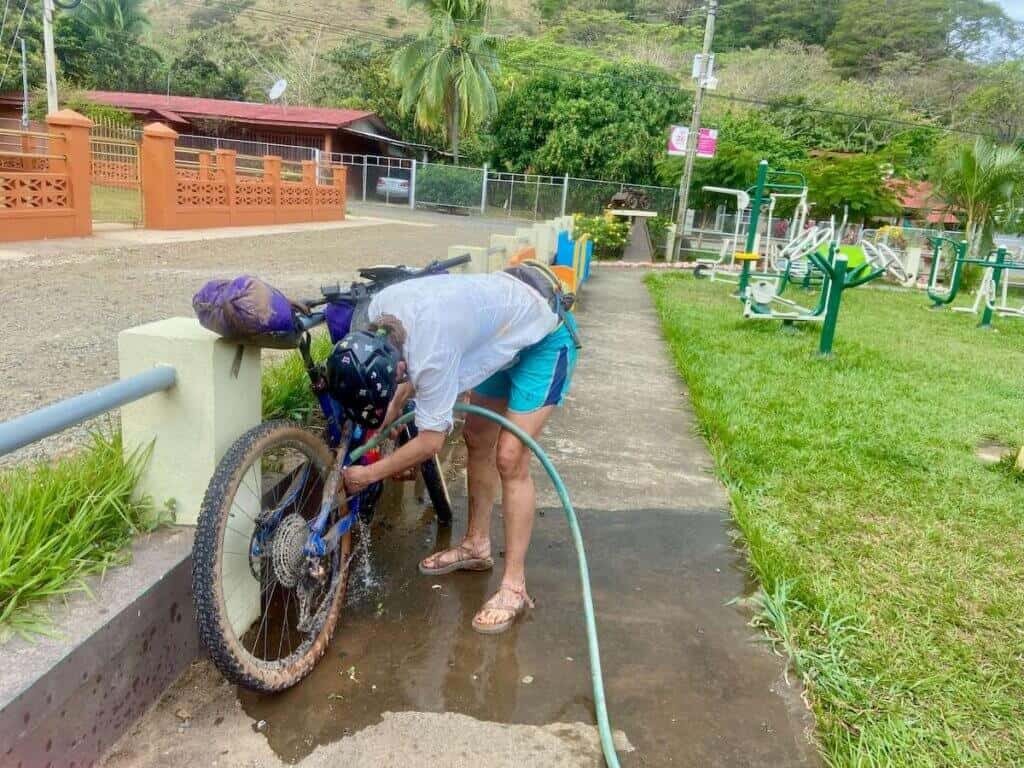
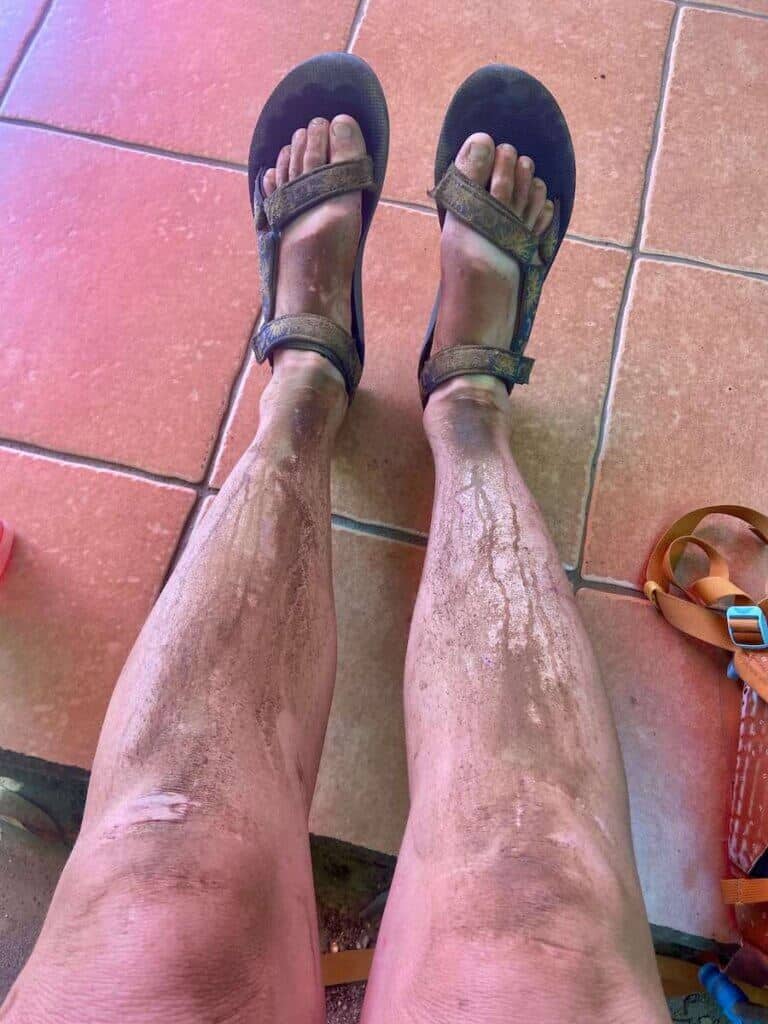
😷 Dust. The dusty roads are intense! I don’t think I could have done this trip without having a shower at the end of each day to wash off the dirt and dust.
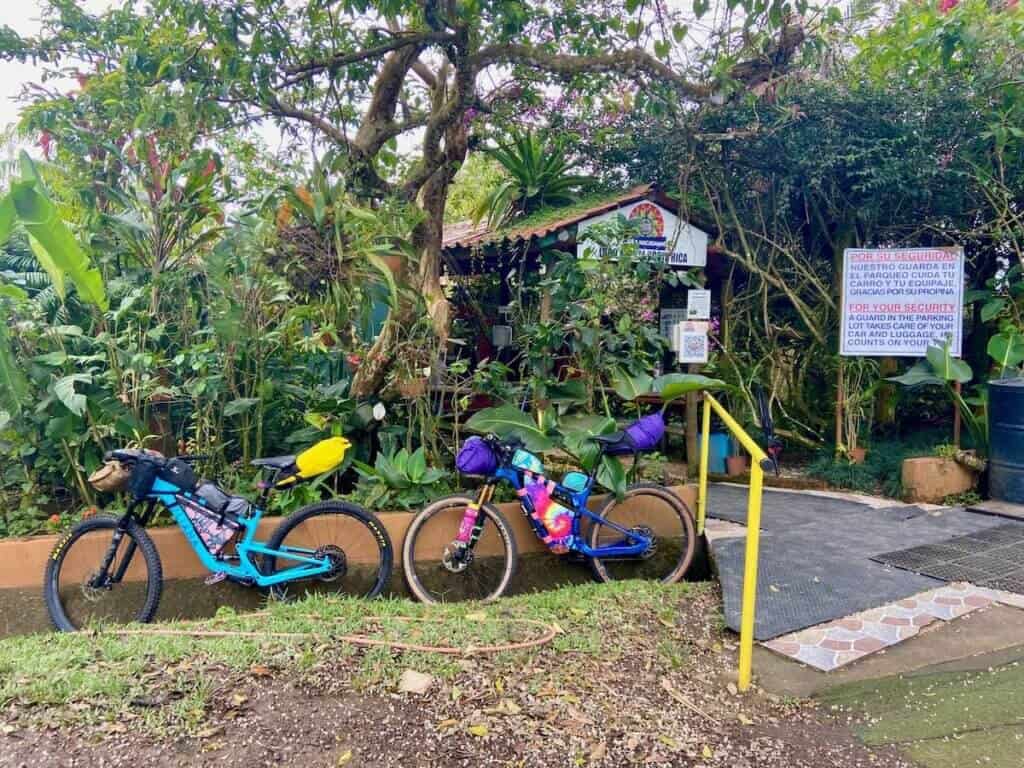
Starting & Ending in Liberia
All of the Costa Rica bikepacking routes start and end in the city of Liberia. You can fly straight into Liberia from several US cities and, like all of Costa Rica, it’s pretty easy to navigate.
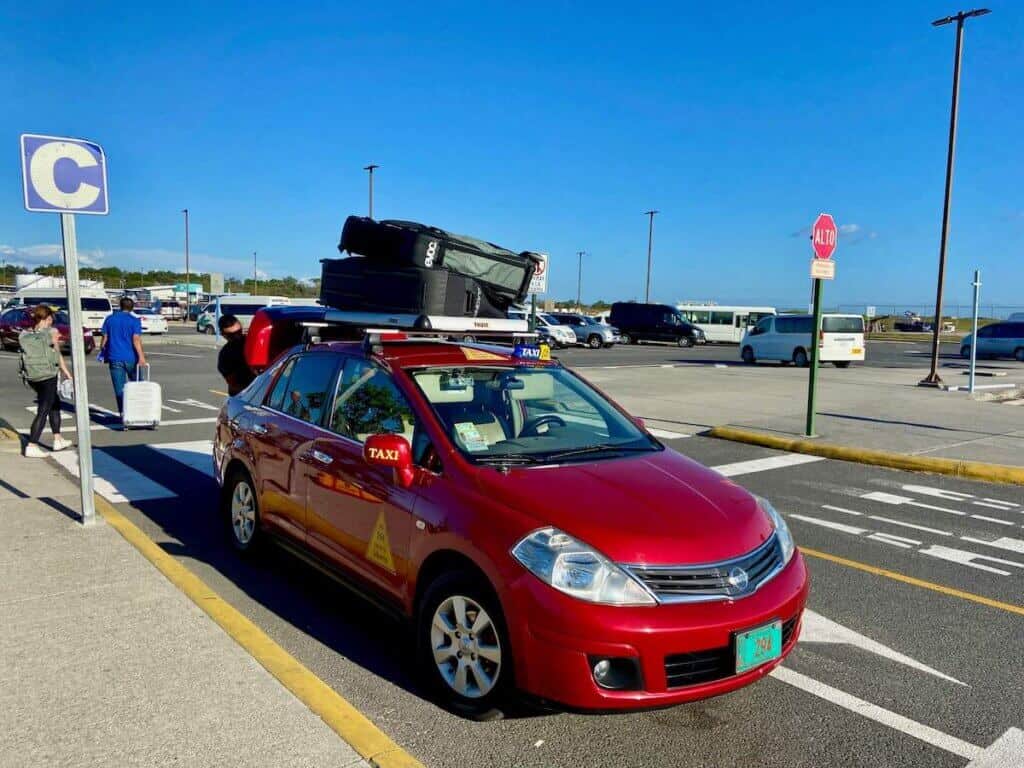
Prepare yourself mentally for your bikes to be transported on top of a taxi, though 🙂
Never flown with a bike before? Learn how in my complete guide on how to fly with a bike.
Here are a few helpful tips for starting and ending your trip in Liberia:
- We stayed at Hotel Javy and they stored our bike bags for two weeks. They also arranged our private shuttle to Lake Arenal where we started our trip.
- You can purchase a SIM card from one of the small shops around Liberia. I got Liberty and it worked fairly well throughout our trip. I’ve heard that Kolbi has better service, though. (You’ll need an unlocked phone to use an international SIM card).
- The roads into and out of Liberia are very busy and not at all fun (or safe) to bike on. Consider either getting a private taxi or taking a bus to a better place to start outside the city. At the end of our trip, we grabbed a bus from Sardinal back into Liberia (see day 13 below).
My Costa Rica Bikepacking itinerary
I know reading a day-by-day itinerary of someone else’s trip isn’t very interesting, but here is the breakdown of my trip. I’ve also included contact info for places we stayed and a few tours we did. I hope it’s helpful for planning your adventure!

Miles: 36.45 miles
Elevation gain: 3,504 ft
Sleeping: Sunset Inn Campground in El Castillo
(*these numbers are a bit high because we went off course a few times for food/exploring)
Day 1 in detail
From Hotel Javy in Liberia, we took a private taxi/shuttle to the shores of Lake Arenal since we decided to skip the first section of the route around Rincón de la Vieja Volcano. (Hotel Javy can arrange this shuttle for you – ask for a bus or van, not a taxi).
Our driver dropped us off at the touristy Macadamia Cafe where we made final touches to our bikes and gear and set off. I’m sure the food at Macadamia Cafe is great, but we weren’t into the crowds and just wanted to start our ride.
The North Shore of Lake Arenal is mostly paved and moderately busy with traffic. It is beautiful and a nice way to ease into biking in Costa Rica. Definitely take the dirt road route out of Nuevo Arenal, though, to skip more pavement.
Once we rounded the east side of the lake and crossed over the dam, the road turned back to dirt through Arenal National Park. Supposedly there are great views, but we didn’t get to see them because of torrential rains 🙁
We passed through the park quickly (unfortunately) and camped at Sunset Inn Campground near El Castillo. The owner is a super sweet older man who made us a delicious breakfast the next morning!

Miles: 24.53 miles
Elevation gain: 2,848 ft
Sleeping: Finca Tucanes camping near Tilaren
Day 2 in detail
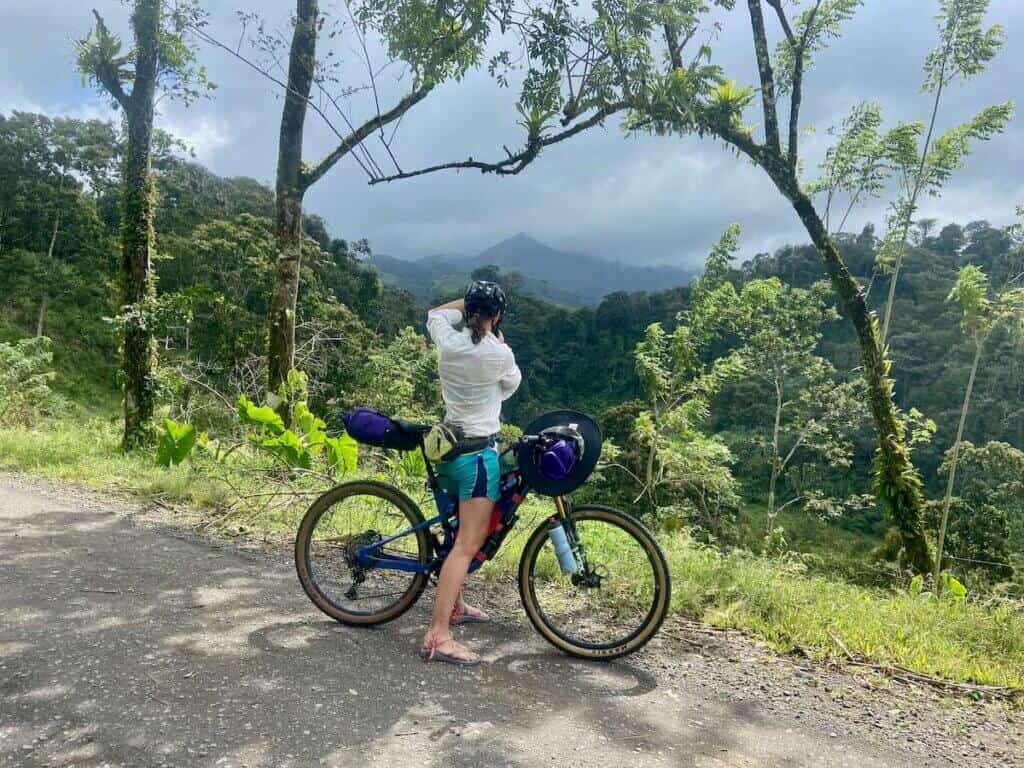
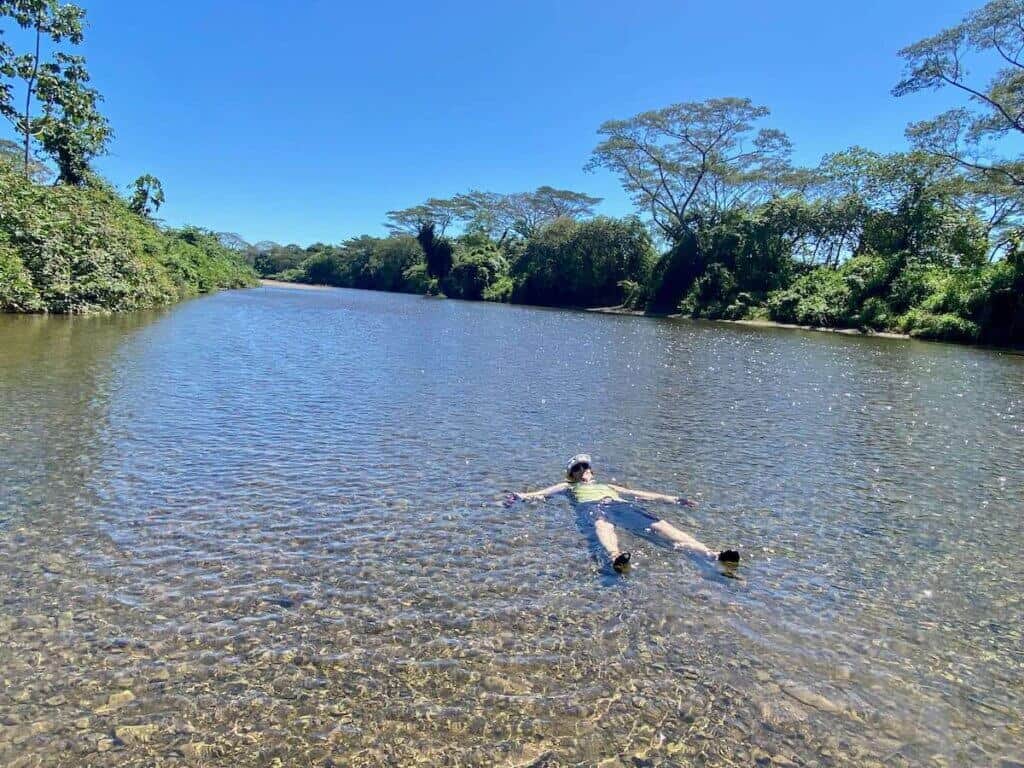
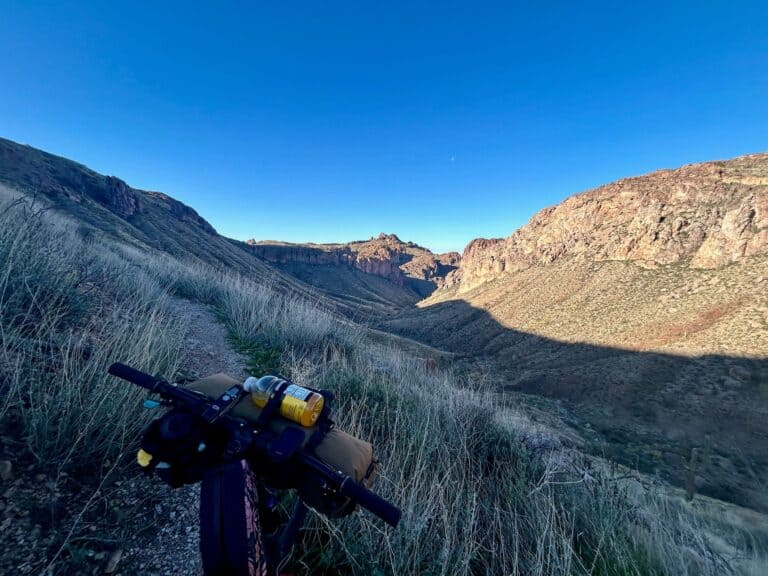
This south shore section of Arenal was one of my favorite stretches of the whole route. It’s remote and rugged and has very little traffic thanks to the numerous river crossings – some we could ride through, others we had to carry our bikes across.
There is one huge soul-crushing hill if you decide to take the inland route instead of sticking to the coast, but it was only day 2 so we had the legs for it 🙂
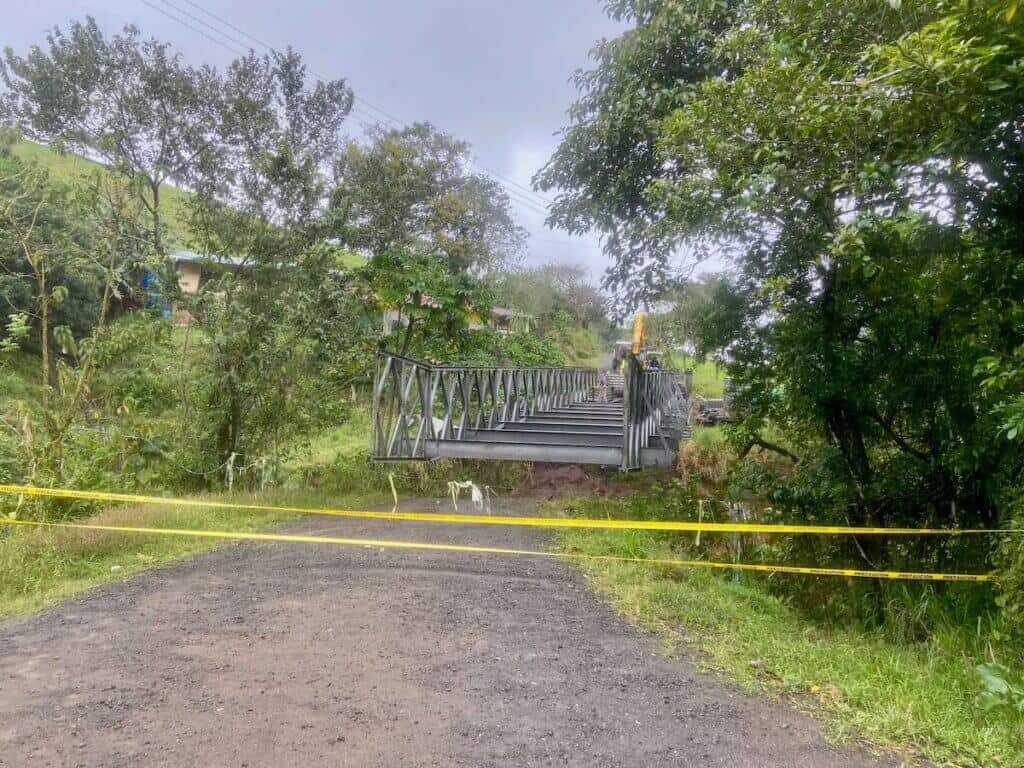
The biggest struggle of this day, though, was getting to the other side of a deep riverbed because a new bridge was being put in and there was no other way across. It was such a ridiculous ordeal of pushing and carrying our bikes through deep mud and steep sidehill terrain. It’s funny in hindsight…
We decided to deviate a bit from the main route again by dropping into the town of Tronadora for lunch at La Brisa restaurant (delicious!). The descent down to town was stunning with glistening lake views.
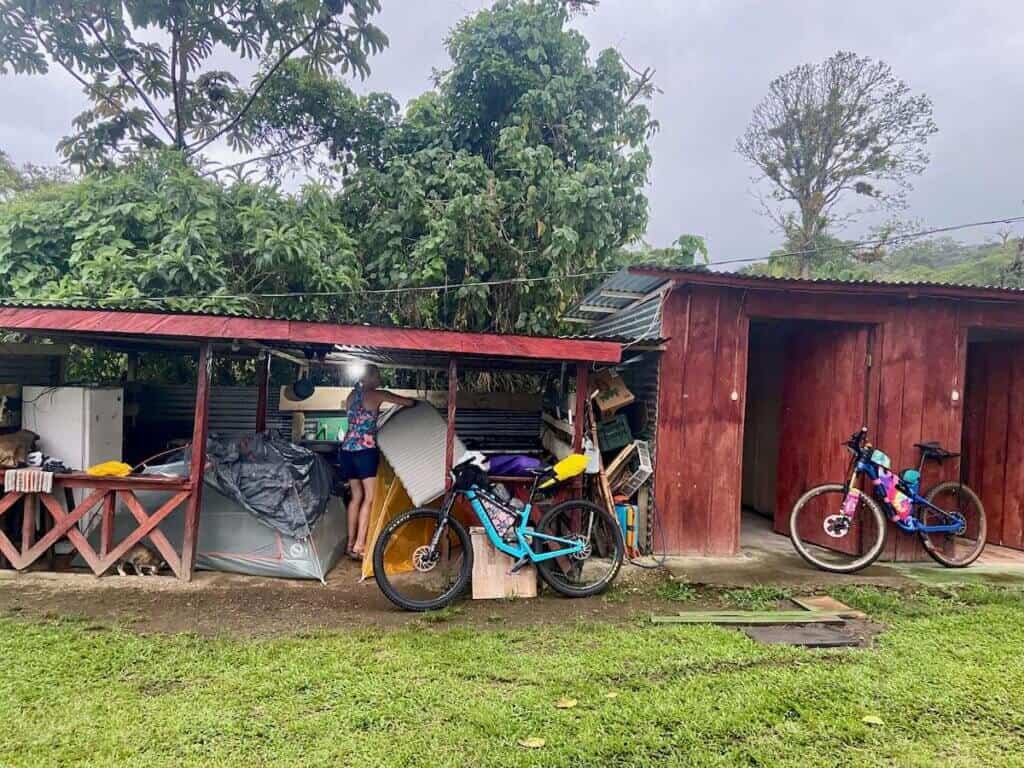
From Tronadora, we headed to Finca Tucanes to camp for the night. The host, Jessica, is wonderful and there are plenty of places to camp (including under a roof if it’s raining). There’s also a shower and sinks to wash out clothes.
If you don’t want to camp, Jessica has cabins to rent on Airbnb. Make arrangements ahead of time, though. We didn’t text ahead and she was a bit surprised to find us waiting at the gate with our bikes and gear!
Finca Tucanes contact info:
Miles: 23.55 miles
Elevation gain: 2,838 ft
Sleeping: Cabinas, Bar y Restaurante El Cayuco in Las Juntas
Day 3 in detail
Day 3… Because it had been so rainy and windy the past two days, Michelle and I weren’t quite on the same page about riding. We had three options:
- Follow the main route which would have meant a 30+ mile day with 4,000+ ft of climbing and likely a strong headwind
- Take a bus from the town of Tilaren, which was close by
- Make our own route
We opted to make our own route.
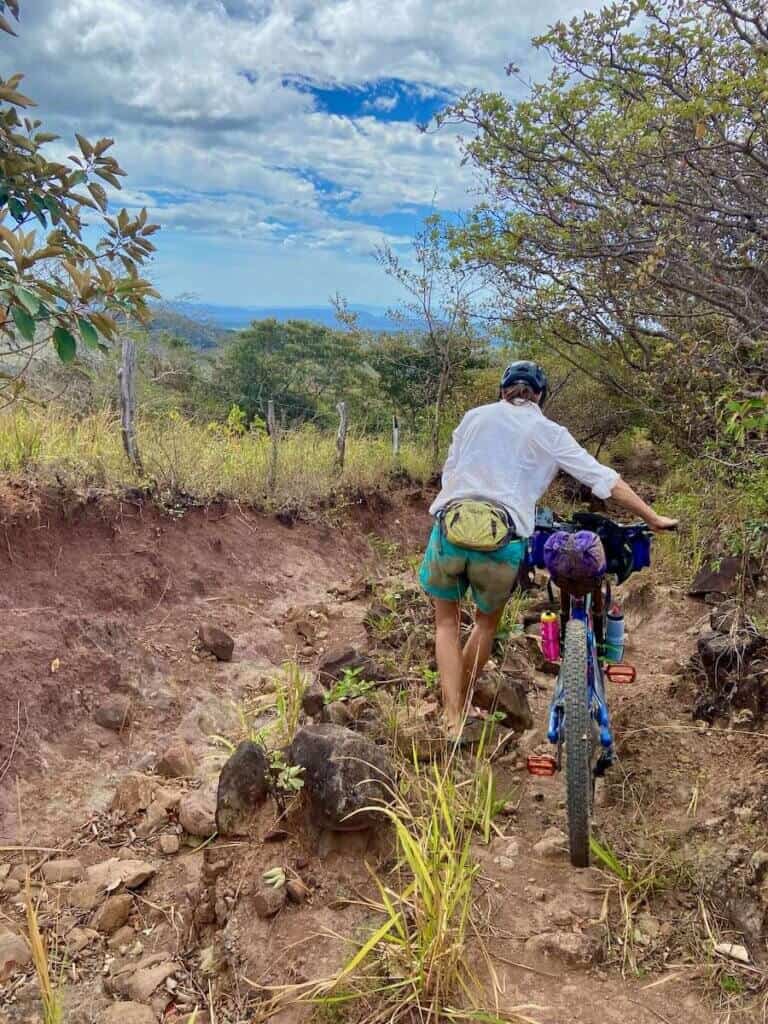
For the first 15 miles, it was awesome (although there was one very muddy descent at the start). But then we came to Calle (road in Spanish) Solania and it was definitely NOT a calle. A dirt bike couldn’t have even made it up or down the steep, overgrown, rutted path.
For the next two hours, we walked and stumbled our bikes down a steep mountain trail in the middle of nowhere. Literally. Thankfully, we had our maps so we knew where we were, but it was exhausting and frustrating. But not raining!
We rolled into the town of Las Juntas hot, hungry, and ready for the day to be done. Looking back, it was probably the most type 3 fun I’d ever done. But it makes for fond memories 🙂
We opted to not camp that night and instead stayed at a cheap motel in Las Juntas called Cabinas, Bar y Restaurante El Cayuco.
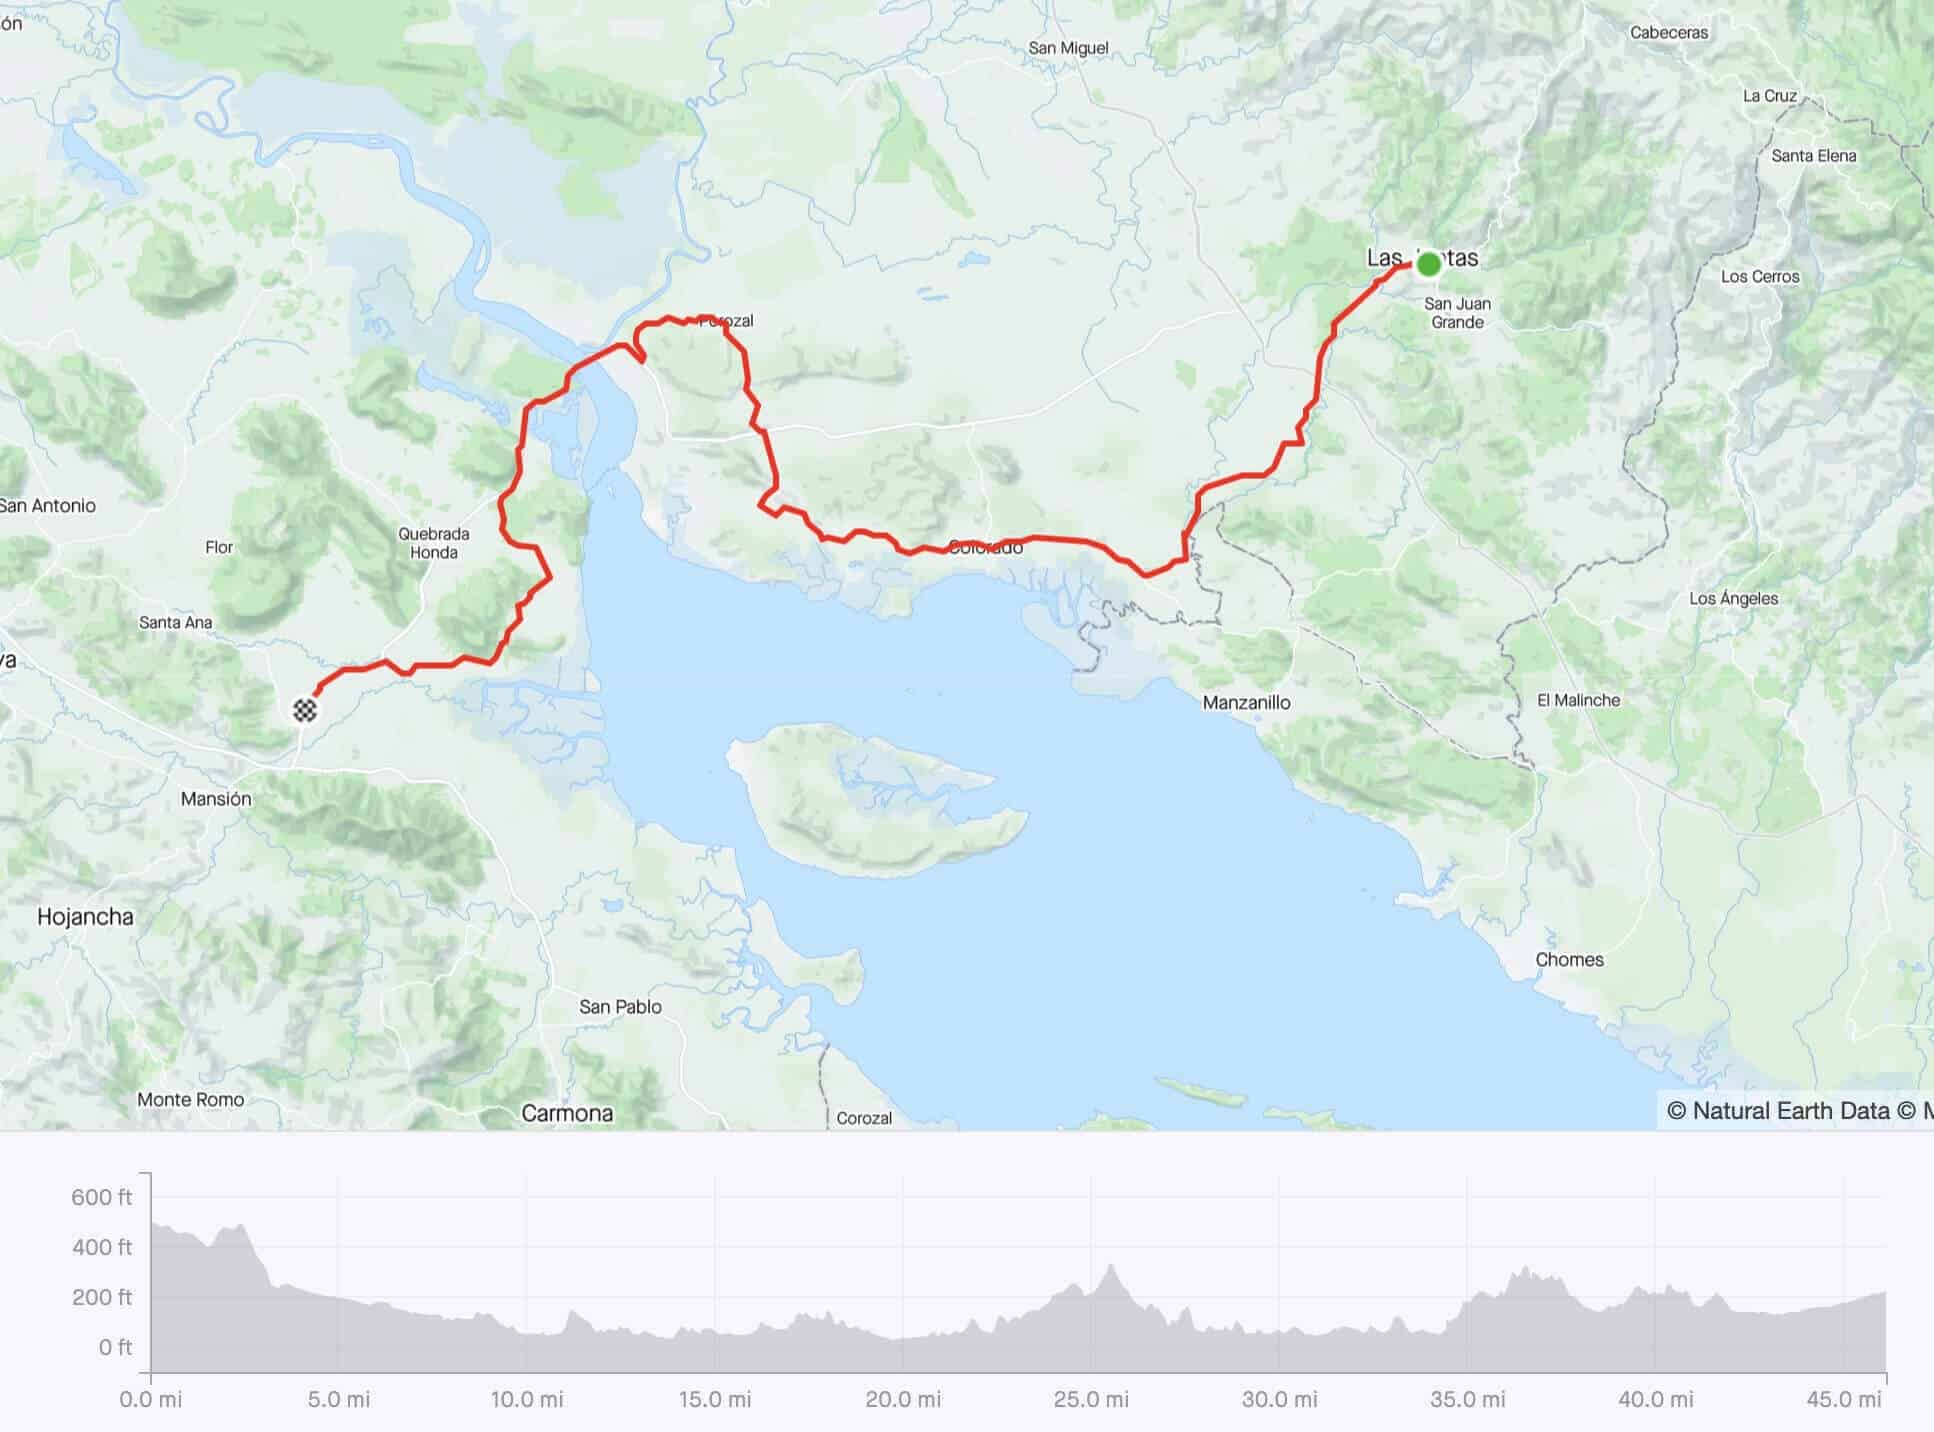
Miles: 46.12 miles
Elevation gain: 2,484 ft
Sleeping: Oasis Place camping
Day 4 in detail
I really enjoyed day 4. It was mostly easy pedaling, which was much appreciated after the long hike-a-bike we had yesterday and quite a bit of climbing since the start.
The roads were quiet and pleasant until we reached highway 18, which was quite busy for a few miles, unfortunately.
We camped at Oasis Place off Highway 18. Like Finca Tucanes, we showed up unexpectedly and had to wait for someone to come let us in. Reach out ahead of time to let them know you’re coming. The hosts are super sweet and even made us breakfast in the morning.
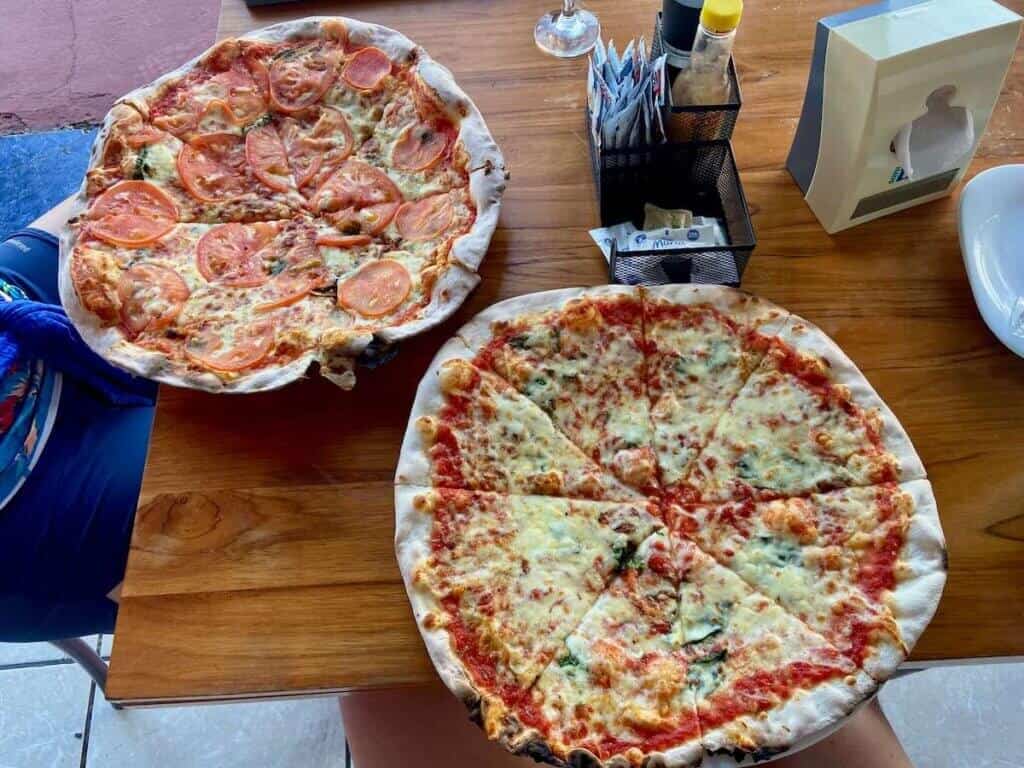
For dinner, the restaurant up the road serves amazing pizza.
Oasis Place contact info:
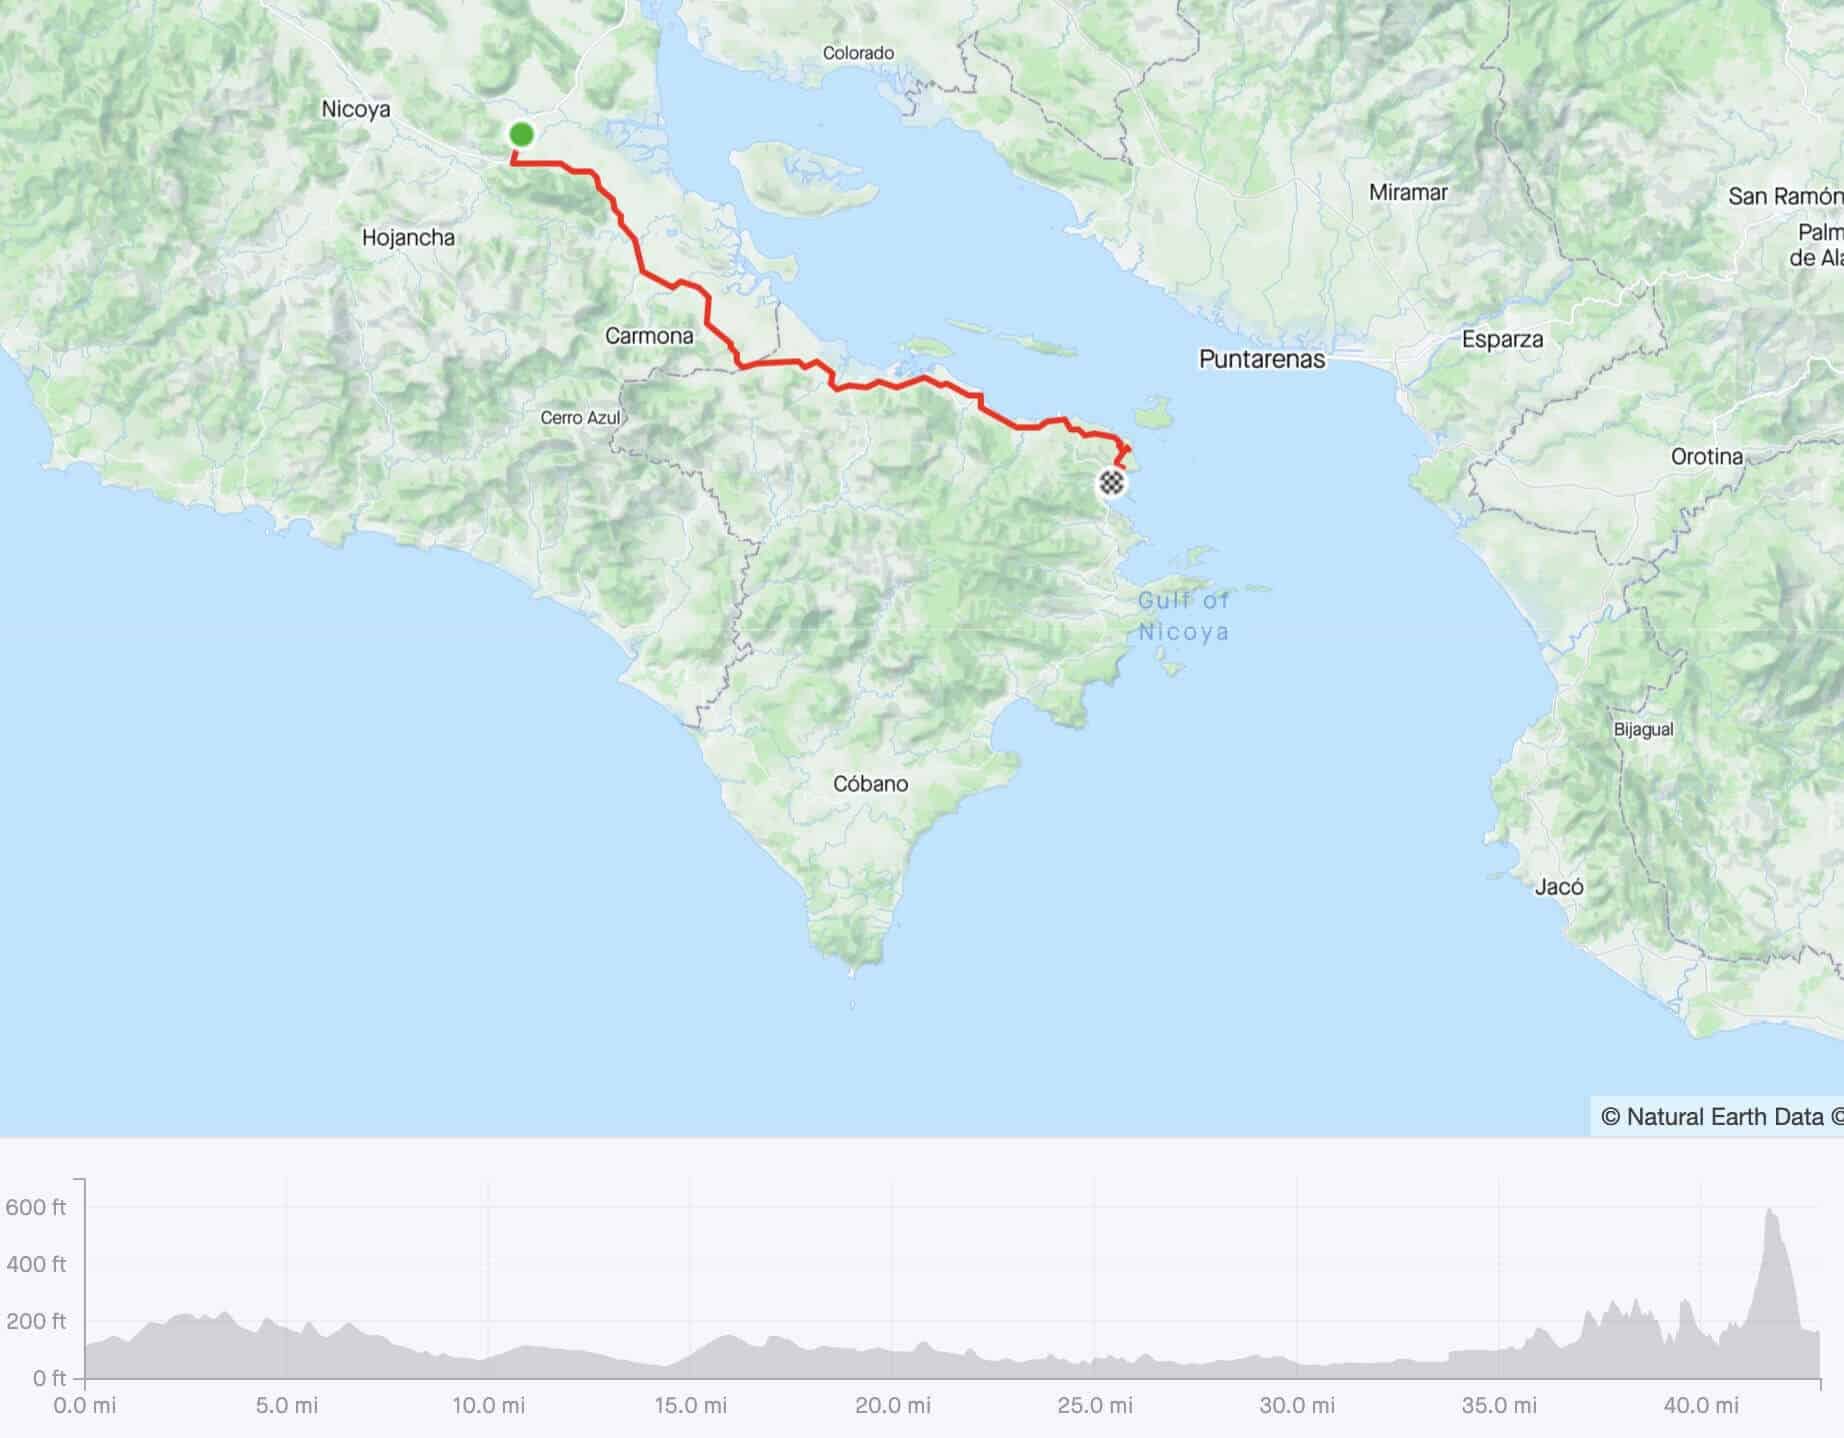
Miles: 42.95 miles
Elevation gain: 1,811 ft
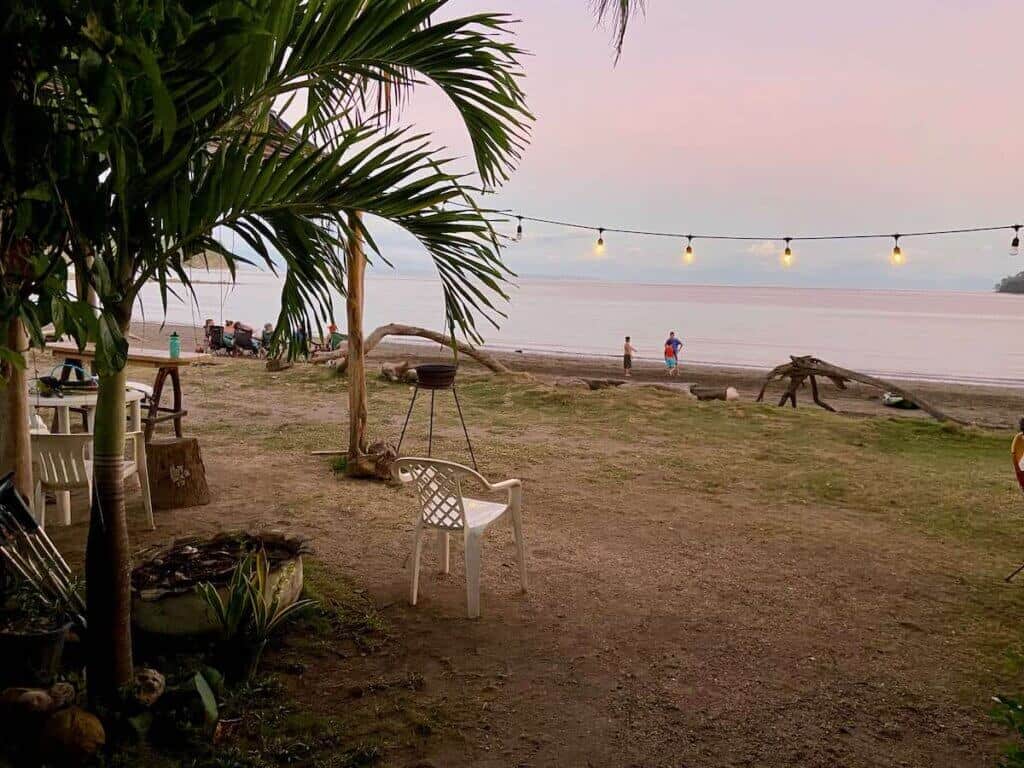
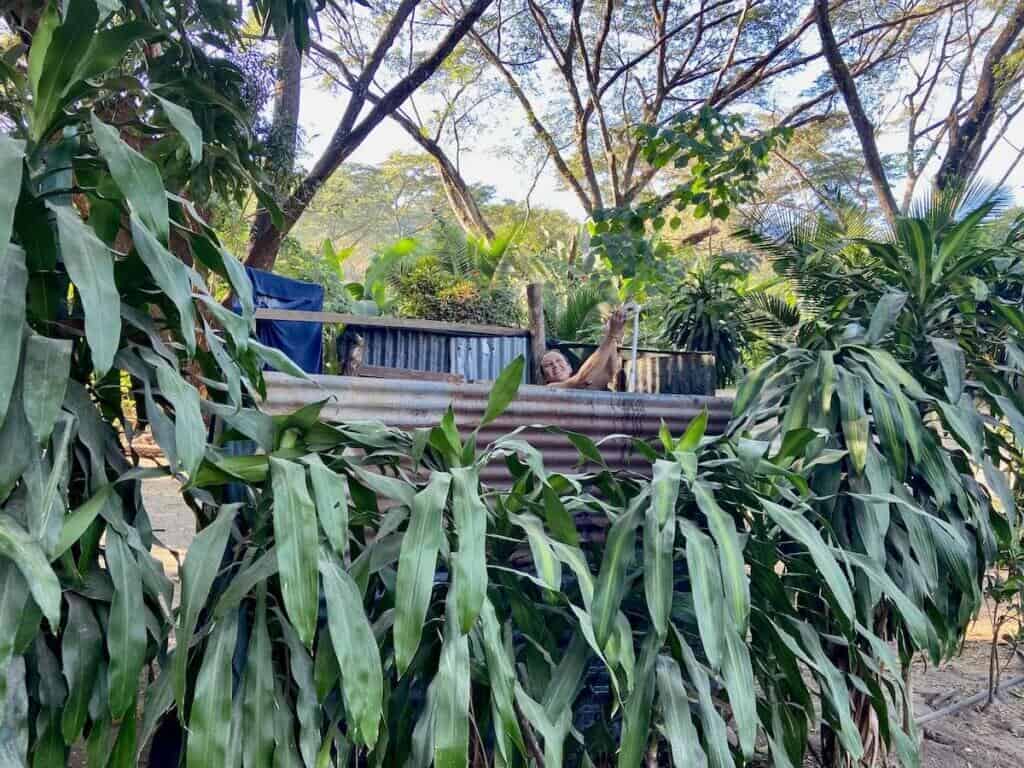
Sleeping: Restaurant Erika camping
Day 5 in detail
The riding on day 5 was mostly on paved, busy road but we hit it on a Sunday, so I don’t think it was as busy as it could have been. One of the highlights, though, was stopping at Restaurant Jardincito for a Dragonfruit and Passionfruit batido – so good!
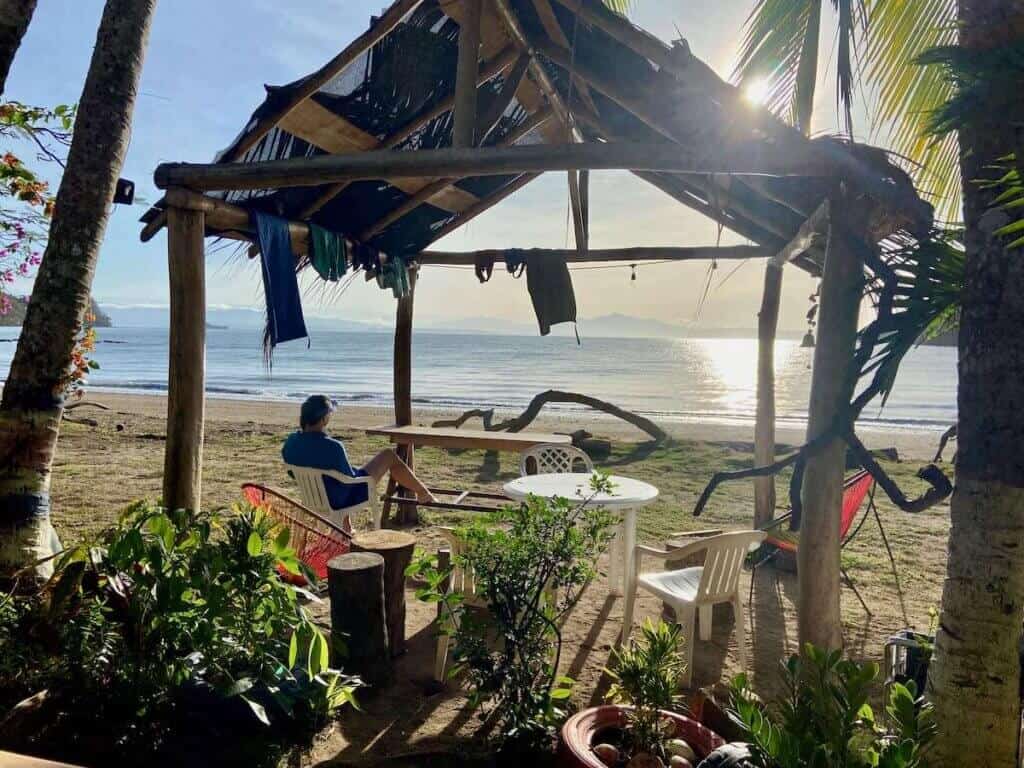
This was also the day we first hit the beach. The road out to Playa Blanca turned to dirt, but I wasn’t a huge fan of Playa Blanca because it was busy, loud, and didn’t have much shade. I’d skip this beach and keep going to Restaurant Erika, my favorite place of the whole trip!
Restaurant Erika is a super cute, quiet restaurant right on the beach owned by a really nice family. There’s great swimming, plenty of shade, good food, drinks, and hammocks. I could have stayed here for several days.
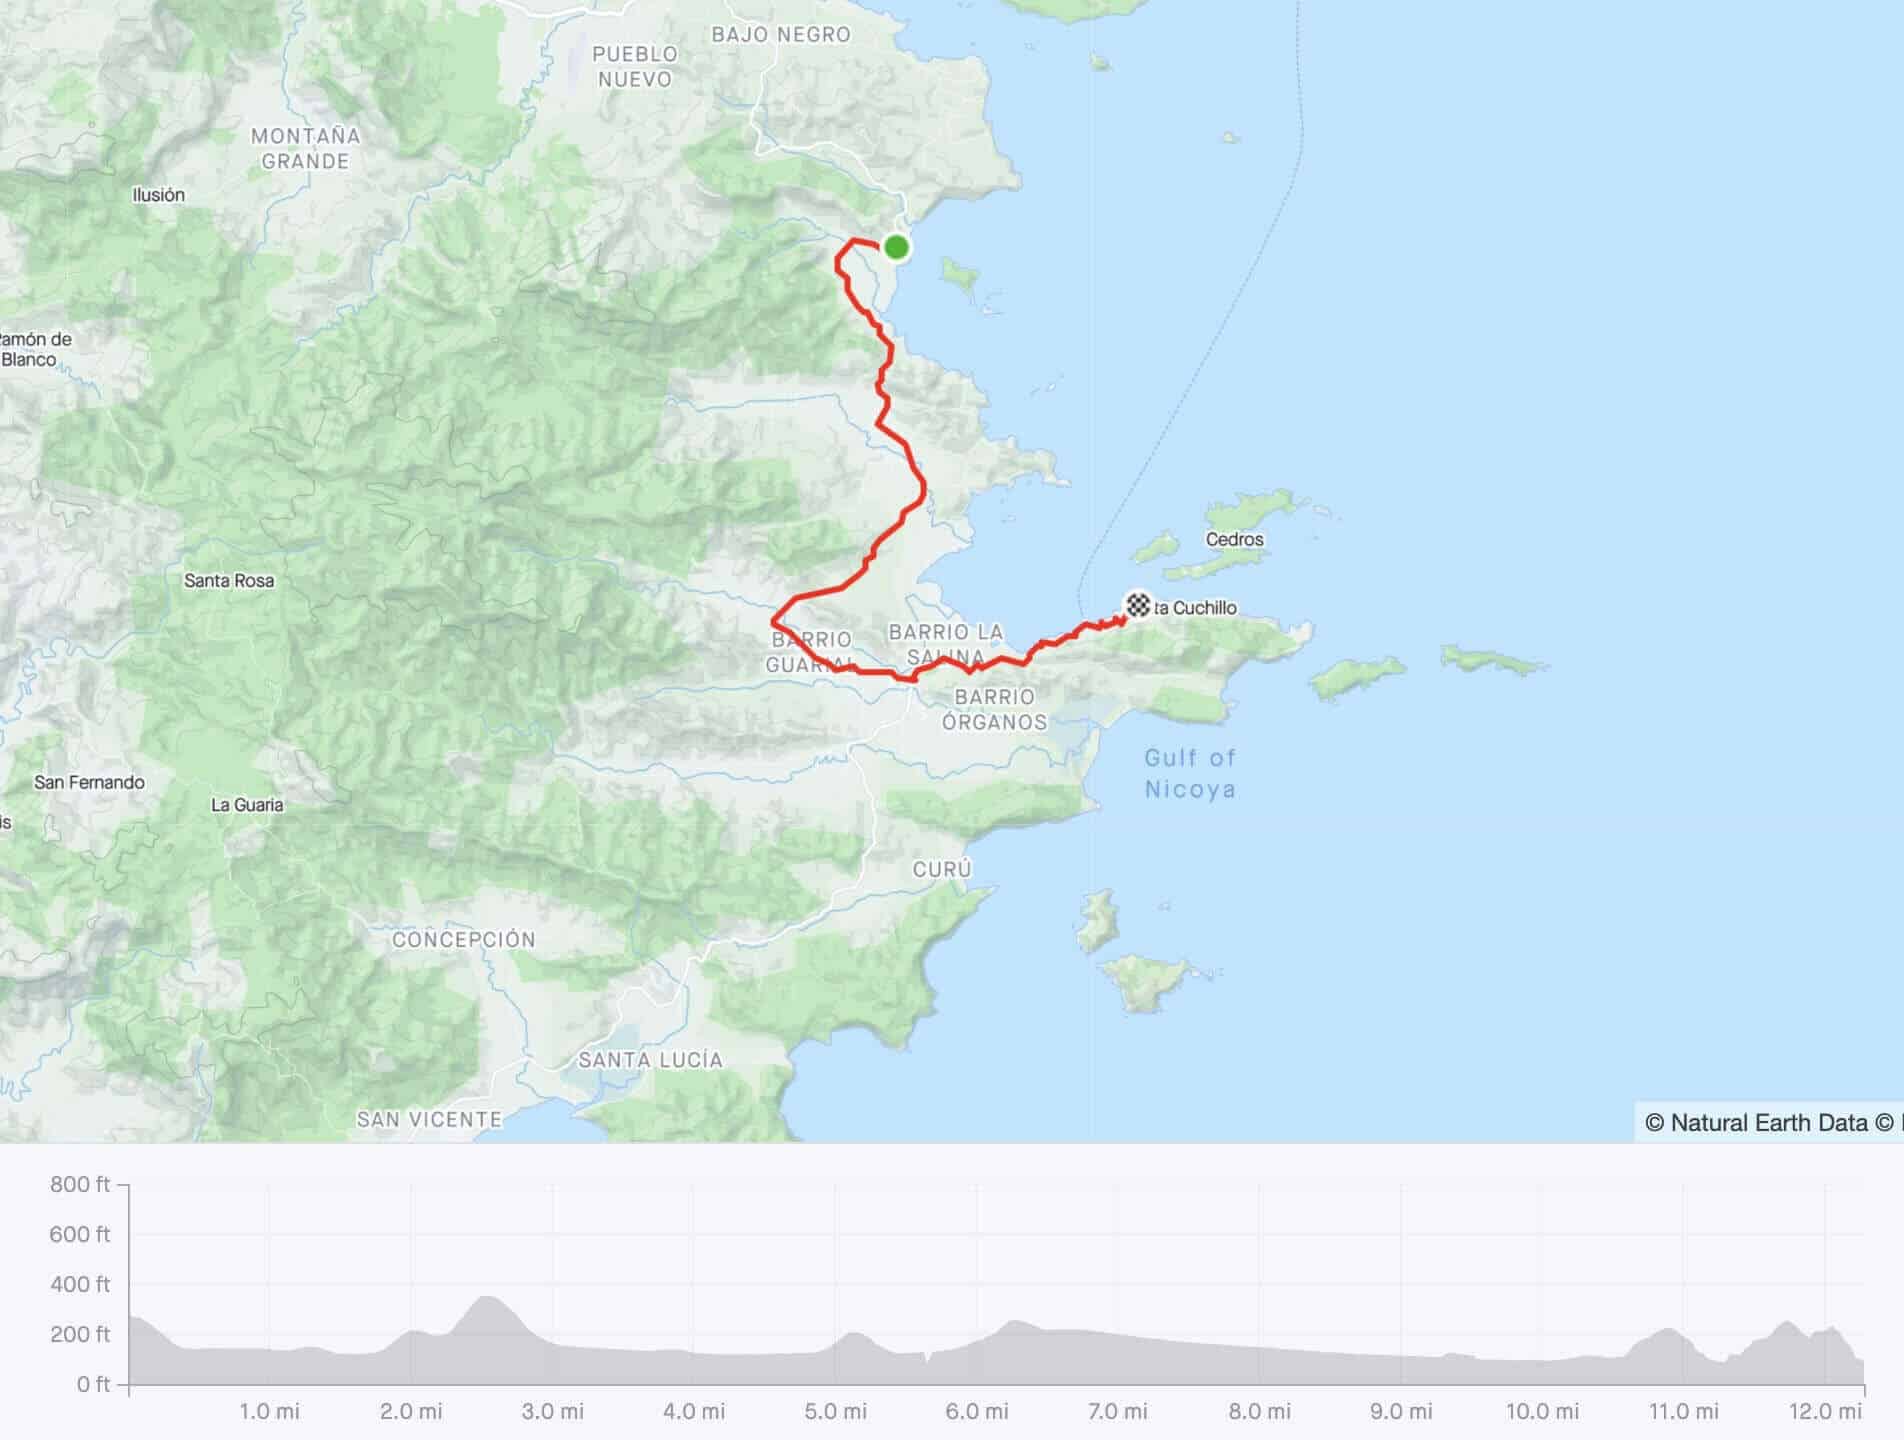
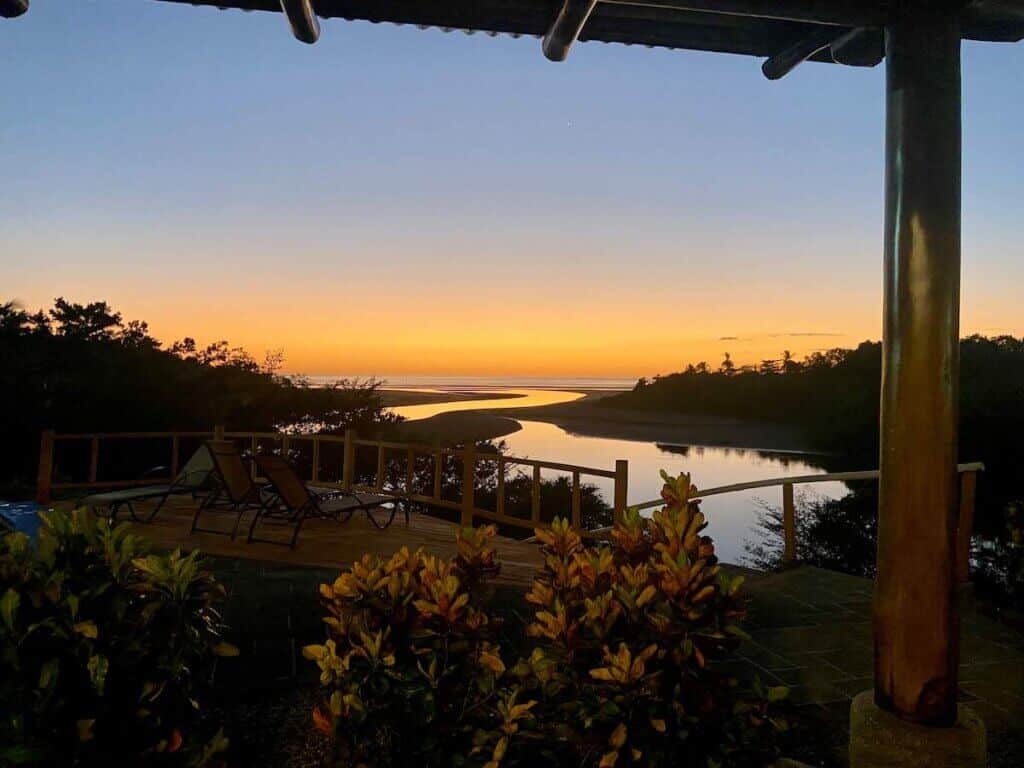
Miles: 12.27 miles
Elevation gain: 873 ft
Sleeping: Eddys Bioluminescence
Day 6 in detail
This was a short day of riding because we only had a few miles to go. We had signed up to do a tour with Eddys Bioluminescence near Paquera. I’d seen this magical ocean phenomenon many times before when working on ships in Baja, but Michelle hadn’t.
To get there, we did have to get off the main route and add some climbing (there are some hills!), but it was worth it. If you haven’t seen bioluminescence before, do it. It’s so amazing!
Eddy also let us camp at his place, which had showers and flat ground for our tents, and there was a restaurant about a kilometer away (up more hills).
Eddys Bioluminescence contact info:
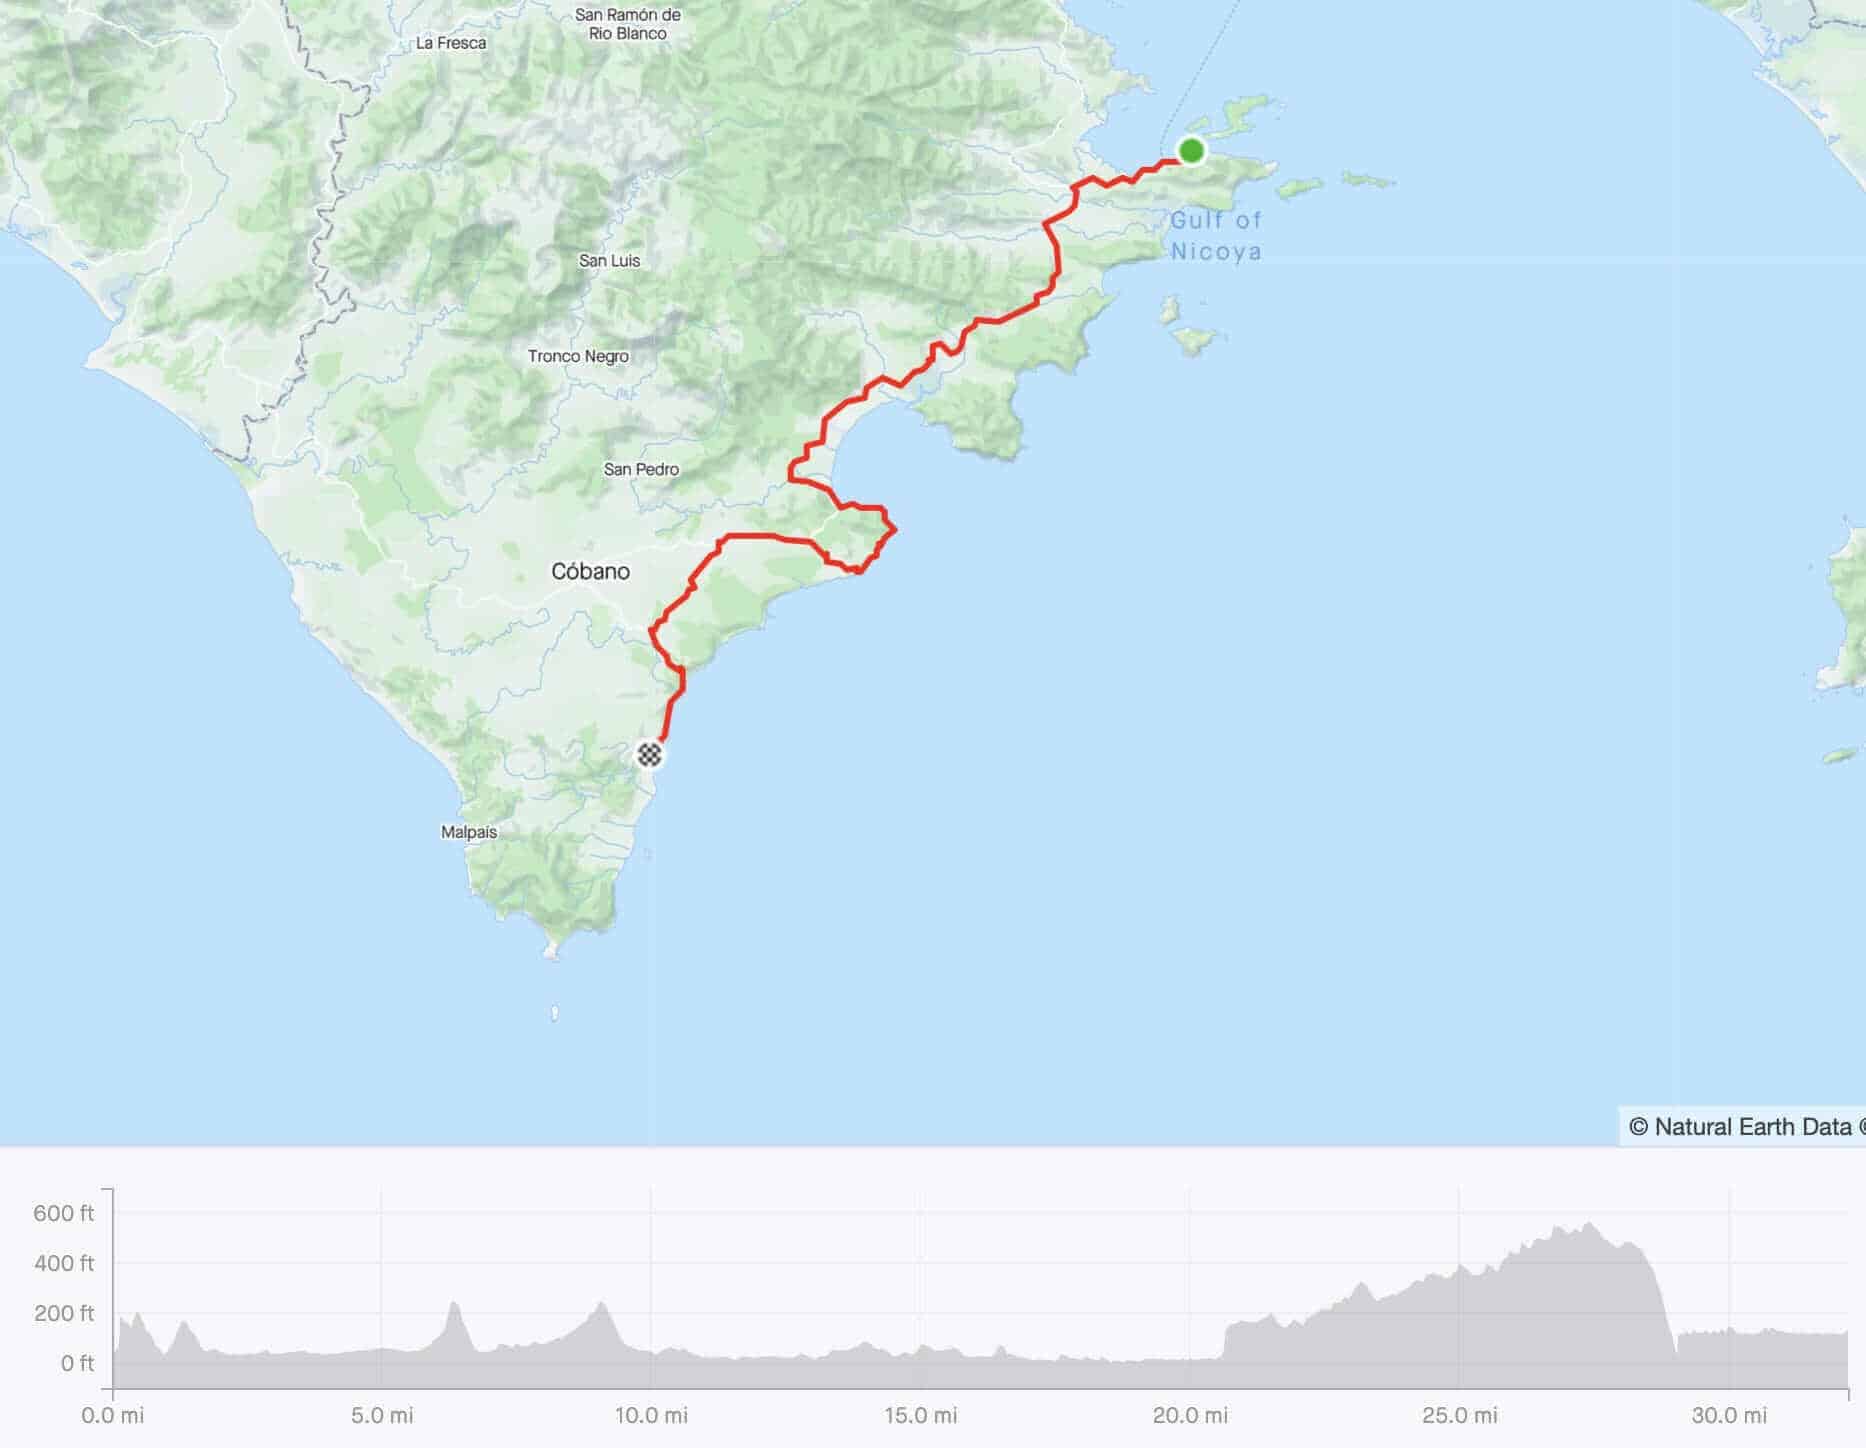
Miles: 32.21 miles
Elevation gain: 2,211 ft
Sleeping: Victor’s Campground
Day 7 in detail
The most memorable part of this day was the shore loop just past Tambor. Don’t skip it! It was our first (small) taste of beach riding and the route actually felt like mountain biking (as opposed to gravel or road riding).
We rolled into Montezuma in the early afternoon and spent an hour or two at Chico’s Bar and Restaurant, which had great beach views and delicious coconut milkshakes.
Montezuma was really busy and touristy, though, so we didn’t linger for long. We headed out with some empanadas for dinner and landed at Victor’s ‘campground’ for the night. It was super basic and rustic but had showers and he even gave us some ice for our boxed white wine.
If you want a more established campground, Fernando Morales is a little farther down and looked like it was a bit nicer.

Miles: 25.17 miles
Elevation gain: 1,293 ft
Sleeping: Restaurant Tanga
Day 8 in detail
After breakfast at a nice lodge in the much quieter town of Cabuya, we made our way across the hilly terrain to Mal Pais. We fueled up with snacks and Gatorade then pedaled a hot, dusty, and slightly miserable few miles through Santa Teresa.
Santa Teresa is the Cabo of Costa Rica. Not my scene.
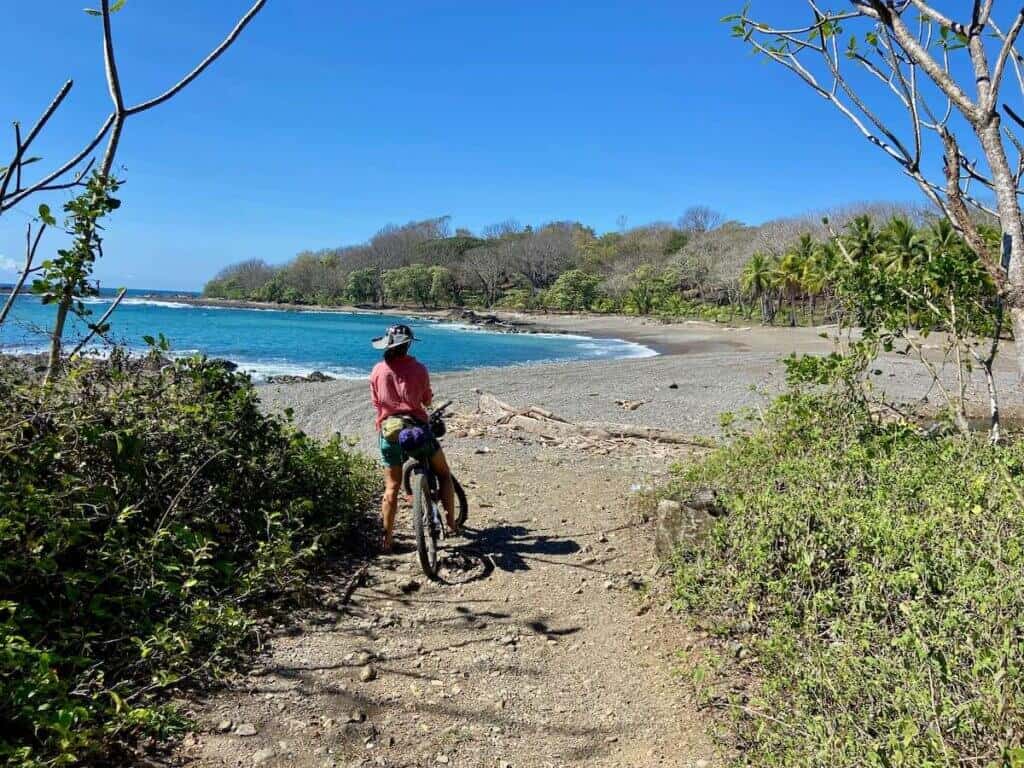
Thankfully, the route took us on some awesome beach riding after surviving the chaotic streets of Santa Teresa and it was a beautiful pedal to Playa Coyote where we spent the night camping at Restaurant Tanga.
The area is really beautiful and quiet, but the restaurant owner – Carlos – closed the kitchen at 5pm without telling us, so we had to hitch a ride to a nearby hotel for dinner. It had great views, though!
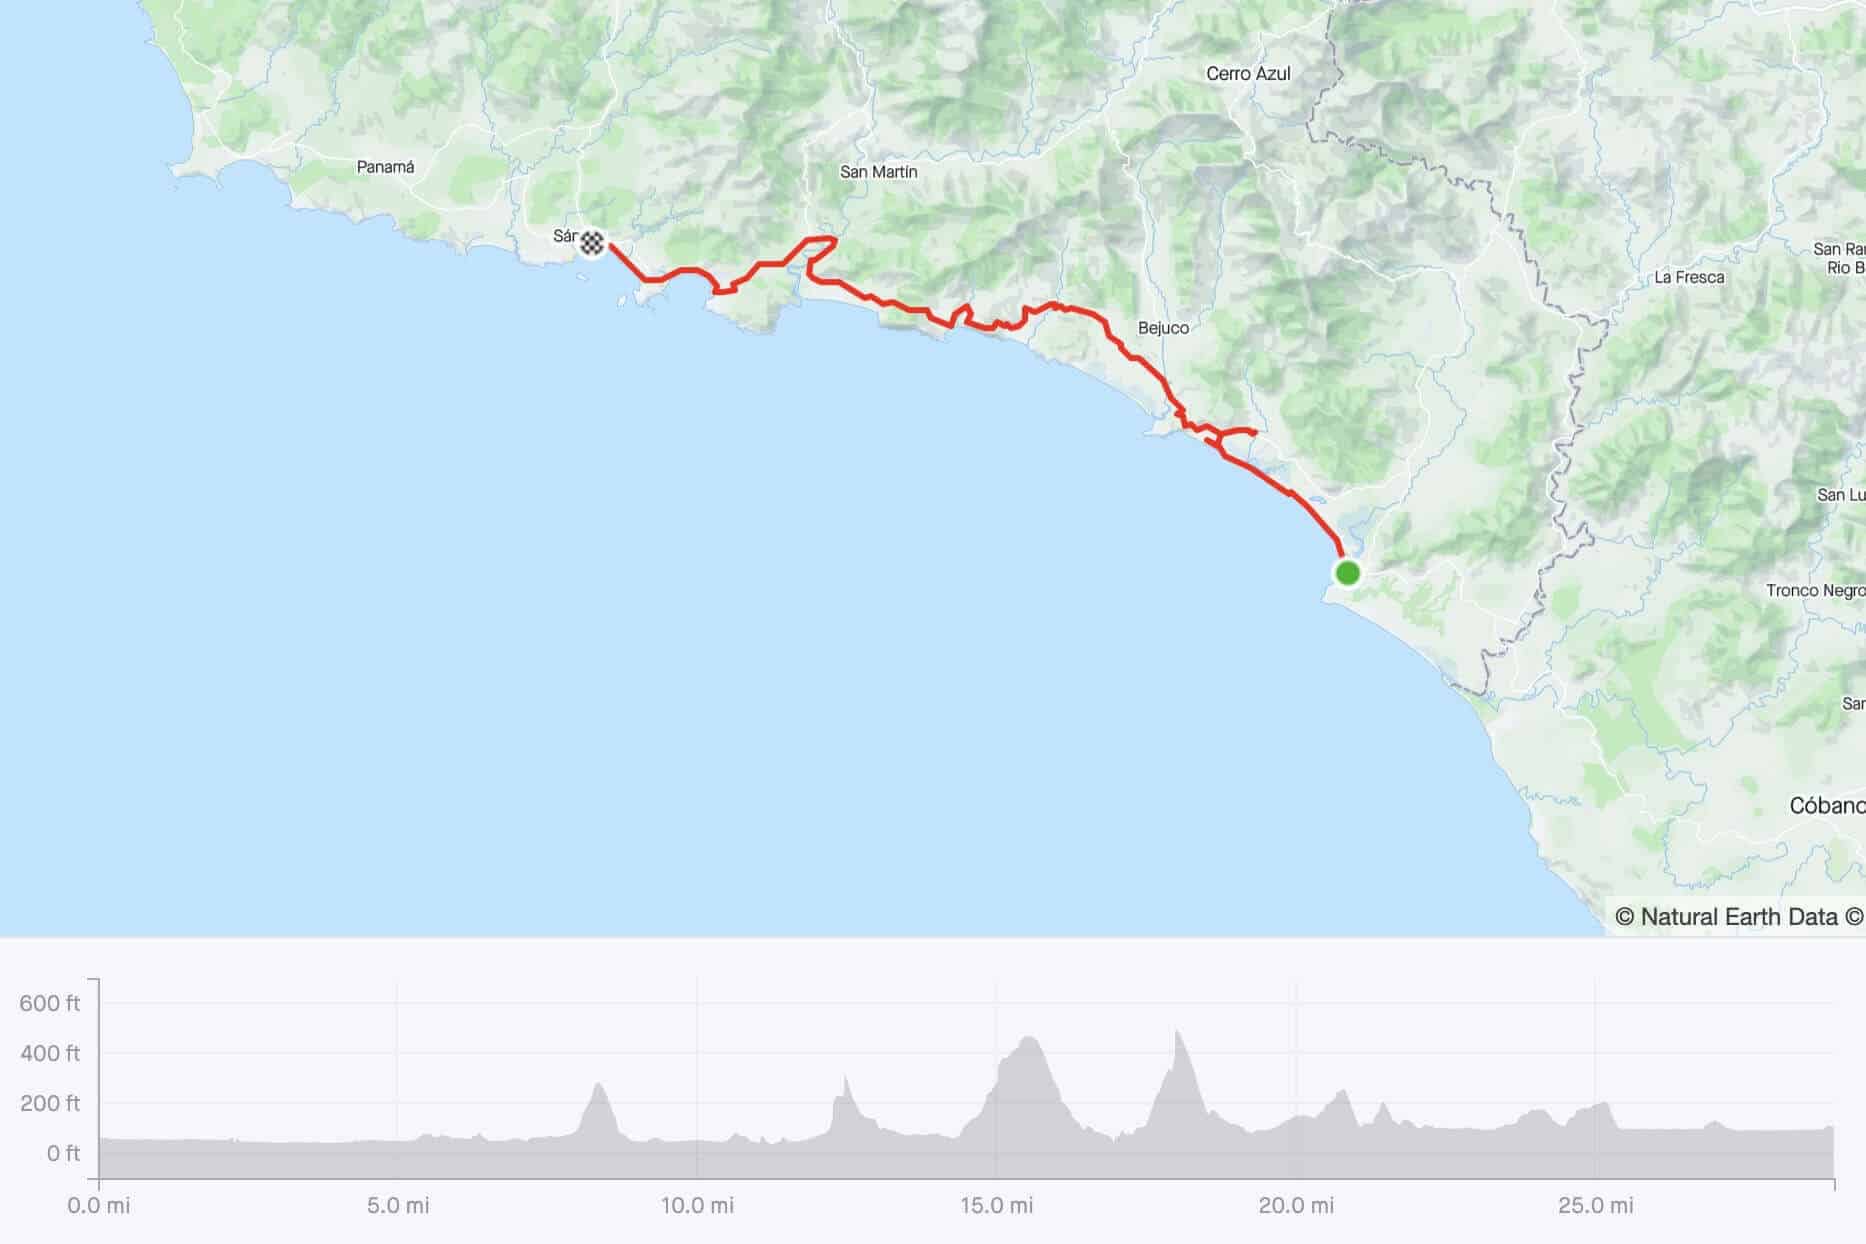
Miles: 28.98 miles
Elevation gain: 1,949 ft
Sleeping: Coco’s Campground in Sámara
Day 9 in detail
Coyote Beach has a deep river estuary that we need to cross at dead low tide, so we woke up early and made our crossing at 6:30am.
From there, we had several miles of glorious hard-packed sand beach riding all the way to the small town of San Miguel. Unfortunately, there weren’t any good food options, so we did have to detour a bit to find breakfast at Laguna Mar hotel.
The rest of the day wasn’t nearly as pleasant as the morning. It was hot and dusty with big hills and a fair amount of traffic.
But we did stop at a beach resort/spa in Islita for a nice break and a delicious smoothie.
Camping for the night was at Coco’s in Sámara. It was right on the beach with basic amenities like showers, sinks, and toilets.
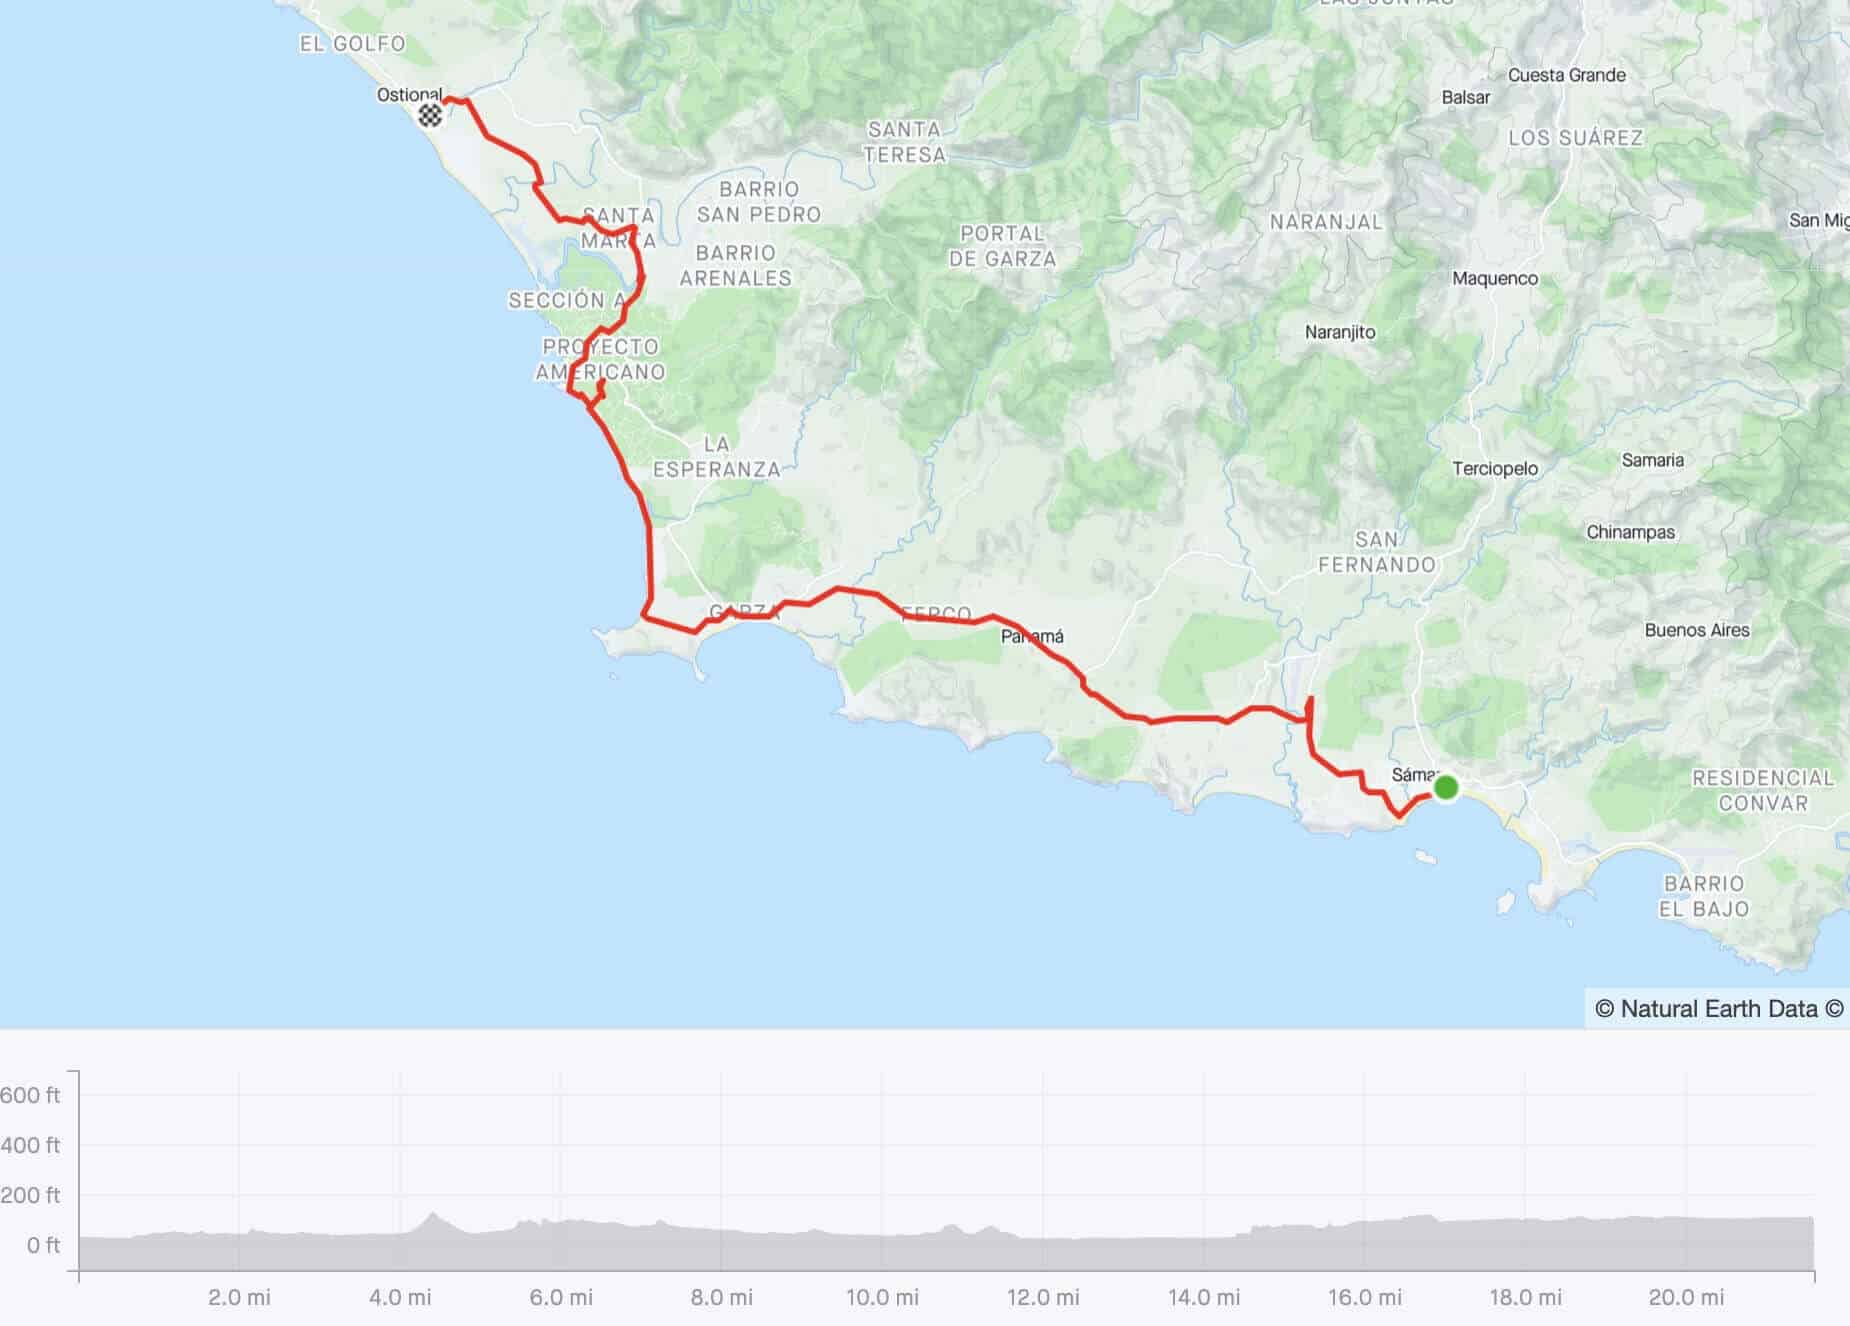
Miles: 21.59 miles
Elevation gain: 597 ft
Sleeping: Ostional Turtle Lodge
Day 10 in detail
One of our must-do’s for Costa Rica was to visit Ostional to (hopefully) see baby turtles. Despite my numerous visits to Central America, I’d never seen baby turtles hatching and it was on my bucket list.
The ride from Sámara to Ostional was short and sweet with very little elevation gain. We had booked a night at the Ostional Turtle Lodge, which was a nice little place within walking distance of the beaches.
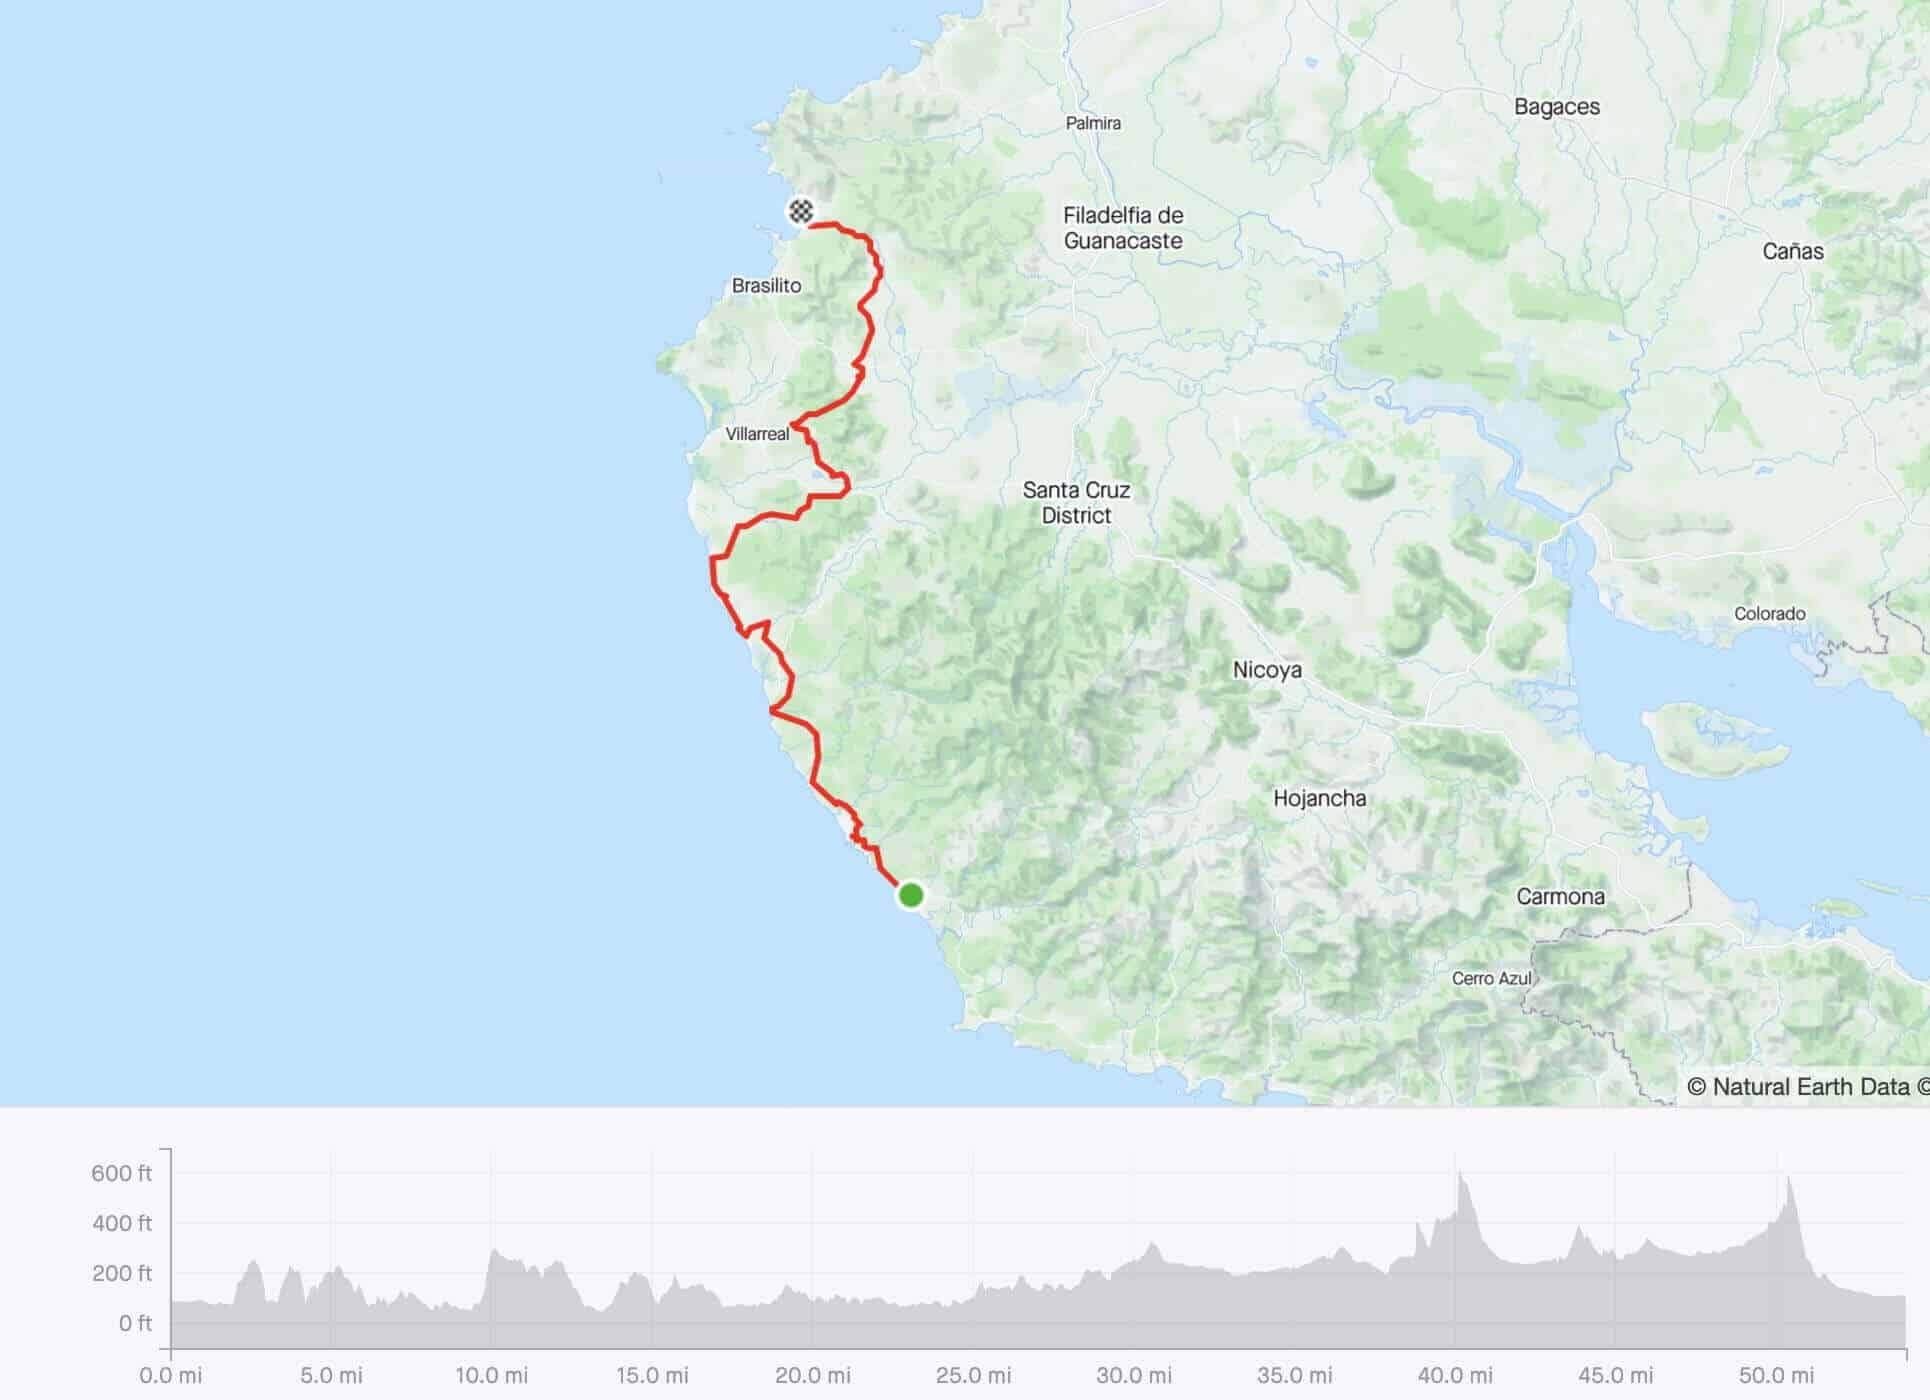
Miles: 54.05 miles
Elevation gain: 3,832 ft
Sleeping: Las Brisas Restaurant
Day 11 in detail
The next morning, we woke up at 4:45 to meet our guide (we had booked a turtle tour, but you really don’t need a guide). For the next few hours, we walked the beach and watched baby turtles emerge from the sand and make their way down to the ocean. It was amazing!
After saying goodbye to the turtles and packing up our bikes, we headed out for what was going to be our longest day on the bikes.
Please don’t ride on Ostional Beach as the route says because there are baby turtles and turtle nests.
We wanted to make it to Las Brisas restaurant near Playa Potrero, which was 50+ miles and almost 4,000 ft of climbing. It was a long, hot day in the saddle, but the camping at Las Brisas was worth it and it made for a shorter final day.
Another highlight of this day was stumbling across the Corozon Surf Cafe near Playa Negra about 22 miles from Ostional. Don’t miss it! It’s a French cafe that serves amazing food and coffee in the middle of nowhere.
Apparently, they also have Airbnb rooms and cabins for rent. Had I known, I think we would have ended our day there.
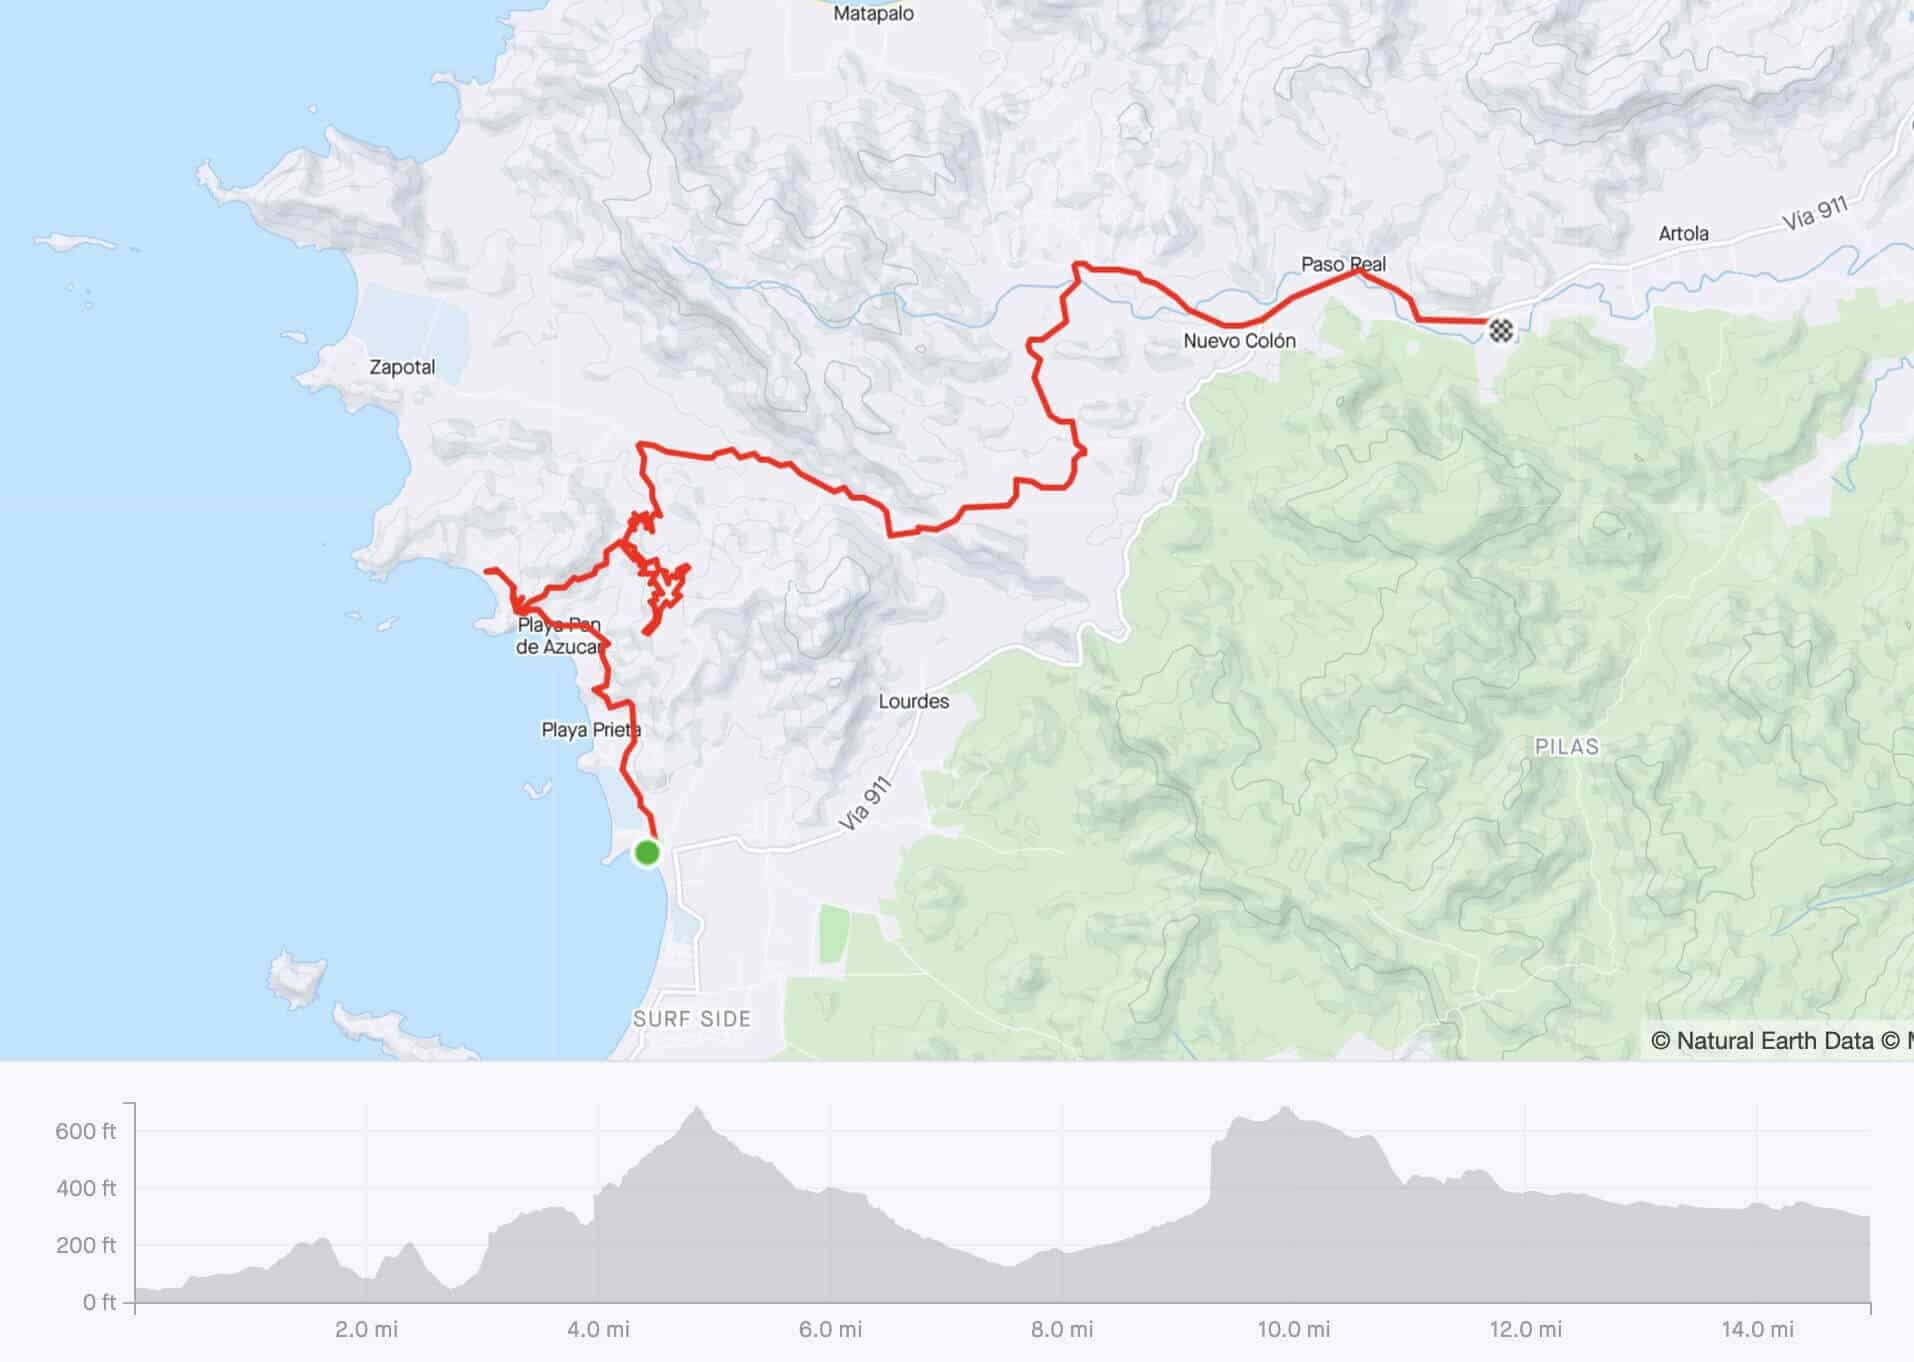
Miles: 14.97 miles
Elevation gain: 1,614 ft
Sleeping: Born to be Wild Eco Resort
Day 12 in detail
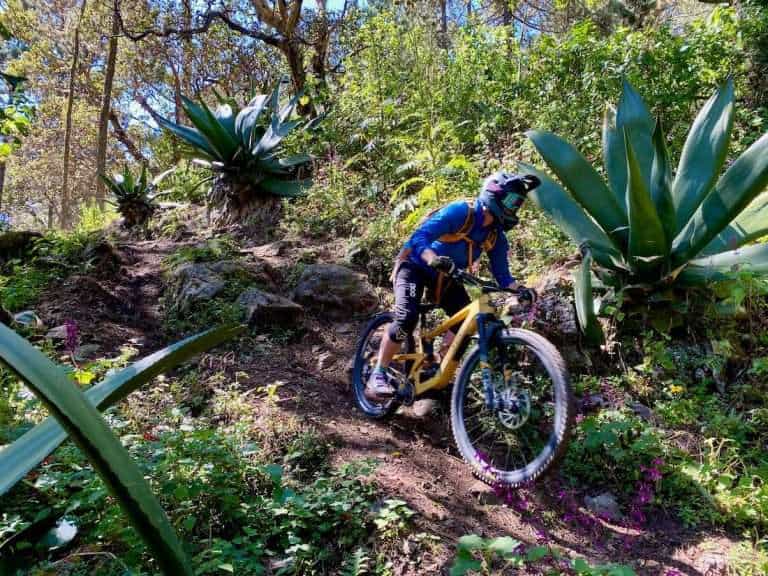
Our final ‘real’ day of riding! And we got to hit some singletrack. The Las Catalinas mountain bike trail network is located about 4 kilometers north of where we camped the night before. We made our way over there and stopped at Pura Vida Ride bike shop for some much-needed chain lube.
The main route climbed up some singletrack to a jeep road, but we wanted to explore more of the trails, so we took B Trail to D Trail and then added an extra loop on F to H before linking back into the main route via D Trail again.
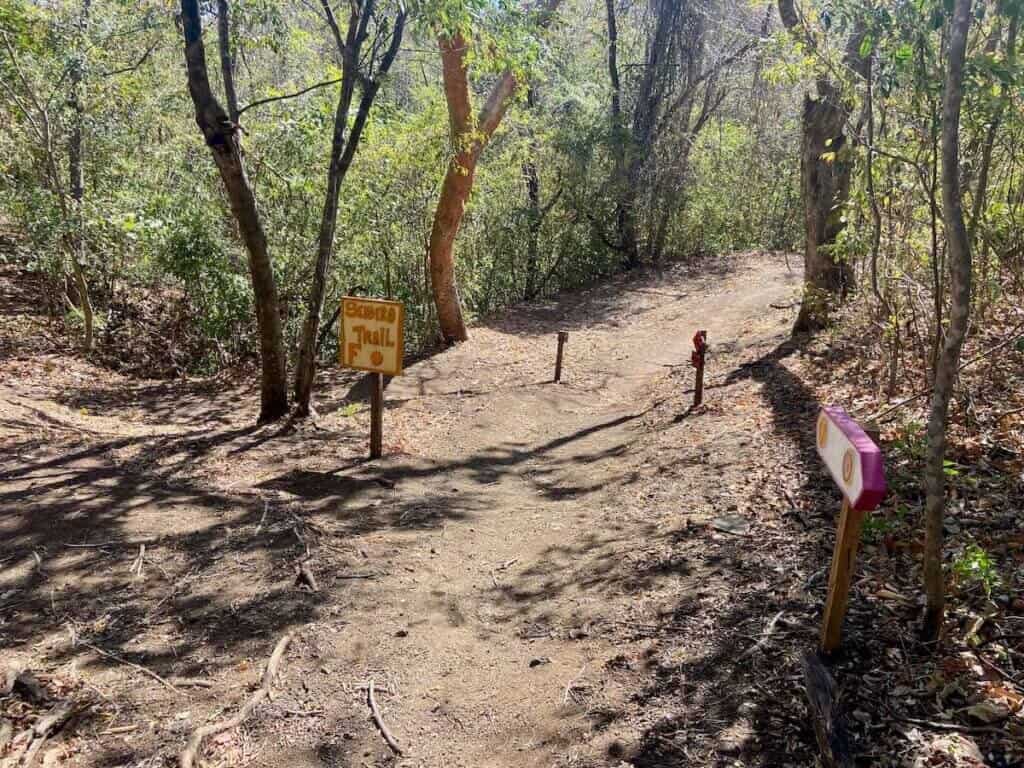
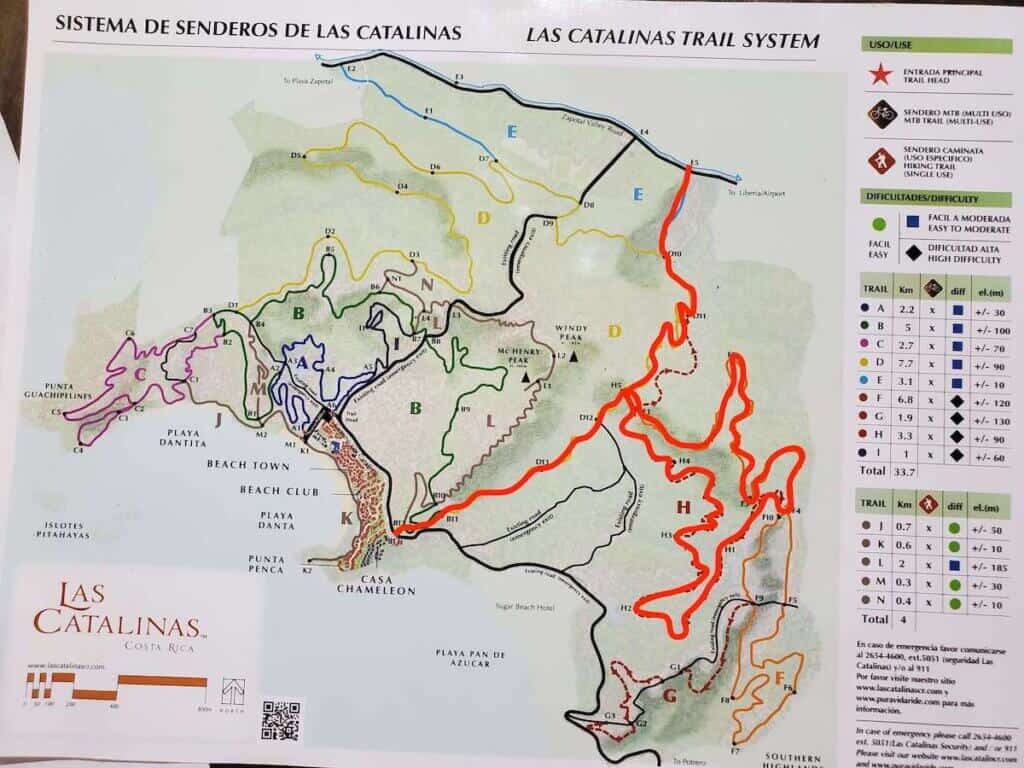
If you’re a mountain biker, I highly recommend doing at least this section of trail. Better yet, budget for a full day to explore Las Catalinas!
We finished our day – and trip – at Born to Be Wild Eco Resort. The owner is a nice Polish ex-pat who made us dinner and breakfast and let us lounge out by the pool for the afternoon. It was a great finish to a great trip!
I didn’t record this short ride, but we rode our bikes about 5 miles from Born to be Wild Eco Resort to the town of Sardinal where to caught a bus back to Liberia and Hotel Javy.
The road into Liberia is really busy, so I highly recommend skipping it. The buses aren’t really equipped to take bikes, but we were able to fit ours in the handicapped area at the back of the bus. You might also be able to stow them underneath in the compartments. It is up to the driver as to whether they’ll allow you to board the bus with bikes.

Planning your trip
Part of the fun of bikepacking trips is figuring out things on the go, but here are a few helpful planning tips so you don’t have too much type 2 fun.
Camping
Initially, I thought we were going to be able to wild camp in rural areas, but I quickly discovered that this wasn’t going to be an option nor did I want to wild camp after realizing how sweaty and gross we were going to end each day.
Wild camping is almost impossible for several reasons:
- There are barbed wire fences everywhere, preventing you from accessing anything on the side of the road
- The terrain is not flat, so it would be challenging to find suitable spots for your tents
- The vegetation is overgrown, so you would most likely be bunking with bugs and other crawlies
We stayed in campgrounds or campground-ish places 10 out of 12 nights. Each spot had (cold) showers, sinks to rinse out our clothes, and toilets. Some even included – or offered – breakfast.
Depending on where the campground is located, you may need to bring dinner since there were some that had no restaurants around.
Most camp spots charged $6-$10 per person per night.
Water & hydration
The tap water throughout Costa Rica is actually safe to drink. We didn’t filter our water once and neither of us got sick. You’ll be able to fill up your water at campgrounds and restaurants or buy water at any store.
I recommend being able to carry 2.5-3L of water.
I also highly recommend embracing Gatorade (we probably averaged 2/day) and bringing SaltStick tabs, which are a lifesaver in hot, humid climates.
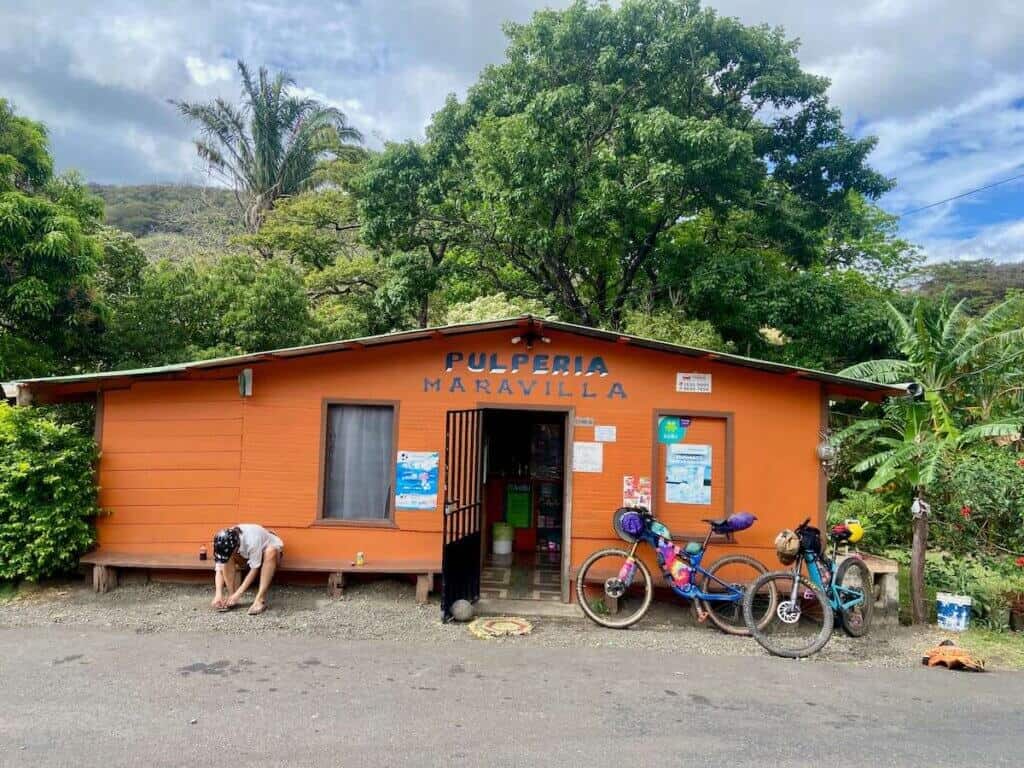
Food
Food is plentiful along the route and you really won’t need to carry more than a few snacks or maybe a dinner here and there. That being said, Costa Rica isn’t cheap, so if you want to save money, then you’ll want to cobble together your meals at grocery stores instead of restaurants.
We didn’t bring a stove because we couldn’t fly with fuel and didn’t want to waste time searching for some in Liberia. We were able to get coffee every morning and we honestly didn’t miss the stove.
Staying cool
We quickly realized that we were going to need some strategies to stay cool throughout our trip. The temps, especially on the coast, were in the 90’s, although we did have a nice breeze most days.
Here are a few tips on staying cool:
- Wear loose long-sleeve shirts
- Wet your clothes with hoses or sinks (they’re everywhere)
- Bring a Da Brim helmet visor
- Get an early morning start and aim to finish early afternoon
- Don’t push hard! You have all day to get from point a to point b, so slow down and enjoy the ride 🙂
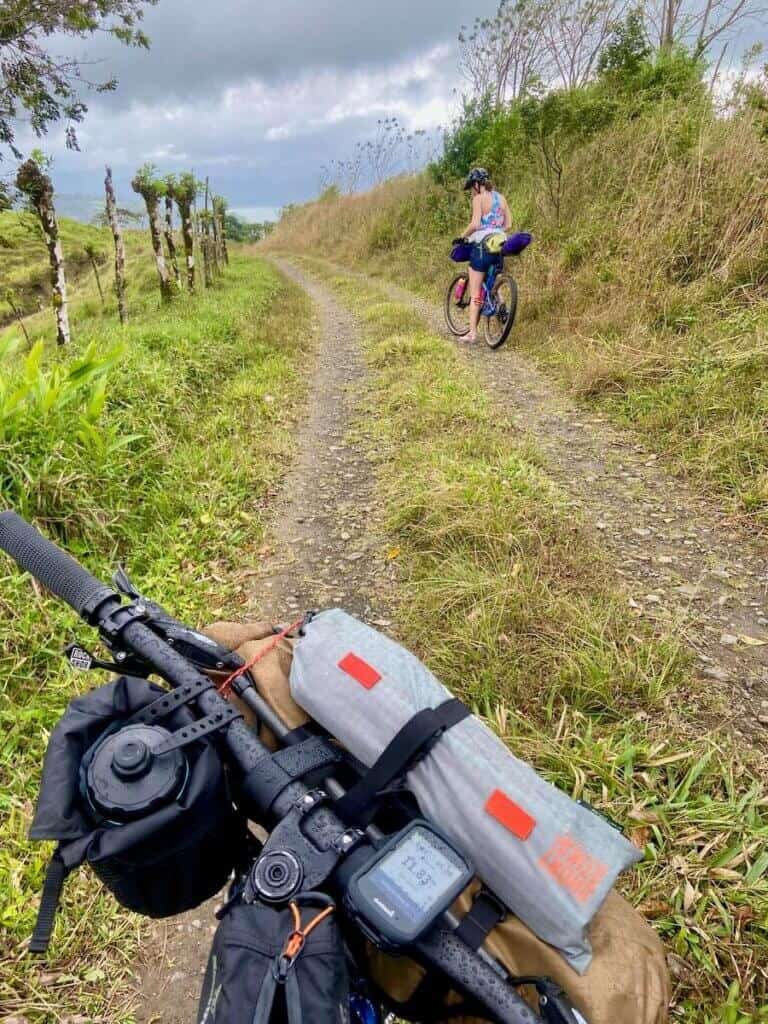
Navigation
You will definitely need a way to navigate your ride that is not your phone. I have a Garmin Edge 830 bike computer that I love. I also used the Ride With GPS app as well as TrailForks on my phone, but only as secondary navigation.
TIP: Download the Ride With GPS bikepacking route to your Ride With GPS phone app for offline use. You can also pin it so it’s easily accessible from the app. This way, you can see all the points of interest like camping, notes, restaurants, etc… along the route.
Don’t navigate by the Ride With GPS app, though, because it sucks the life out of your battery.
Costa Rica Bikepacking Gear & Set-Up
For a complete list of bikepacking gear, head over to my bikepacking gear checklist post. Below is the gear set-up I had for this trip:
The Bike
While most of the roads on these Costa Rica bikepacking routes are dirt or paved, I highly recommend either a short-travel full-suspension mountain bike or a hardtail mountain bike. I don’t think it would be very enjoyable on a fully rigid gravel or touring bike. There are some rough roads, sandy stretches, and singletrack opportunities.
I rode my Juliana Joplin (120mm rear travel, 130mm front fork) and my friend Michelle rode her Kona Hei Hei (120mm rear travel, 130mm front fork).
Bikepacking Bags
We went light with our gear, so we were able to get away with just a frame bag, seat post bag, handlebar roll, and top tube bag. I was testing out Rogue Panda’s bags (frame bag, handlebar roll/harness, and seat post bag/hardness) and they were awesome for this type of trip.
I recommend staying away from panniers if you can because they will be bouncing and jostling around on the bumpy roads.
Read next: A Comprehensive Guide to Bikepacking Bags
Camping gear
We went super minimal with camping gear. No stove or cooking supplies and no sleeping bag. The liner I brought was a little too thin, so I was (surprisingly) cold until I picked up a lightweight fleece blanket.
- Tent: Big Agnes Copper Spur UL 2 Person Bikepack
- Sleeping pad: Sea to Summit Ether Light (men’s)
- Pillow: Sea to Summit Aeros
- Sleeping bag: Neither of us brought one (it’s Costa Rica!), but we were both cold at night. Bring at least a lightweight quilt
- Headlamp: Petzl Actik Core
- Powerbank: BioLite PD 40
Clothes & riding essentials
We found that we could rinse out our clothes every night, so I actually didn’t even use the second pair of chamois or the second sports bra I brought. Go minimal!
- 1 pair chamois. I alternated chamois/no chamois each day
- 1 paid of lightweight shorts
- 2 quick dry jerseys
- 1 sports bra
- 1 buff. Highly recommend for the dust. You can also soak it in water to help keep cool
- 1 pair of sandals (men’s). We actually pedaled in sandals the whole way, which was definitely the way to go
- 1 pair of gloves. HANDUP are my go-to.
- Lightweight rain jacket. I brought my Patagonia Houdini (men’s)
- Helmet. Bring a light-colored one (like white) that is well-ventilated.
- Ombraz sunglasses. Best bikepacking sunglasses!
- Hydration pack or be able to carry 2.5-3 L of water on the frame
- SaltStick electrolyte tabs. These were a lifesaver.
Tools & spares
Again, go minimal. You really don’t need much, but make sure you bring all the spares, tools, and maintenance things you might need in case of a mechanical.
There are bike shops sprinkled throughout the route, but you won’t come across one every day.
- Multi-Tool
- Master chain link (make sure you get the right one for your chain)
- Zip ties
- Valve cores
- FULL bottle of lube. Don’t skimp! Also bring a rag or two
- Tubeless repair kit and/or spare tubes
- Small bottle of sealant if running tubeless
- Bike pump
- Derailleur hanger (check to see if a universal one will work)
- Tire levers
- Tire boot
What I’d do differently next time
I’m the kind of person that likes to ‘do it all’, so if I did this trip again, I’d allow for more time to do the Rincón de la Vieja Volcano section that we missed.
For me, an average of 30-40 miles a day with 2,000-3,000 ft of climbing is ideal.
Here’s how I would plan this trip again based on the Costa Rica Bikepacking Loop 3 Route:
- Day 1: Liberia to Curubandé de Liberia
- 11 miles, +929 ft, several camping options, hiking and mountain biking trails for exploring
- Day 2: Curubandé de Liberia to Estación Biológica Caribe
- 40.5 miles, +3,808 ft, camping at Estación Biológica Caribe, jungle trail
- Day 3: Estación Biológica Caribe to Rinconcito Lodge
- 20.3 miles, +2,511 ft, camping at Rinconcito Lodge
- Day 4: Rinconcito Lodge to Rio Naranja
- 27.2 miles, +1,941 ft, Airbnb near Rio Naranja
- Day 5: Rio Naranja to El Castillo
- 48.5 miles, +4,828 ft, camping at Sunset Inn Arenal Camping. Big day, but worth doing this in one day
- Day 6: El Castillo to Finca Tucanes
- 24.5 miles, +2,848 ft, camping at Finca Tucanes (contact ahead of time)
- Day 7: Finca Tucanes to Juntas
- 27.7 miles, +3,593 ft, Cabinas, Bar y Restaurante El Cayuco in Las Juntas
- Day 8: Las Juntas to Oasis Place camping
- 46.1 miles, 2,484 ft, Oasis Place camping (contact ahead of time)
- Day 9: Oasis Place Camping to Restaurant Erika (skip Playa Blanca)
- 43 miles, 1,811 ft, camping at Restaurant Erika
- Day 10: Rest day at Restaurant Erika!
- Day 11: Restaurant Erika to Eddys Bioluminescence
- 12.3 miles, 873 ft, camping at Eddys Bioluminescence (make a reservation)
- Day 12: Eddys Bioluminescence to Montezuma
- 32.2 miles, 2,211 ft, Victors camping
- Day 13: Montezuma to Playa Coyote
- 25.2 miles, +1,293 ft, camping at restaurant Tanga or Hostel Alouatta. You will need to time the tide to cross the estuary at dead low.
- Day 14: Playa Coyote to Ostional
- 48 miles, +3,490 ft, Ostional Turtle Lodge or camping
- Day 15: Wake up early to see the turtles! Ostional to Corazón Surf Cafe
- 23.7 miles, +1,417 ft, room or cabin at Corazón Surf Cafe
- Day 16: Corazón Surf Cafe to Potrero or Las Catalinas
- 37 miles, +2,465 ft, camping at Las Brisas restaurant in Potrero or splurge for a fancy place in Las Catalinas
- Day 17: Las Catalinas mountain bike trails!
- There are dozens of miles of singletrack here that are worth a day of exploring. It may be worth splurging for a two-night stay in Las Catalinas
- Day 18: Las Catalinas to Sardinal where you can catch a bus back to Liberia
- 14.3 miles, +1,187 ft, Hotel Javy in Liberia
TIP: Before you leave for your trip, add the contact info for places you want to visit or stay to your phone’s contacts app. This way, they will be easy to pull up when you need to send a Whatsapp message or give them a call.
Final thoughts
Bikepacking through Costa Rica was an adventure-filled two weeks. Sure, there are things that I would change if I were to do it again, but isn’t that true for any trip? Overall, it was an awesome experience filled with sunshine, wildlife, relaxing on the beach, and rewarding days in the saddle.
I hope this post inspires you to plan your next bikepacking adventure – to Costa Rica or beyond!
RELATED POSTS
Into long-distance bikepacking? Check out these related blog posts:
What questions do you have about bikepacking in Costa Rica? Is this a trip that piques your interest? What route version most interests you? Leave a comment below!


Thanks for sharing this info. I just completed the Loop 6 variation of La Gira de Costa over two weeks and your itinerary, suggestions and advice came in handy several times. Hot, but not too rainy nor too dusty. Late November seemed like good timing this year. Cheers!
Glad my guide came in handy! I hope your trip with smoothly and you got to experience the best of Costa Rica.
Thx for this great post, Becks!
Hey @Andrew, do you mind sharing your general itinerary? I will be doing loop 6 soon and curious your average daily mileage / elevation? Any other tips appreciated!
Awesome write up!
Fantastic blog and great to inform my cycle tour round the Nicoya Peninsular in March. A quick question as I am a bit more time limited so will have to shorten it or ride quicker! I see you rode up to about 50 miles a day, but approximately what speed or hours riding time did this correspond too? Many thanks in advance. Guy
Glad you find it helpful! We went pretty slow. Most days we rode for 5-6 hours, but we also stopped a lot to take photos, etc… The riding itself isn’t particularly hard. There are some steep parts and long climbs, but they’re on mostly good dirt roads. Have a great trip!
Great details! My partner and I will be doing this route (a little slower) for a month in December and were curious what app you used to find campgrounds? Thanks for the info, great resource
We used the Bikepacking.com Ride With GPS map that has most of the campgrounds marked. Have an awesome adventure!
Thanks a lot for the details of your trip!! Very useful tips!! I will consider them all since I am planning to do it from day 11 to day 14 based on your itinerary next summer in Costa Rica. I wonder if you had any issues with the traffic on those days…
Glad you found it helpful! You shouldn’t have too much traffic on days 11-14 until you get to the outskirts of Liberia (I highly recommend taking the bus into town). Enjoy the singletrack around Catalinas!
Great blog, I’m planning a trip on this route and would hear what you think about this bike: https://www.canyon.com/en-dk/gravel-bikes/adventure/grizl/og/grizl-cf-6/4141.html?dwvar_4141_pv_rahmenfarbe=R126_P01
For reference I’m a good climber and have biked in Norway with harder gearing.
Canyon makes great bikes, but the Grizl wouldn’t be my first pick for a bikepacking bike, especially if you plan on doing big trips like Costa Rica. I wouldn’t choose a carbon frame for bikepacking because they can’t withstand use and abuse as well as aluminum or steel and the geometry on the Grizl looks to be designed more for speed and efficiency so the fit is probably a bit racier. For multi-day loaded riding, a more relaxed geometry is more comfortable and stable, especially when carrying heavy gear. Lastly, the ideal bike for Costa Rica is a short-travel hardtail bike (something with front fork suspension). You could use a gravel bike, but you’ll probably feel a bit under-biked in sections. Hope that helps!