
Tested: Rogue Panda Canelo Handlebar Bag Review
The Rogue Panda Canelo has revolutionized handlebar bags for bikepackers. When I first started bikepacking, my handlebar setup was bulky, heavy, and fixed to the bike. When I wanted to get something out of it, like my sleeping bag, I had to fuss around between my bike’s cables and the bags straps to get access. And that was the easy part. Packing gear back into that bag was even harder!
But the Canelo is designed differently. Instead of the bag being fixed to the bike, it’s attached to a harness that allows you to remove it from the handlebars so you can carry it into your tent and have much easier access to your gear.
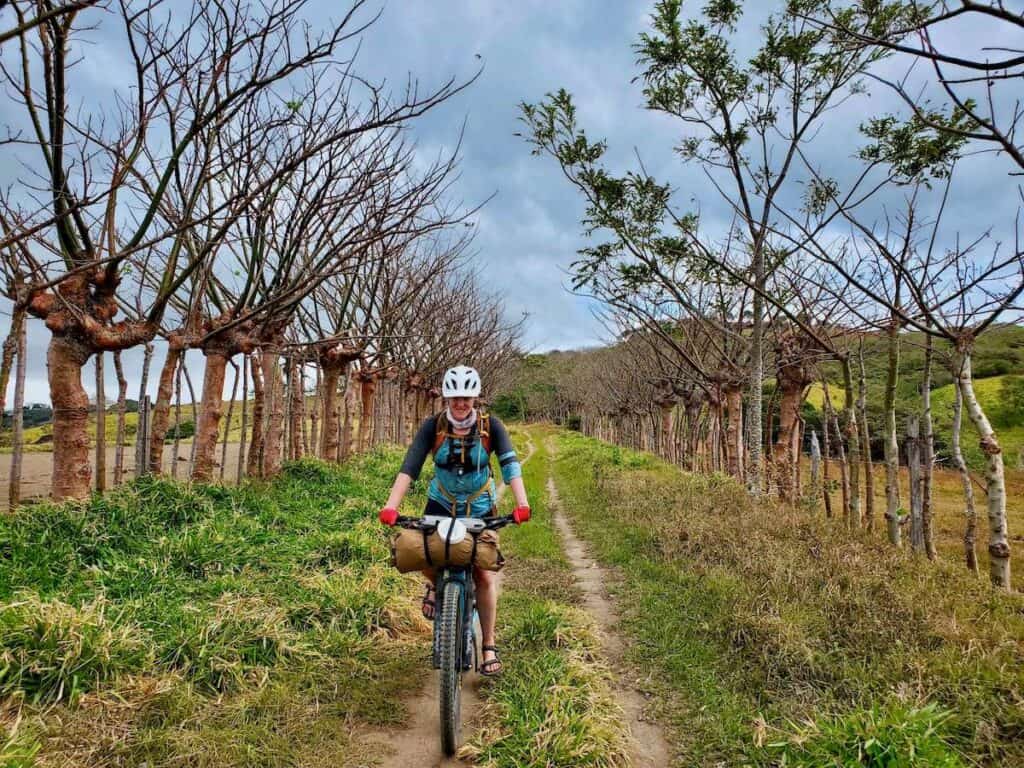
I’ve tested the Rogue Panda Canelo on several tips now (including a 460+ mile ride around Costa Rica) and I’m a big fan. Not only is it more convenient, but it’s also super durable, well-made, and secure.
In this post, I share what I love about the Canelo, a few things that could be better, and tips on how to decide if this is the bikepacking handlebar bag for your adventures.
Rogue Panda Canelo At A Glance
- Weight: 6 oz (harness), 5 – 6.4 oz (dry bag)
- Fits handlebar diameter: 22 to 35mm
- Carbon fiber bar length: 12 in
- MSRP: $100 for the harness
- $25 (GlidePlate)
- $60 (Gila dry bag)

Pros
Cons
Where to shop:
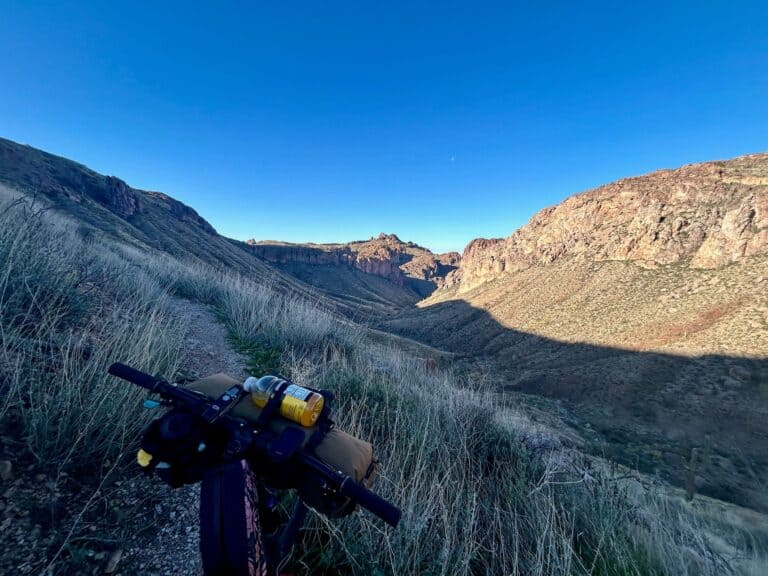
Fun Fact: The Canelo is named after the Canelo Hills section of the Arizona Trail, which traverses through beautiful rolling grasslands in southern AZ.
How The Rogue Panda Canelo Works
The Canelo Handlebar Bag & Harness is designed to meet the needs of every bikepacker from weekend warriors to long-haul adventurers.
Here’s a detailed breakdown of its features and how it works:
The Harness System
The harness system is the key feature of the Rogue Panda Canelo. It is designed to securely attach a dry bag to your handlebars while distributing the weight evenly across the front of the bike.
The harness is made up of several parts:
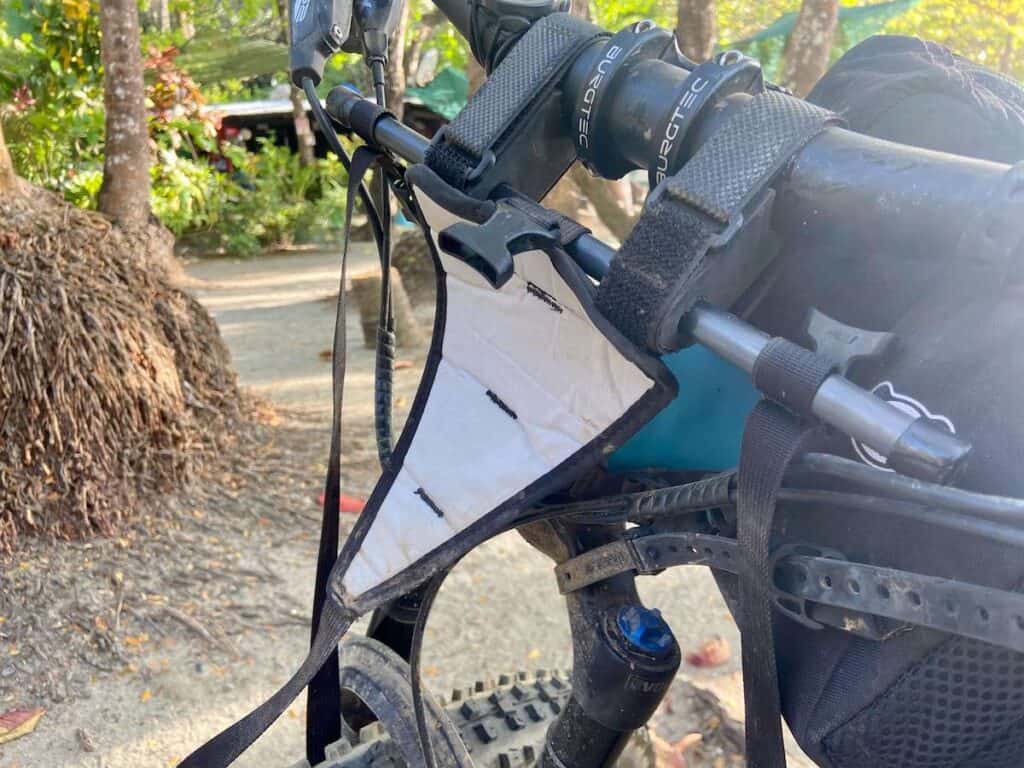
The harness
The harness is a triangle-shaped piece of durable material where the dry bag securely sits.

GlidePlate
The GlidePlate is a separate piece from the harness. It straps around the head tube and provides additional stability for the harness. It also protects against abrasion, which can wear away paint or damage the frame.
The GlidePlate requires a minimum head tube circumference of 7 inches, so it won’t work with all bikes. (See more about the GlidePlate in the “What could be better” section below).

A 12-inch carbon fiber bar
This bar provides rigidity and structure to hold the harness and dry bag securely in place.
3 straps with high-quality buckles
The Canelo has three long straps that secure the dry bag to the harness. Two of the straps are attached to the carbon fiber bar and one strap is attached to the harness.
Each strap has a high-quality buckle that allows you to really tighten down around your dry bag.

2 precision-cut foam blocks
These foam blocks act as spacers between your handlebars and the harness. They allow for more space for your brake/shifting cables and they also make the harness sit up higher, giving more room for front tire clearance.
The foam blocks are secured to the handlebars with heavy-duty velcro straps.

The Gila Dry Bag
The Canelo can be used with any dry bag, but if you don’t have one or you’re in the market for a new one, the Gila Dry Bag is designed to be used with the Canelo.
The Gila comes in three sizes – Small, Medium, and Large.
While Large may sound like the best option (you can fit more gear!), keep in mind that you’ll lose some clearance between your front tire and the harness and you’re risking added extra weight to the front of your bike.
I have the Medium Gila dry bag and I can fit my sleeping bag, my sleeping bag, and a puffy jacket.
step-by-step Guide to Installing the Canelo Harness
Need help strapping your Canelo Harness to your bike? Here’s a step-by-step guide:
- Install the GlidePlate around the head tube and secure with the longer strap. The rubber backing goes toward the frame.
- Place the foam blocks on either side of the stem faceplate. Secure the blocks with the Velcro straps.
- Thread the shorter GlidePlate strap through one of three loops on the back of the harness and secure it with the clip buckle. You may need to try different loops to see what fits best. The harness should be flush against the GlidePlate.
- Secure the dry bag to the harness with the three straps. Really cinch them down by pulling up on the straps to gather in extra length.

What I love about the Canelo
The Canelo has a lot of great features. Here are a few that stand out to me as a bikepacker:
The removable dry bag
Being able to remove the dry bag from the harness is huge. If you’ve used a fixed-bag handlebar bag, you know how annoying it can be to unpack and repack your gear. Plus, you can’t bring the bag into your tent (or accommodation), which might require multiple (unplanned) trips back to your bike.
You can choose to use your own dry bag or purchase the Rogue Panda Gila dry bag, which comes in three different sizes and lots of color choices.
To help you choose a Gila dry bag size, here is a rough guide:
- Small (12L): Best for drop bar bikes or s/xs bikes
- Medium: (16L) Best for bikes with flat handlebars and front suspension
- Large (20L): Best for flat handlebar bikes with no front suspension
Some other cool features of the Gila dry bag are:

The Quality & Durability
Rogue Panda doesn’t cut corners when it comes to quality and durability. All of their custom bags are hand-sewn in Flagstaff, Arizona (the harness is not) and they truly care about providing the highest quality products possible.
The Canelo harness is made from top-notch materials that strike a balance between durability and being lightweight. It’s seriously pretty tough.
The harness system also has thoughtful features like heavy-duty buckles (the last thing you want out on the trail is for a buckle to fail), a rubber grip on the back of the GlidePlate to minimize rub, and contrast webbing on the Gila dry bag so you can tell which side specific gear is on.
Sure, the price of the Rogue Panda Canelo may be higher than some other handlebar bags and harnesses, but in this case, you are paying for what you get.
Its stability & Performance
So how does the Canelo perform? I’ve been pleasantly surprised with how stable and secure the harness and bag are when attached to my handlebars.
Even when bouncing down rough roads or technical singletrack, the bag stays anchored and in place.
I will say that there are a few things to keep in mind when using the Canelo harness:
Good tire clearance
Depending on what bike you have and what size dry bag you’re using (and how full you stuff it), you can actually get quite a bit of tire clearance, which is awesome for mountain bikes with front fork suspension.

What Could Be Better
While overall I love the Canelo, there are a few considerations to think about before buying:
Can be Tricky to Install (at First)
You’ll probably spend a fair amount of time trying to figure out how to install the Canelo harness onto your bike the first few times you use it.
It is a bit tricky, but as with everything, practice makes perfect! Don’t not buy the Canelo Harness because you’re unsure of how to use it. Refer to my step-by-step guide above.
GlidePlate Doesn’t work for all bikes
Unfortunately, the GlidePlate doesn’t work with bikes that have less than a 7-inch head tube diameter due to its size.

If this is your bike, you’ll need to use the included alternate strap to secure the harness and apply tape around your head tube to prevent rubbing and abrasion.
Can Sag with heavier loads
This is true for all handlebar bags and harnesses, but if you carry heavy items in your dry bag, you risk having it sag down toward your front wheel (which is no bueno).
I recommend only packing your lightest gear in the front and checking the straps and foam blocks every day of your trip to make sure they haven’t shifted.
Small bikes will probably need to use a small dry bag
Small and extra-small bikes have less space to accommodate handlebar bags, so you will probably need to opt for a small dry bag in order to prevent the bag from hitting your front tire.
This is true for all handlebar bag setups, though, not just the Rogue Panda Canelo.
How it Compares
There are several other bikepacking handlebar harness systems out there. Here’s how the Canelo compares to two of the more popular ones.
Revelate Designs Handlebar Harness
Weight: 14.7 oz
Fits handlebars: Not specified
Price: $95
Rogue Panda Canelo
Weight: 6 oz
Fits handlebars: 22 to 35mm
Price: $100
Salsa Anything Cradle
Weight: 14.8 oz
Fits handlebars: 35.0 – 31.8mm
Price: $125
Final Thoughts
Overall, I’m extremely happy with the Rogue Panda Canelo handlebar harness and Gila dry bag system. It’s lightweight, durable, and more importantly stable and secure when riding even the roughest of trails.
I’ve put the Canelo through the test of over 600 miles of bikepacking and it hasn’t failed in any way. It does require some time to install correctly and it’s good to check the straps a few checks throughout a trip, but it’s a great choice for any bikepacker looking for a simple and efficient handlebar bag.
RELATED POSTS
Looking for more bikepacking gear reviews and tips? Check out these related blog posts:
Have you used the Rogue Panda Canelo handlebar harness? What are your thoughts about it? What questions do you still have? Leave a comment below!


I love hearing from you and appreciate your comments! However, if you leave a rude, unconstructive, or spammy comment, it will be deleted. It’s cool to be kind. Have an awesome day!