
Bikepacking The White Rim Trail: A self-supported adventure
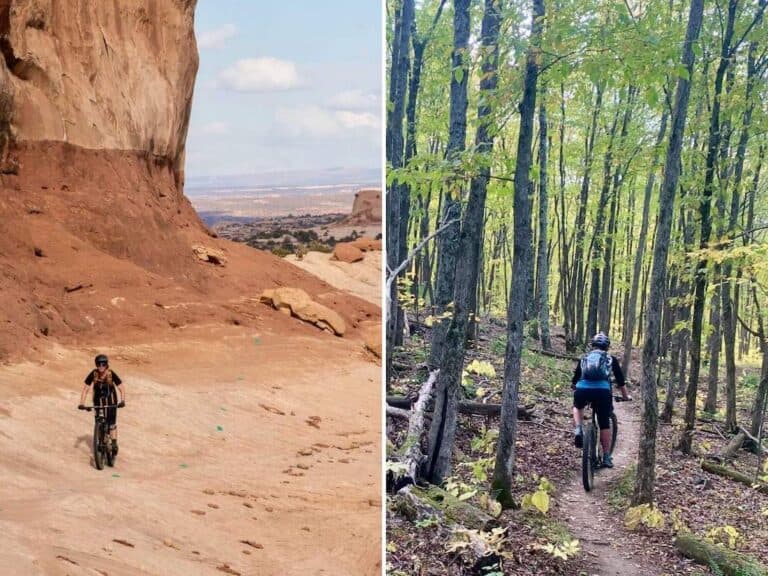
The White Rim Trail was one of my first-ever bikepacking trips and it’s still one of my favorites to date. The route is incredible. It skirts the northern edge of Canyonlands National Park outside of Moab and passes through some of the most jaw-dropping landscapes in the West. We pedaled under towering red rock bluffs, passed natural stone arches, gazed up at thin spires reaching to the sky, and gawked at huge canyon vistas that rivaled those of the Grand Canyon.
Many people drive the 104-mile loop in a rugged 4×4 vehicle, but my boyfriend and I did it as a two-night fully self-supported bikepacking trip. I wouldn’t call it easy (although some people ride the whole loop in a day), but it was definitely memorable and I loved every second of it.
There are steep switchbacked climbs (some of them hike-a-bikes), long winding descents, incredibly scenic campgrounds, and plenty of exposure to keep you on your toes. The remoteness of this trail makes it even more spectacular and exciting!
If you’re looking for a challenge and are ready for some tough pedaling on a heavy bike, this is a bucket-list ride for sure. In this post, I cover everything you need to know about planning your own self-supported White Rim Trail bikepacking ride.
What is the White Rim Trail?
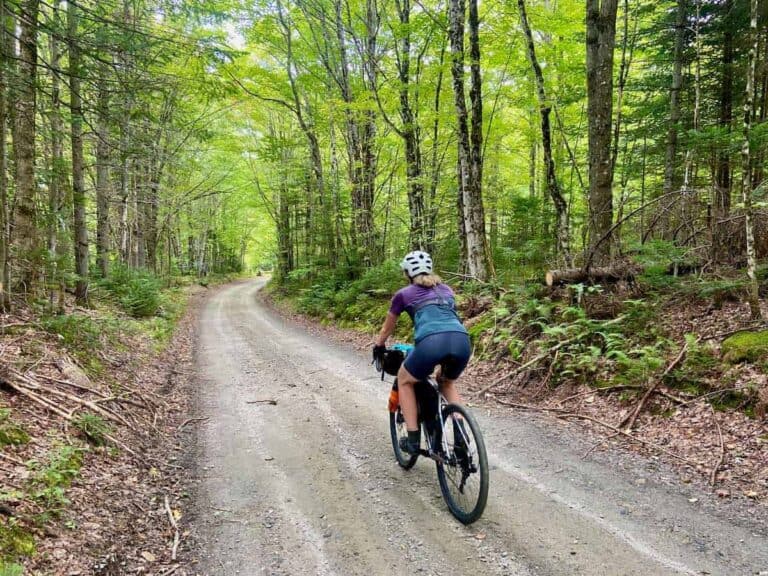
The White Rim Trail is a 72-mile unpaved doubletrack road that follows a narrow band of white sandstone above Canyonlands National Park and the Colorado River. The road sits below the Island in the Sky Mesa and offers amazing views out of the canyons and spires of Utah’s largest National Park.
Fun fact: The White Rim Road was constructed in 1950 by the Atomic Energy Commission to provide access to uranium miners so they could mine deposits for nuclear weapon production during the Cold War. The mines have long since been closed, but the road remains open to 4×4 vehicles and mountain bikers.

The White Rim Trail Map
This map just shows the White Rim Trail, which is 72 miles long. The full 104-mile loop also includes Mineral Canyon Road, Island in the Sky Road, and Shafer Trail. (I dive into the full route below).

Watch a video of our White Rim Bikepacking adventure!
White Rim Trail Permits
Getting an overnight White Rim Trail permit can be very competitive. There are 19 campsites (20 if you include the remote Taylor campsite which isn’t really an option for bikepacking). Each campsite can accommodate 15 people and 3 vehicles per day.
Day-use permits are also granted for 50 vehicles and 50 mountain bikers, but biking the White Rim in a day is intense, to say the least.
Permits are REQUIRED for day and overnight use for both bikes and vehicles and they get snatched up quickly, so mark the dates below on your calendar.
Permit Seasons
Overnight permits are broken up into four ‘seasons’ and permits can be reserved four months in advance of each season:
- March 10-June 9 (opens November 10)
- June 10 – September 9 (opens February 10)
- September 10 – December 9 (opens May 10)
- December 10 – March 9 (opens August 10)
So for example, if you wanted to plan a bikepacking trip in April, you would want to be online to reserve your dates on November 10th.
Permit Process
1. To reserve a permit for the White Rim Trail, head to the Canyonlands Overnight Backcountry Permits Page and click on the ‘check availability’ button. Then select ‘Island in the Sky – 4WD/Mountain Bike’ and the number of people in your group.
2. You’ll see a list of available campsites pop up. The challenging part is finding campsites that work well together for an overnight bikepacking trip. We stayed at Shafer our first night and Murphy C the next night. See more info about how we did our two-night trip as well as different itinerary options in the next section below.
3. Once you’ve selected your dates, click the ‘book now’ button and you’ll be prompted through a few more questions. You’ll need to choose an entry and exit point – for our trip we started and ended at the top of the Mineral Bottom Switchbacks. You’ll also need to give information about your vehicle, emergency contact, and general contact information.
4. Once you’ve filled out all the information and checked the box saying that you’ve read all the Need to Know stuff, click ‘Proceed to Cart’ and finish checking out. It’s a one-time fee of $36 per permit, which includes all campsites and group members. You do not need to do separate bookings for each night or campsite.
5. The White Rim overnight permit does not include the entry fee into Canyonlands National Park, so you’ll need to purchase an individual park pass, which is required for each person. These passes are good for 9 consecutive days, so you’ll want to buy them as close to your departure date as you can, ideally the day of or the day before your trip. You can buy individual passes online or at the entrance gate or the Island in the Sky Visitor’s Center. Each individual pass for mountain bikers is $15.
Important things to keep in mind regarding your permits:
My 3-day White Rim Bikepacking Itinerary
There are a number of ways to put together a bikepacking route along the White Rim Trail. There are 9 campgrounds with 19 campsites available and the loop can be ridden in either direction.
Below is the itinerary we did and I thought it was damn near perfect. I actually don’t think I would change a thing about it! Each day’s mileage was spread out pretty evenly as was the climbing/elevation gain. The only ‘bummer’ is that we ended days 2 and 3 with hefty climbs.

Day 1: Top of Mineral Bottom switchbacks to Shafer campground
We started our bikepacking trip at the top of the Mineral Bottom switchbacks where we could leave our car. It might be tempting to start at the bottom of the switchbacks so you don’t have to end the loop with a huge climb, but if you do that, you’ll have to climb up the massive cliff on the first day with fully loaded bikes. It’s truly better to do this at the end when you’re not as weighed down. It’s also a fun final challenge! (Pro-tip: have cold beverages waiting for you).
Shafer canyon road
The first day wasn’t too exciting until we got to Shafer Canyon Road. We started our pedal along the grated Mineral Bottom Canyon Road, which had a slight incline. Just keep pedaling kept going through my head… When we got to the intersection of Route 313, we turned right and followed the paved Island in the Sky road until we got to the entrance gate of Canyonlands National Park.
Note: If you didn’t buy an entrance fee (see permit section above) you’ll need to get one at the gate or at the Visitor’s Center a mile down the road.

The Shafer Switchbacks
Just after the entrance gate, we came to the turn-off to Shafer Canyon Road on the left. This was the start of the fun stuff! I pulled on an extra layer and readied myself for a 6-mile descent down to Shafer Campground. As I descended, I started to catch glimpses of the incredible views of the White Rim off to the left and got a first taste of the exposure to come.
Tip: Take your time on the descent and go slow. There are about half a dozen crazy switchbacks down to the bottom of the Shafer descent and it would not be good if you go over the edge.
Once I got to the bottom of the Shafer Canyon Road switchbacks, it was a quick roll to Shafer Campground. Unfortunately, we did lose a bit of elevation that we had to regain in the morning, but it was a good warm-up for the legs 🙂
Note: There is no sign for Shafer Campground, but take a left onto Potash Road with signs toward Moab.
Also, leep an eye out for bighorn sheep and deer scrambling around on the rocks and canyon walls surrounding the campground!


Day 2: Shafer to Murphy Campground
Day 2 was a big day – don’t underestimate it! It was just over 41 miles from Shafer Campground to Murphy Campground and we stopped a lot for photos and videos. There were also a few side-stops like river overlooks and the Musselman Arch that I thought were worth checking out. But since this is such a big day with lots of miles to cover, it’s best to keep moving slowly.
We winded our way along the edge of the White Rim with lots of zigzags in and out of canyons and epic views the entire way. For the most part, the terrain rolled pretty well, but there was definitely a slight upward trajectory. I consoled myself and my legs by knowing that tomorrow would have a slight downward trend.

Murphy’s Hogback
Once we got to the turn-off for White Crack Campground, we were about 8 miles from camp at the top of Murphey’s (which is ahhh-mazing!). The clincher, though, was a real rough hike-a-bike up to the top of the Murphey’s Hogback Mesa. It was brutal, especially with a 60-70lb bike. My strategy? Take 10 steps and rest. Repeat until I crested the summit then thank the stars that the hardest part of the trip is over.
Once we set up camp and had a wet wipe bath, we enjoyed on of the most scenic dehydrated dinners I’ve ever had (or at least top 5).


Day 3: Murphy Campground back to your car
Day 3 – the last day – was probably both my favorite and least favorite day. The start from camp was a super fun and moderately technical (at least with bags strapped to your frame) descent from Murphey’s Campground and from there, it’s lots of rolling doubletrack down to the Green River.
There were still plenty of scenic vistas of Canyonlands and a few climbs, but overall the start of day 3 involved lots of rolling hills and some nice pedaling along the Green River.
Hardscrabble Climb
There were two big climbs to tackle, though. The first was Hardscabble, which started out mellow but quickly turned into a steep hike-a-bike beast. It wasn’t as hard as the Murphy climb, but it was still a challenge and I for sure let out a few curse words. The descent down the other side was long, sandy, and fun, though, and then it was more pedaling above the river with a great spot to enjoy lunch.

The last few miles after we passed the Labyrinth Campsite was a bit of a mental struggle. It was about 5 miles to the base of Mineral Bottom and the Horsethief Trail that took us back to our car. Just keep pedaling 🙂
Horsethief Trail
This final climb looked way more brutal than it actually was. I honestly enjoyed this ascent because it’s 100% rideable (unlike Murpheys and Hardscrabble) and it was the final challenge to the 100 miles that we just rode on a loaded bike. I took my time, put my bike in its lowest gear, and just kept spinning my way to the top where we had a cold beverage waiting for us!
Tip: take your time on this last day so that you climb up Horsethief in the shade. We started our climb around 3pm and about half of it was gloriously shaded.


Tips for planning your White Rim Bikepacking trip
Alternative camping/Route Options
As I mentioned above, there are nine campgrounds along the White Rim, so there are lots of different options for creating your own route. Personally, I think riding the loop clockwise and camping at Shafer and Murphy is the best combo, but if you can’t get a permit for those campsites, here are two other decent options:
- Make it a one-nighter and camp at White Crack campsite. This would make each day about 54 miles.
- Park at the Visitor Center and do the loop counterclockwise. Camp at Labriynth, Hardscrabble, or Potato Bottom for the first night (nice campsites by the river with shade) and then White Crack the second night. If you choose Potato Bottom, you’ll do the Hardscrabble climb/hike-a-bike on the first day.
Tip: I would try to avoid camping at Airport, Gooseberry, or Candlestick. While these campsites have great views, they are super exposed and don’t have any protection from the sun or wind.
Best time of year to Bikepack the White Rim
If you are doing a self-supported bikepacking trip along the White Rim, I HIGHLY recommend planning it in the cooler spring and fall months. Summer can get extremely hot in the Canyonlands (over 100°) and it would be hard – even dangerous – to attempt a self-supported trip during this time.
Spring
We rode the White Rim in early March and lucked out with the weather. It can still be cold, wet, and windy in March, but we found the day temps to be perfect (50s-60s) and the night temps manageable (mid-30s). March is iffy, though, so if you get a permit for early spring be prepared to cancel your trip if the weather isn’t cooperating.
When we rode it in March, we mostly had the place to ourselves and the snow was still capping the La Sal Mountains in the distance, making for even more dramatic landscapes.
Later spring – like April or early May – might have more reliable weather.
Fall
Mid-September to early November are also prime months for bikepacking the White Rim. This also means that you’ll be sharing it with lots of other tourists, though – mainly 4×4 day-trippers and supported bike trips, so be prepared for traffic.
What to pack for the White Rim
Water
The biggest concern when packing for a White Rim bikepacking trip is water. There is no water along the majority of the route, so you will need to carry all the water that you’ll need. There is the possibility of getting water on the last day (or first day depending on which direction you ride) when you’re down by the Green River, but it’s very silty and should only be relied on in case of emergencies.
We carried 12L of water EACH for our three-day, two-night bikepacking trip. That’s 26.5lbs of extra weight in just water. We both had about 3L to spare at the base of the final climb up Horsethief Trail, but I’m very hesitant to say that we carried too much water.
The Park Service recommends a gallon of water a day per person (which is basically what we had) and if our second day hadn’t been chilly and windy I’m sure we would have consumed almost all of it.
Don’t underestimate how much water you’ll need, especially if you plan your trip during warmer weather.
Bikes & Gear
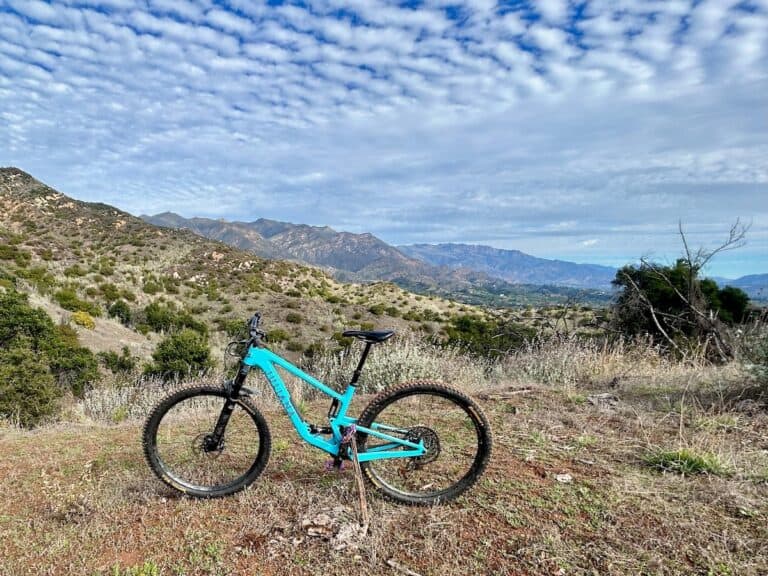
We rode the route on our Santa Cruz Chameleon hardtail bikes. You’ll want at least a hardtail for this ride if not a short-travel full suspension bike. Even though it’s on a ‘dirt’ road, there are stretches that are quite rough, and even I felt a little under-biked on my Chameleon.
As far as bikepacking bags and gear, you’ll also need to think this through as well because you need to carry everything. This includes all your water, food, and camping gear. We opted to use rear racks and panniers so we carry everything more comfortably. It would be hard to carry everything you need without using racks, but it could be possible if you have the right setup.
I can’t stress enough that there is nothing out there and you need to carry everything you need. Bring enough water!
For specific gear recommendations, head over to my Bikepacking Gear Checklist.

Additional Info
Bathrooms & Trash
Each campground has at least one – sometimes two – pit toilets that are sparkling clean and (usually) stocked with toilet paper. Please do not throw your trash into the toilets – you must pack out all of your trash.
Caching Water
If you don’t want to (or can’t) carry all the water you need, you can cache water along the White Rim with prior approval. This isn’t ideal because part of the appeal of bikepacking the White Rim is riding it blind! If you cache water you’ll get a glimpse of the views and stunning landscapes ahead of time.
But if you do need to cache water to make your trip work, contact the Backcountry Permit Office and allow for ample time for cache approval. You’ll also need a 4×4, high-clearance vehicle to drive the White Rim.
Cell Service
There is actually intermittent cell service along the White Rim. I switched my phone off of airplane mode at the White Crack campground junction and had two bars of LTE. I don’t think there’s full service all the way around, but if you have an emergency, there is spotty cell service to call for help.
Wildlife
We saw quite a few bighorn sheep and deer during our pedal along the White Rim, so keep your eyes peeled! The bighorn sheep are amazing to watch if you can spot them climbing around on the red cliffs and bluffs.
We also made a kangaroo rat very (briefly) happy when he dived headfirst into my pannier filled with food. Keep your bags zipped up and secured at night or you find them ravaged by rodents in the morning.

Fitness & Riding ability
Doing a self-supported bikepacking trip along the White Rim Trail is no joke because of its remoteness and lack of water so it shouldn’t be taken lightly. If riding 35+ miles and day with a 70-80lb bike sounds out of your league, then consider doing this trip with a 4×4 support vehicle or signing up for a tour.
Lots of people bike the White Rim as a supported adventure and it’s arguably more pleasant because you can travel lightly, get a ride if you’re feeling tired, and explore side trips like the Holman Slot Canyon. To learn more about a vehicle-supported trip, check out my friend Kristen’s 4-day White Rim adventure.
Read next
Looking for more two-wheeled adventures near Moab? Check out these related posts:
I hope this post inspires you to start planning your bikepacking trip around the White Rim Trail. What questions do you still have? Would you do a self-supported trip or have a sag vehicle? Leave a comment below!


Great overview. And I have two questions.
Looking to get out at the end of October. I hear early spring the sand is compact and easier to ride on. In the fall is it loose from a full season of being driven on?
Looking at 700c 45mm tires as biggest that will fit on the bike I want to ride. My other bike is much heavier but could fit much bigger tires. Neither have any suspension. Would you choose 10lb lighter or fatter tire?
I haven’t ridden the White Rim Trail in the fall, so I can’t really say how the conditions will be. We definitely had some sandy stretches in March, though. As for bike choice I would honestly go with the wider tires.
Awesome. Thank you for the feedback and will provide post ride update.