
How to Pack A Bike for Air Travel: Step By Step Guide [With Checklist!]
Quick Tips for Packing a Bike Bag
So, you’ve booked an awesome bike trip, but there’s one problem… How do you pack your bike for the plane? I get it – the first time I had to pack my bike in a bike bag, I was stressed and nervous that I’d screw up my bike big time and I wouldn’t be able to enjoy my trip. But I’m here to tell you that it’s not as intimidating or hard as it may seem.
Breaking down a bike to fit in a bike bag is easy if you follow a checklist. I’ve done it dozens of times and now I can pack my bike in less than 20 minutes (thank you, I know). In this post, I share a step-by-step guide for disassembling your bike, packing it up, and making sure it’s stable and safe for transit.
Gathering your supplies
Before you start breaking down your bike, you want to make sure you have the right tools. Here’s what you’ll need:
Looking to build up your bike tools? Check out my post on what you need for your home mountain bike tool kit.
Bike Bag Packing Instructions
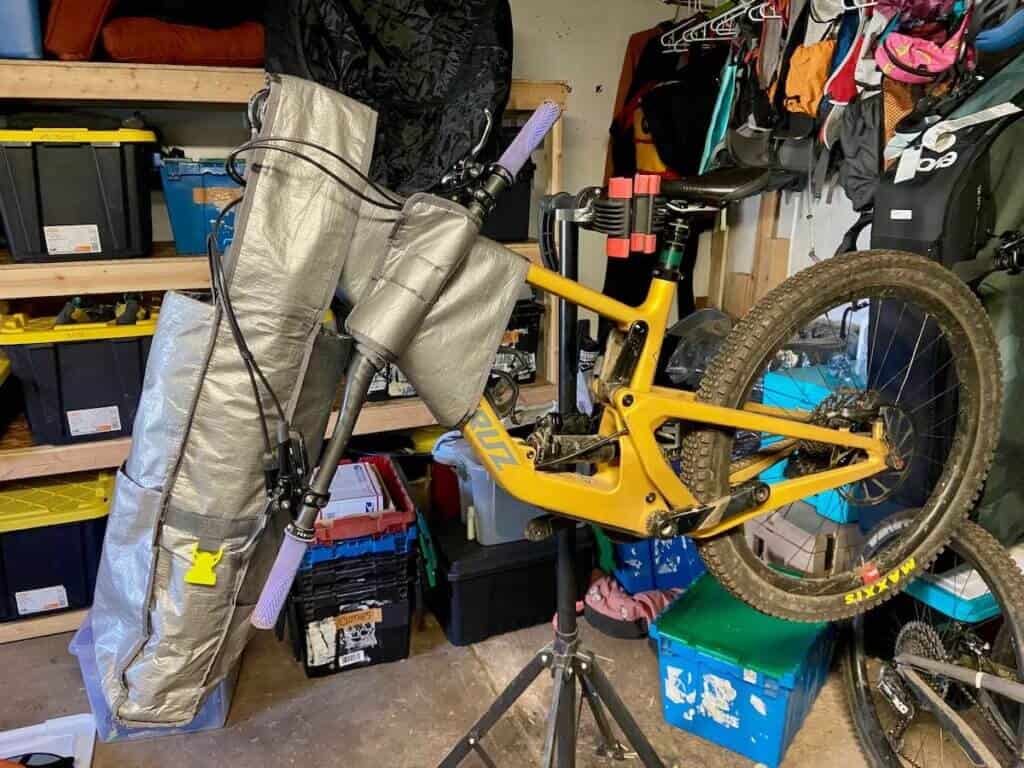
Once you’ve gathered all of your supplies, here is the process I go through when packing my bike into my Dakine bike bag.
Note: this is a general checklist for most bikes. You may need to break your bike down more (or less) depending on what it is and what bike bag or box you have.
1. Shift into the hardest/smallest gear on the rear cassette. This makes it easier to remove/install the rear wheel.
2. Put the dropper post all the way down. If you don’t have a dropper post, loosen the seat post collar and drop the seat post down as far as it’ll go.
Note: in the rare case that your dropper post is still too tall when all the way down, you might need to remove it entirely. It’s not as scary as it sounds. Here’s an article on how to remove your dropper post and how to reinstall it.
3. Remove the pedals. If you have pedal washers, make sure you keep them in a baggie or zip-tie them to the cranks.
4. Remove the front and rear wheels and replace the axles. Don’t forget the axles!
Note: If you have a large bike box, you may be able to get away with leaving the rear wheel on.
6. Remove both rotors. This isn’t mandatory, but after dealing with one too many bent rotors I now always remove them. Loosely replace the screws and pack the rotors in between two pieces of cardboard taped together and marked “front” and “rear”.
5. Partially deflate both tires and place the wheels in the wheel bags. If you have tubeless tires, don’t deflate the tires all the way or you risk breaking the bead off the rim and losing sealant. If this happens, you’ll need a compressor to pump them back up and new sealant!
7. Place a small piece of cardboard or plastic brake spacer between both the front and rear brake pads. This prevents the pistons from advancing if the brakes are accidentally squeezed when the wheels are removed.

8. Remove the derailleur from the derailleur hanger. I like to keep the derailleur fully open by engaging the lock ‘button’. This makes it easy to secure the derailleur to the chainstay with zip ties.

9. Remove the face plate and handlebars. I screw the faceplate back on after removing the handlebars so I don’t lose any of the small parts.
Note: If your bike has a long stem (like a road or gravel bike), you’ll need to remove the stem as well. Do this by loosening the bolts on the side of the stem and then unscrewing the headset bolt.
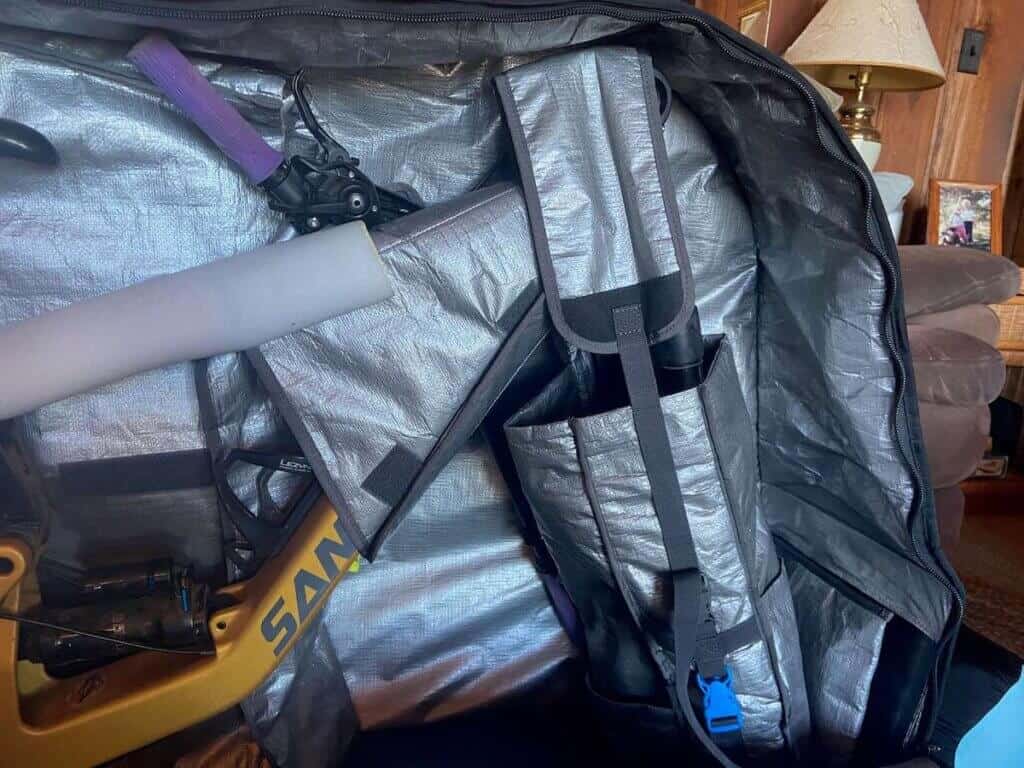
10. Place the top tube padding on the top tube and secure the handlebars to the side with the velcro straps.
11. Slip the front fork sleeve over the front fork and secure it over the top cap. Depending on the size of your bike (like an XL), you may need to remove air from your front fork to get it to compress enough so it fits in the bag.
12. Place your bike into the bag. The rear triangle fits over the foam block.
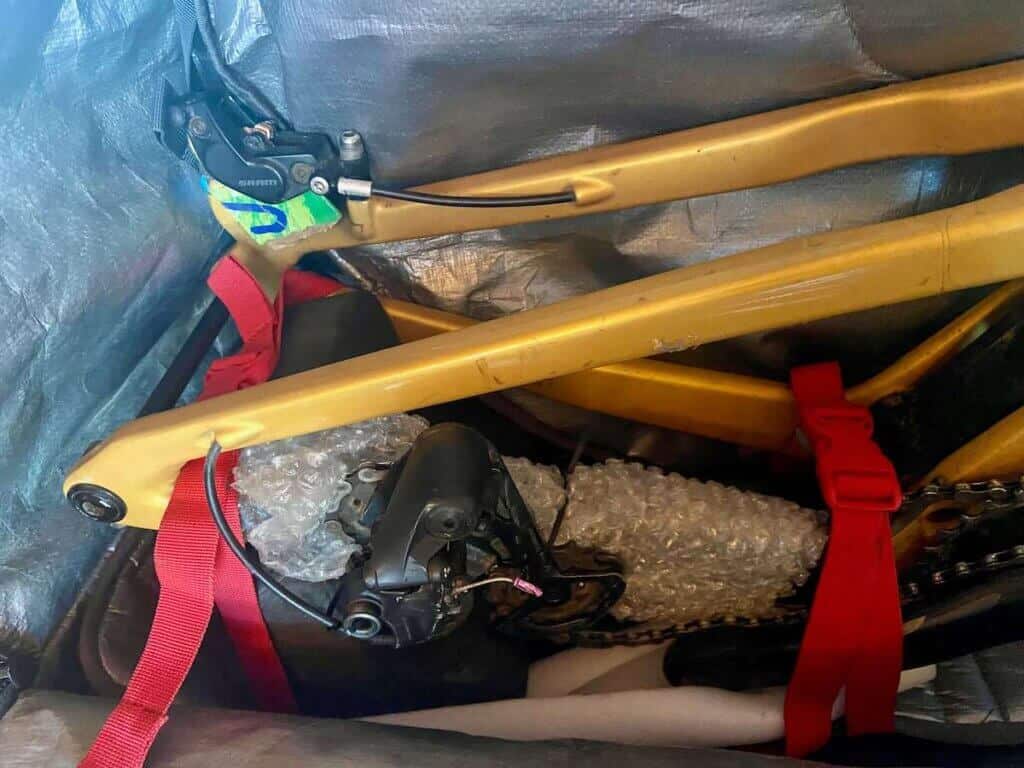
13. Secure the straps and clips. This will be different for each bike bag, but there should be at least a few straps and clips to secure your bike frame, front fork, and wheels inside.
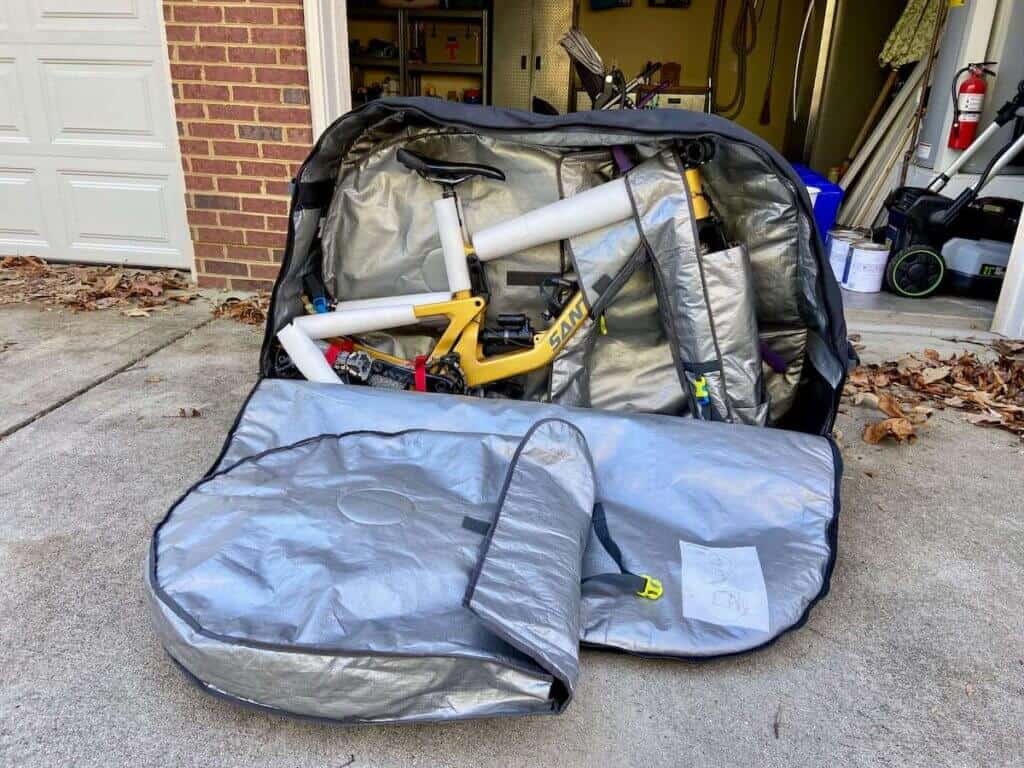
14. Add extra padding around your frame as needed. Then, zip up the bag and you’re all done!
Download A Free Bike Bag Packing List
Tips for getting your bike bag under Airline weight limits
Flying with a bike can be expensive if you’re not careful. When I flew to Mexico for my Oaxaca trip, my bag was over the 50lb weight limit and I had to pay $200 each way! Ughhhhh….
But, there are some tips and tricks you can implement to help you avoid those nasty overweight fees. Here’s what I’ve learned after years of traveling and flying with my bikes.
Have you packed up your bike in a bike bag? How did it go? What tips would you add? Let me know in the comments!


I love hearing from you and appreciate your comments! However, if you leave a rude, unconstructive, or spammy comment, it will be deleted. It’s cool to be kind. Have an awesome day!