
Dakine Bike Roller Bag Review: 6+ Years of Use From Mexico to Africa
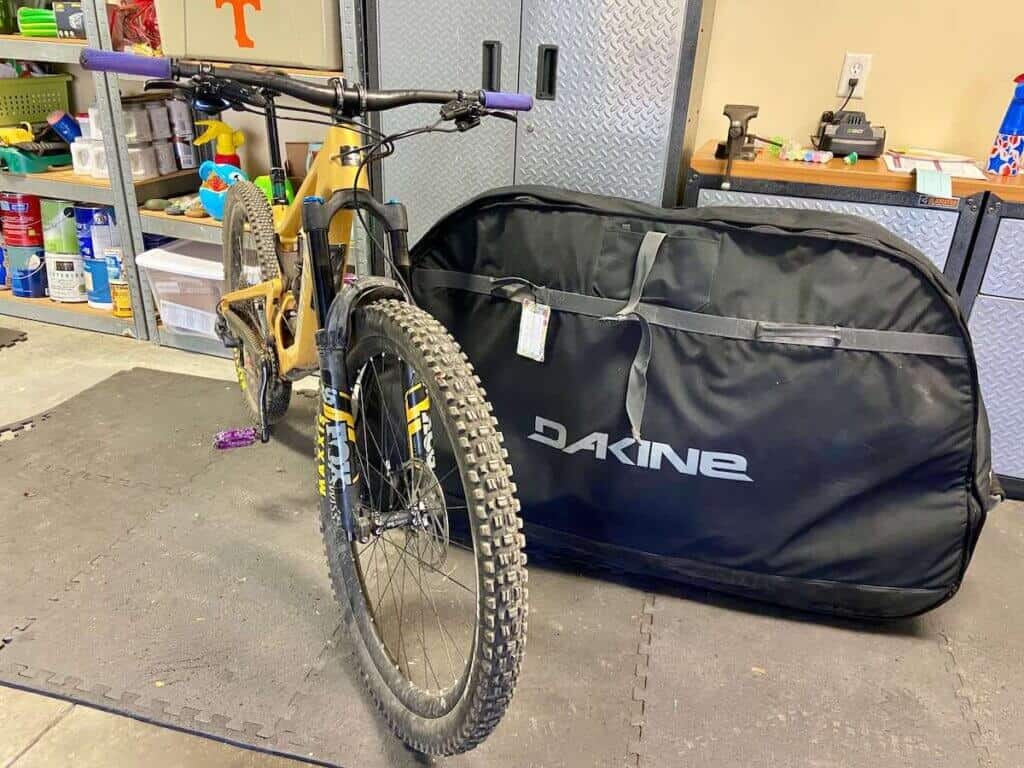
I’ve been using the Dakine Bike Roller Bag for over six years now when traveling with my bike across the country and internationally. From Mexico to Africa, East Coast to West Coast, this bag has done a great job keeping my bikes protected during transit and against disingenuous baggage handlers. The only issues I’ve had are because I didn’t take enough precautions packing it (hello bent rotors…).
I know that some people choose to use a cardboard bike box when traveling, which is fine if you’re only planning on doing a few mountain bike trips that require airplane travel, but if you know you’ll be flying with your bike multiple times in the coming years, a bike bag is definitely the way to go.
There are a number of bike travel bag options out there and they each have their own pros and cons. If you’re shopping around, hopefully, this review will help you decide if the Dakine bike bag is the best option for you!
The short version
My overall rating:
If you’re looking for a reliable, durable, and easy-to-use bike travel bag, the Dakine Bike Roller Bag is my top pick. After six years of use on dozens of flights (aboth domestic and international) it’s held up impressively well and kept my bikes safe through everything from rough baggage handling to bumpy airport transfers. It’s roomy, well-designed, and fits a wide range of bikes. I’d 100% recommend it for anyone who travels regularly with their bike and wants peace of mind that it will arrive intact.
Quick specs:
- Dimensions: 54.33 x 33.46 x 12.6 inches
- Linear inches: 100.39a inches
- Weight: 17 lbs 9.6 oz
Where to buy:
Pros
Cons
☁️ Protection & Padding
As would be expected, the biggest concern I have when flying with my bike is protection. Mountain bikes are not cheap and the thought of trying to get any sort of compensation through the airlines if something gets damaged just sounds like such a headache.
Thankfully, after more than a dozen trips using my Dakine bag, I can say that it does a great job protecting my bikes during transit (when packed correctly). After numerous trips, the only ‘damage’ I’ve had was bent rotors because I should have taken them off in the first place…
The reason I don’t give it 5/5 stars is because the “360° padded protection” is a bit of a stretch because there really isn’t a whole lot of protection in the side panels. But, the exterior bag is made from really tough material that has yet to be ripped during my travels and there is a small amount of padding in the bag itself that does help against blunt force.
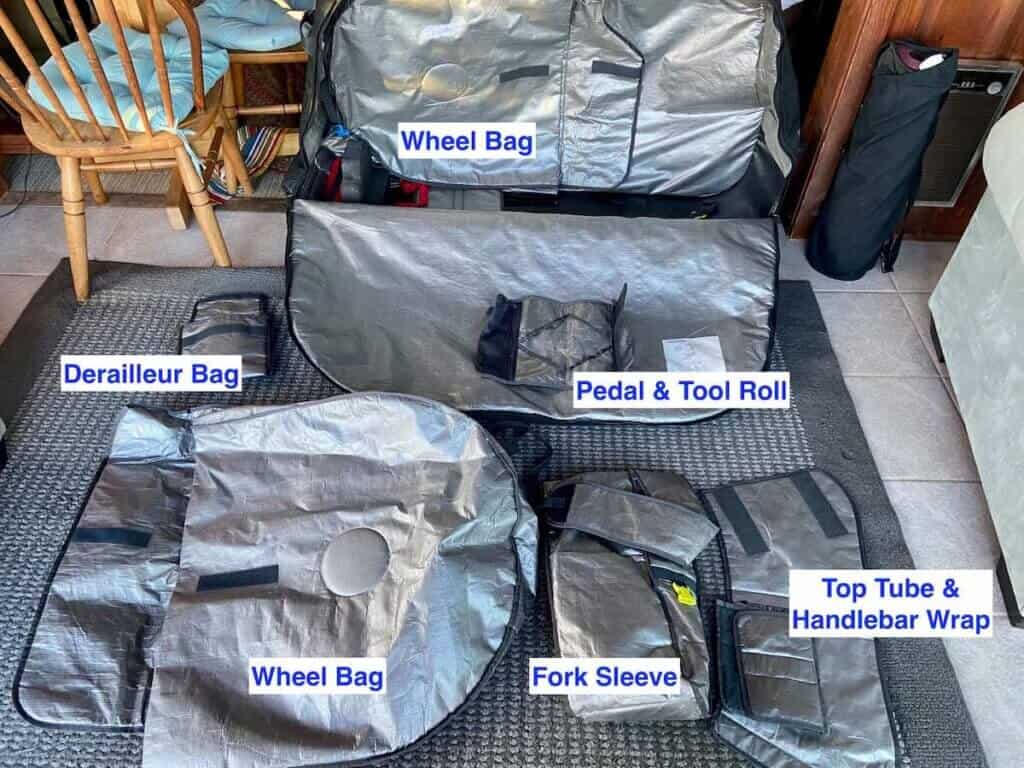
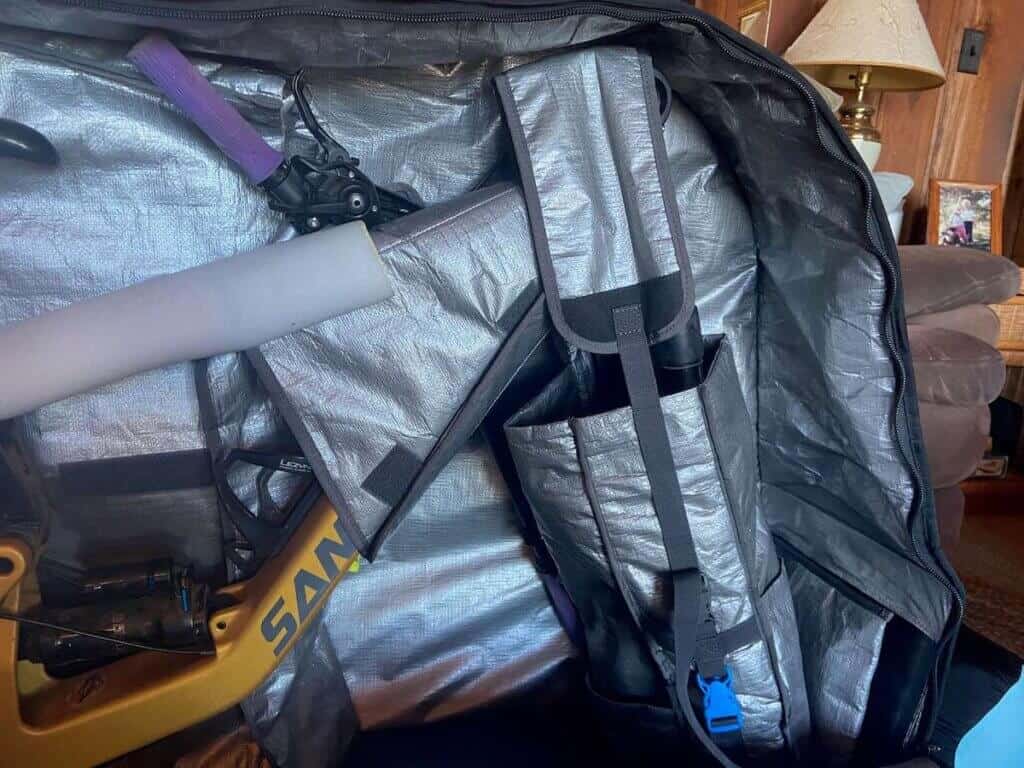
It also comes with several ‘padded’ bags and frame protectors including:
Tip: ask your local bike shop for some round frame protection ‘noodles’ for added padding when packing your bike bag.
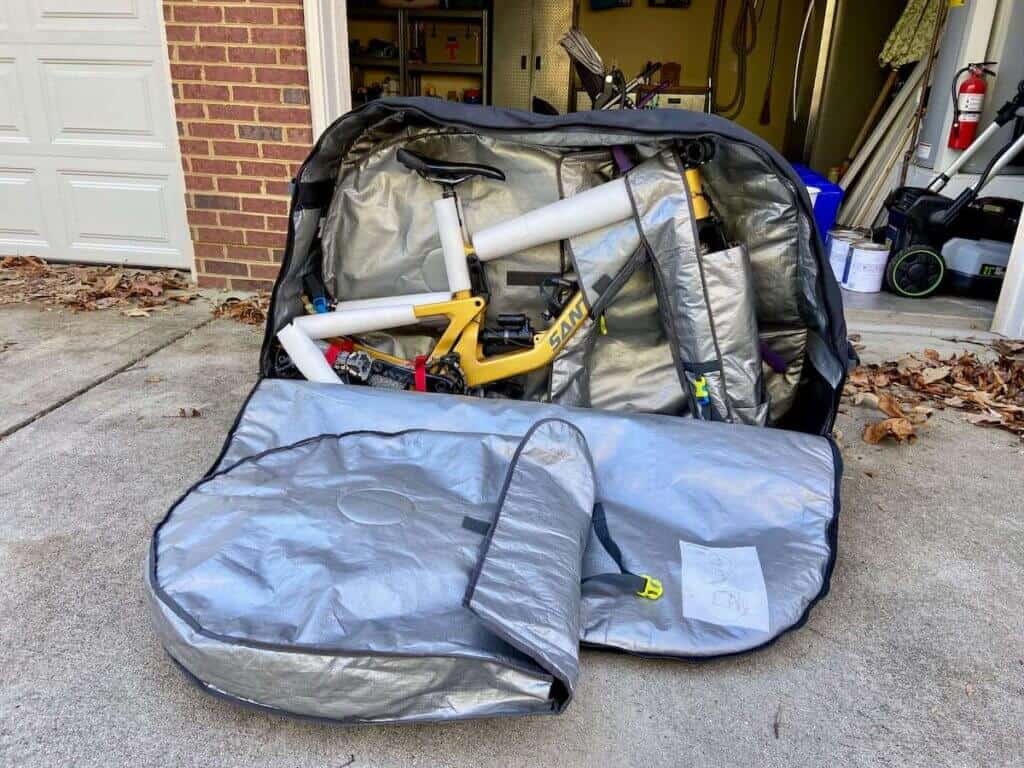
🔒 Secureness & Stability
Bikes can be well-padded, but what if everything shifts around inside during transit? The Dakine bike bag has a few features to prevent everything from moving around inside:
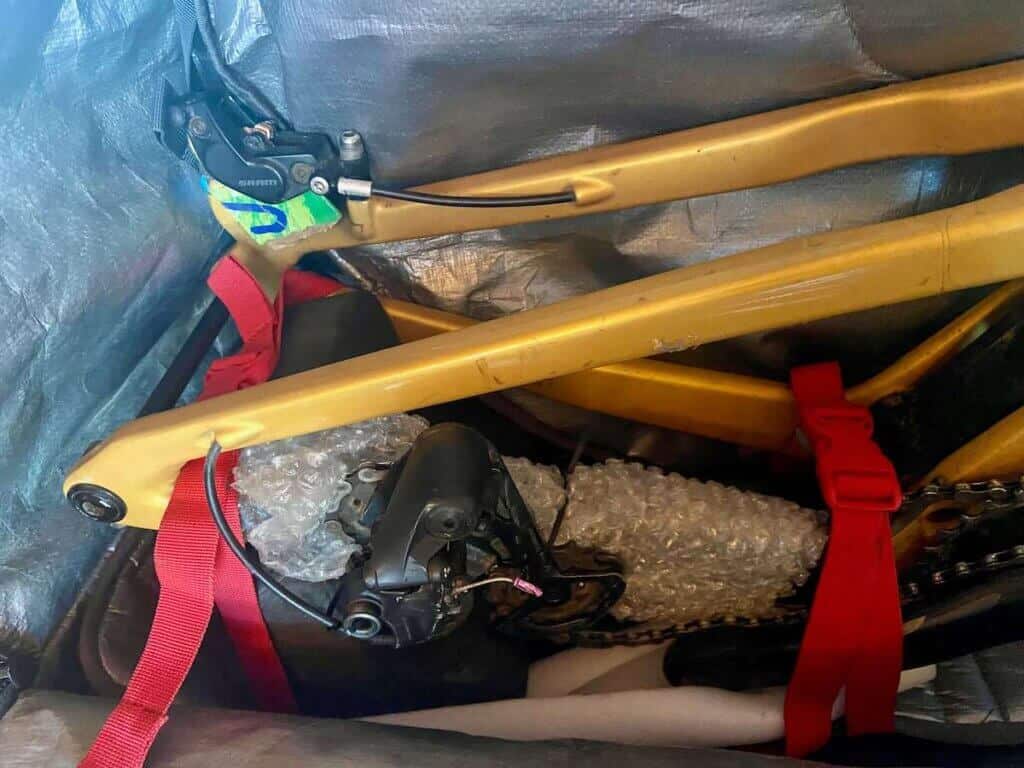
Rear triangle block
The foam block is designed to keep the weight of the bike off the rear triangle. The upper part of the block fits between the two chainstays and allows your frame to rest on the block. The block is secured to the bag by velcro, so it can be moved forward or back depending on the length of your frame.
I highly recommend removing your derailleur and securing it to the chainstay. It’s quick and easy and will save you the headache of dealing with a bent broken derailleur hanger, or worse a broken derailleur.
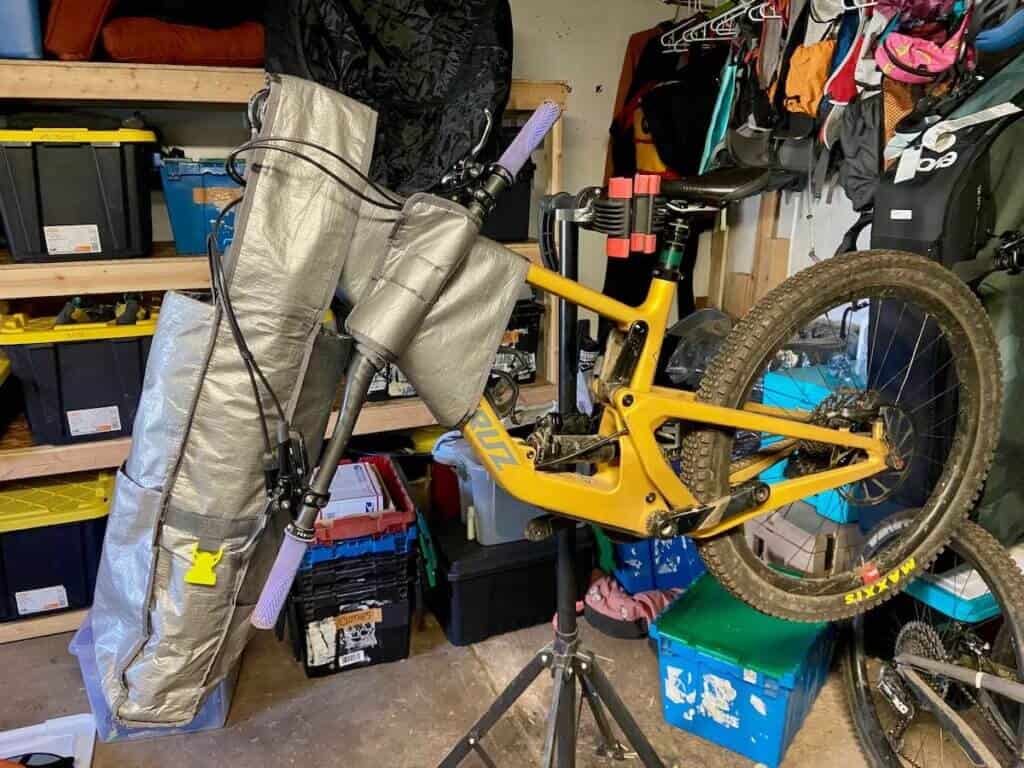
Stabilizing straps
There are three different sets of straps and clips in the Dakine bike roller bag:
- Two straps to secure the rear triangle
- Two straps to secure the front fork sleeve to the floor of the bag
- Two straps to secure each of the wheel bags to the side panels
These straps and clips really keep the bike nice and secure within the bag and prevent it from shifting around during travel.
The front fork and wheel clips are color-coded, which theoretically makes sense, but half the time I get them wrong and it doesn’t make any difference.
My biggest issue with the Dakine Bike Roller Bag is that if you pull too hard on the rear triangle straps, the screw that fixes it to the bike bag pulls out and you need to reattach it with a screwdriver.
✈️ Ease of Travel
At the airport
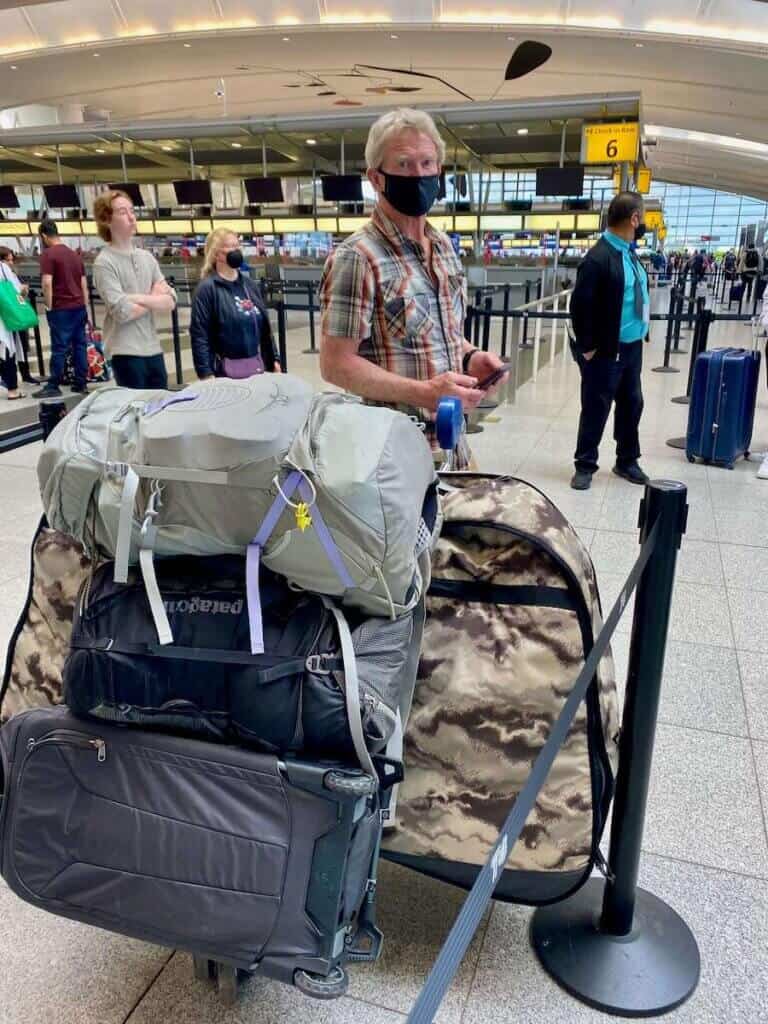
Traveling with the Dakine bike bag is, for the most part, pretty easy. It has two rolling wheels and a front grab handle so you can roll it along behind you at the airport. It also has three handles near the top to help load it into a car or maneuver it around when you need to.
I will say that it’s best to not have to wheel the bag for long stretches, though. It is bulky and awkward and I definitely get forearm pump if I have to tow it for more than a few minutes. If I do need to carry it a distance (say I’m walk to another terminal), I get one of those airport carts so I don’t have to wheel it all the way. Its makes transfers a lot easier!
If you know you will need to wheel your bike bag for longer distances, you may want to check out the Evoc Pro bike bag. This bag has a removable front wheel that makes traveling with it a lot easier.
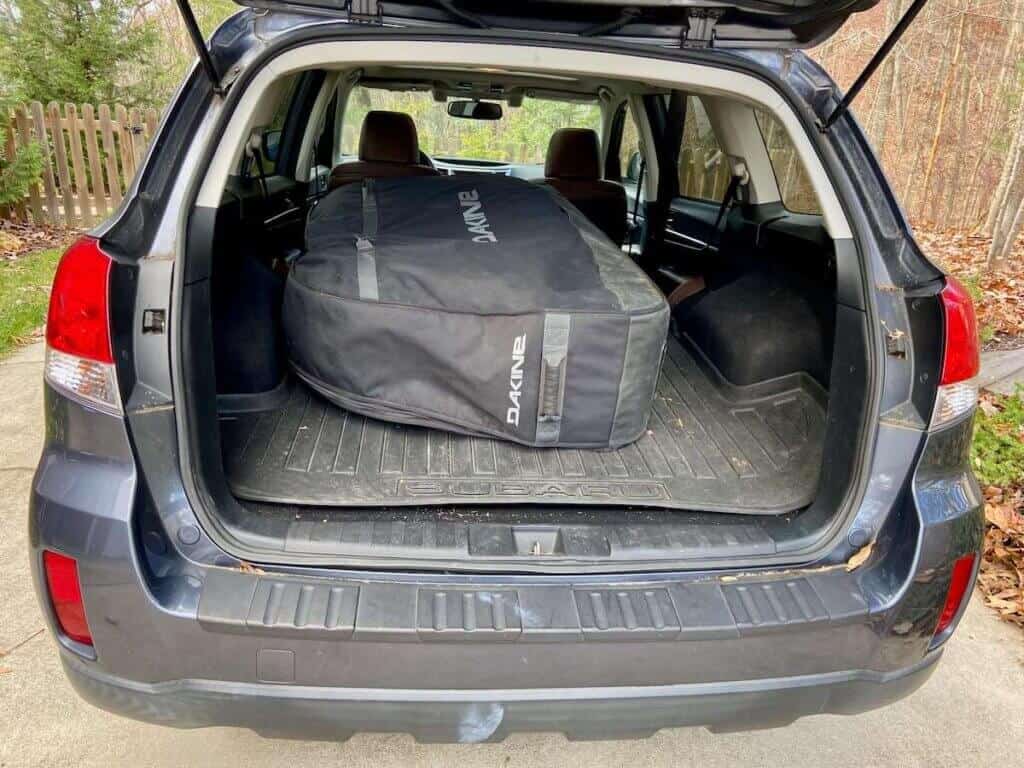
In the car
If you have a hatchback, the Dakine bike bag will (usually) fit nicely either upright or on its side. I have a Honda HR-V and I can fit my Dakine bag upright or on its side. If you have a lower-top hatchback like a Subaru, you may only be able to fit it on its side.
If you have a sedan-style car, it’ll be really tight to fit a bike bag. I haven’t tried it, so I can’t say whether it’s possible or not, but I have a feeling it would be a bit challenging. If you have a sedan, you may need to call a friend or get a ride to the airport.
🏋️♀️ Weight
Let’s talk baggage fees. Flying with a bike can be really expensive if your bike/bag is overweight. Most airlines charge several hundred dollars if your luggage is over the weight limit.
The Dakine bike bag weighs just under 18 lbs, so if the weight limit is 50 lbs, that means your bike must weigh ~32 lbs. If you have a gravel bike or a lightweight cross-country bike you should be fine, but if you have a burly Enduro bike it might be close. All this being said, the Dakine bike bag is one of the lightest bike travel cases on the market. Evoc bags are great, but they weigh several pounds heavier.

Dakine Bike Roller Bag Packing Checklist
First time packing a bike bag? Download this step-by-step checklist to make sure your bike is safely packed for travel.
How it Compares
There are a handful of other options when shopping around for a bike bag. Here are two others to consider or head over to my post on Bike Travel Bags and Cases for more info and choices.
Is the Dakine Bike Bag for you?
I have flown with my Dakine Bike Bag across the country multiple times and internationally a handful of times and I have not had any issues with damage to the bike or bag (don’t worry, I just knocked on wood…).
The bag itself is very durable and the bike is secure when packed properly. It’s also easy to get my bike(s) under airline weight limits so I don’t have to pay hefty overweight fees, which is really appreciated.
Other bike bags may have nicer features like an integrated bike stand, more protection, or a front wheel, but they’re also heavier (and more expensive) which will make it harder to fly without paying extra fees.
Overall, I’m super happy with my Dakine bike roller bag and if you’re looking for a simple but safe bag, I think you will be, too!
Where to buy
If you’ve found this review helpful and you’re thinking about buying the Dakine Bike Roller Bag, consider supporting Two Wheeled Wanderer by purchasing it through the links in this post. The price stays the same for you, but I’ll receive a small percentage of the transaction, which allows me to continue riding and writing Two Wheeled Wanderer. Thanks for your support!
Shop the Dakine Bike Roller Bag at:
Have you used the Dakine Bike Roller Bag for travel? What has been your experience with it? Have you tried a different bike bag? Leave a comment below!
Read next
Need help packing your bike? Download my Bike Travel Bag Packing Guide


Hi Becky! Long time lurker first time commenter…
SoI am flying to Italy from the US next month with my mtb (first time, wish me luck!).
I got the Dakine bag so I can stay under the 50lbs, but wanted to ask:
What bag do you use for your second checked bag, for all your bike gear & extra parts?? With the Dakine for the bike, do you prefer a 2nd rolled bag, or rather a large capacity travel backpack for all the other stuff?
I can’t seem to find a video of people actually wheeling this bag so I’m trying to figure out what will be easier to schlep around train stations, airports, streets in Finale Ligure… )
Hey Sabrina! Sounds like you have an awesome trip planned- Finale Ligure has been on my radar for awhile! So I actually prefer to have a large duffel bag (like 70l) that I can carry on my back. It’s almost impossible to roll another wheeled bag along with the Dakine bike bag. I know duffels aren’t the easiest to lug around, but I find them a good companion to a bike bag since they don’t require hands. I have a NEMO duffel, but Patagonia makes good ones as well.
Good advice, I went with a big backpack duffel! First time flying w bike and it made it across 3 flights, 2 trains and a mile of dragging down cobblestone streets intact 🎉
Finale Ligure is a paradise for mtb, you should make it here! 🙂
That sounds like a journey! Glad the duffel/Dakine roller combo worked for you. Finale Ligure is definitely on my list!
I recent flew with it and the plastic inside under where the work attaches cracked. I am pretty sure the baggage handlers man handled it. I am filing a claim with united. The upside is my bike was completely fine.
Shoot, that’s a bummer… I’ve seen how some baggage handlers toss them around and it’s worse than anything I’d put my bike through 😅 Glad your bike is ok!
I leave Friday for my first trip with the bag- when flying Alaska Airlines do you put anything extra (bike related) since you don’t have to worry about weight? I see that they say they can charge you baggage fees in that case, but wonder if they really care as long as you’re not throwing in the kitchen sink lol
I definitely add a few more items to my bike bag when flying with Alaska 🙂 I’ve never had a problem with them charging more. Have an awesome trip!
After purchasing my Dakine bag several months ago, I just used it for the first time a couple weeks ago and your step by step was the best one I found. Thanks for the assist! It went great and now I want to take it every time I fly.
Awesome! So glad everything went smoothly. I really haven’t had any issues flying with my bikes in my Dakine bag other than bent rotors which I should have taken off in the first place… happy travels!