
7 Basic mountain bike maintenance Projects You Can Do At Home
Riding bikes is fun, but it’s important to also take care of your bikes so you can continue to ride and rip without the risk of getting hurt, or worse, damaging your bike. Just like a car, mountain bikes need regular love and maintenance to keep them working smoothly and nicely. We all know how much of a bummer it is to do the walk of shame back to the car because our chain (shockingly) snapped after a gazillion miles of use.
Mountain bike maintenance can sound scary, especially if you’re new to it. But once you actually commit and take the plunge you’ll begin to see how everything works and wrenching on your bike will get easier. It’s a bit like sending your first drop – scary at first, but then no problemo.
With the help of this blog post, some YouTube videos (by professionals), owner manual guides, and a little patience, you can easily do these basic mountain bike maintenance projects at home.
Let’s get started!
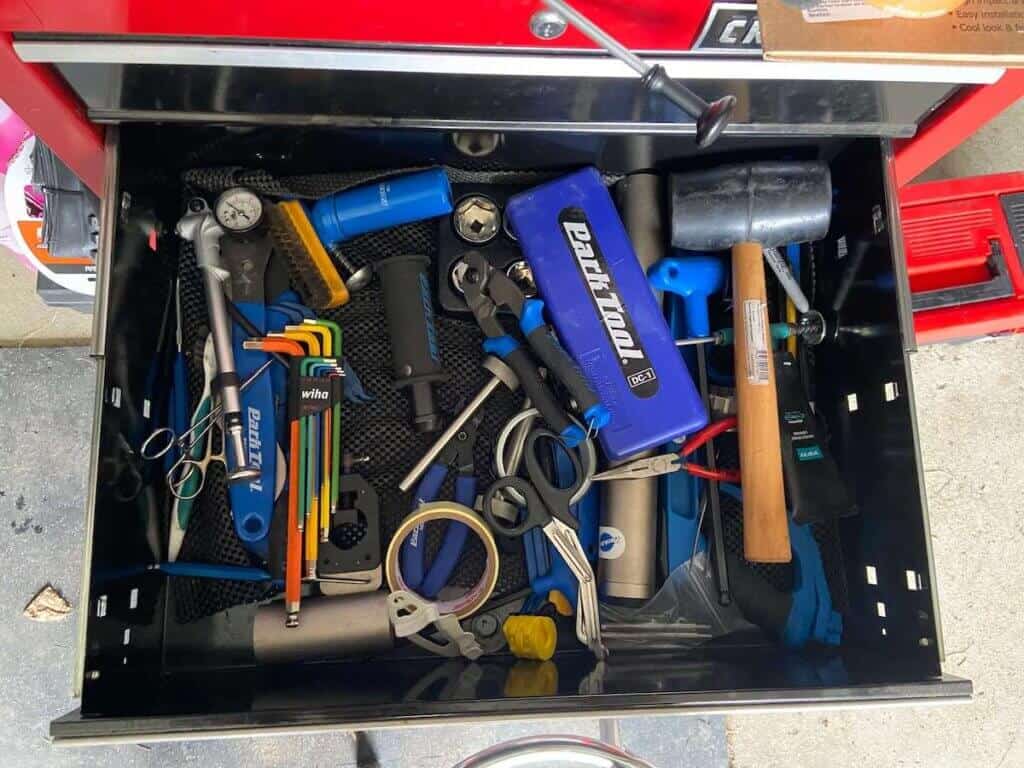
Building your mountain bike maintenance toolbox
Before we get our hands greasy, you’ll need some basic tools to start working on your bike.
You don’t need to invest in a full bike mechanics tool kit, but you will need some basic items.
Head over to my post on Mountain Bike Tool Kits & Essential Supplies for your Home Bike Shop for a complete list.
Here are the basic tools you will need to get started:
- Set of hex wrenches
- 3-Way Torx Wrench — T10/T25/T30
- Shock pump (digital is really nice. Analog is cheaper)
- Multi-tool with chain breaker
- Tire levers
Mountain bike maintenance schedule
To help prevent big and expensive problems, it’s important to keep up with regular mountain bike maintenance.
The tips below are a good starting point, but you may need to adjust your maintenance schedule based on how often you ride and the conditions you ride in.
Before every ride
TIP: It’s a good idea to get into the habit of pumping your tires up to a specific PSI before each ride. Not only will this make your riding feel more consistent, but it’ll also help you avoid rim dents and flats.
PSI will vary depending on your weight, ride style, type of terrain you’re riding on, and what tires you have.
Grab a tire pressure gauge so you know exactly how much air you’re putting in and what PSI you like to ride at.
Every 2-6 months
Yearly
Read next: New to mountain biking? Check out my Mountain Biking 101 Post
Mountain bike maintenance Projects
Now that I’ve covered the essential mountain bike maintenance tools you’ll need and a general overview of a mountain bike maintenance schedule, here are some mountain bike maintenance projects to get you started:
1. Clean, grease & lube your bike
One of the best ways you can keep your bike in tip-top shape and running smoothly is to keep all the moving parts nice and clean, greased, and lubricated. This includes your chain, drivetrain, dropper post, front and rear suspension, hubs, etc…
Here are a few quick and easy ways to keep your bike clean, greased, and lubed:
What you’ll need
- Degreaser
- Brushes
- Chain lube
- Maxima SC1
- Grease
- Shop rags
Videos & tutorials
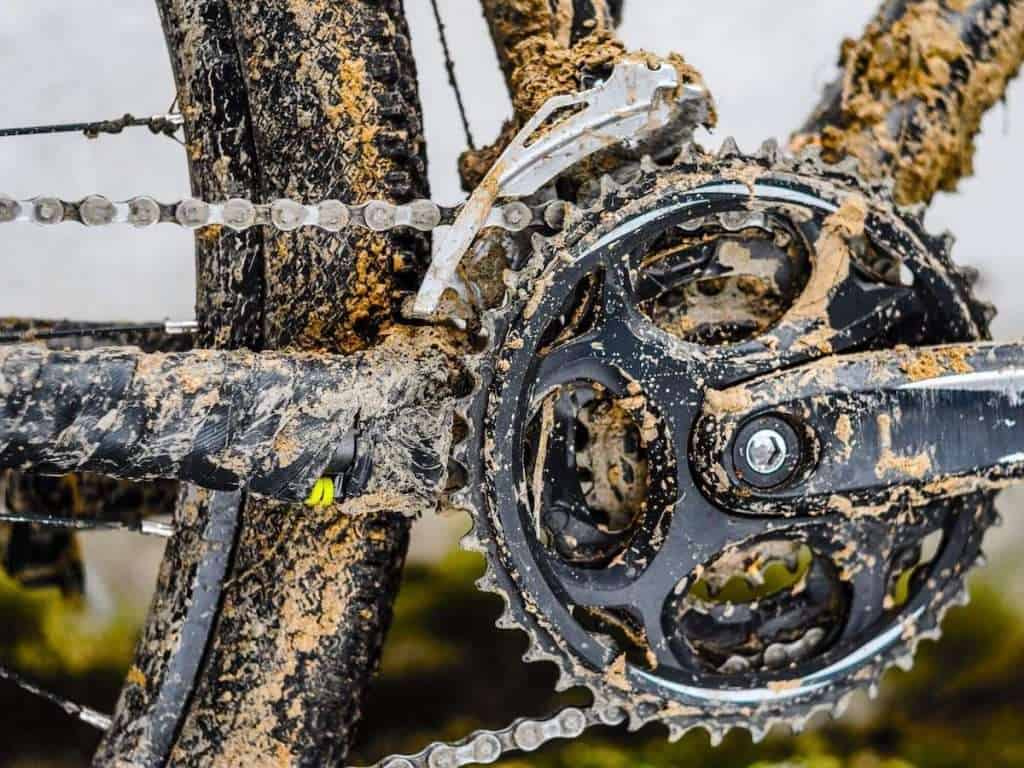
2. Replace the chain
Bike chains wear out over time and will eventually need to be replaced. A good rule of thumb is to replace your chain when it’s about 75% worn.
If you feel like your gears are slipping or you’re hearing a lot of chain slap as you bound down the trail it might be time to load a new chain onto your drivetrain.
You can check the wear by using a chain wear indicator or if you track your rides (like on Strava), a new chain is needed around every 2,000 miles.
What you’ll need
- Chain wear indicator (not necessary, but helpful)
- Multi-tool with a chainbreaker
- New chain (these are drivetrain specific, so make sure you know what speed you need – ie 11-speed, 12-speed, etc…)
Videos & tutorials
3. Add tire sealant
If you’re running tubeless tires (which most mountain bikers are these days), you’ll need to add 1-2 ounces of fresh sealant every few months depending on how much you ride, where you ride, and what the temps are.
As a general rule of thumb, the more you ride, the harsher the trails (think thorns and rocks), and the less humid the temps, the more often you’ll need to add sealant.
What you’ll need
- Valve core remover
- Sealant injector
- Tire sealant
- Spare valve core if old one is gunked up
Videos & tutorials

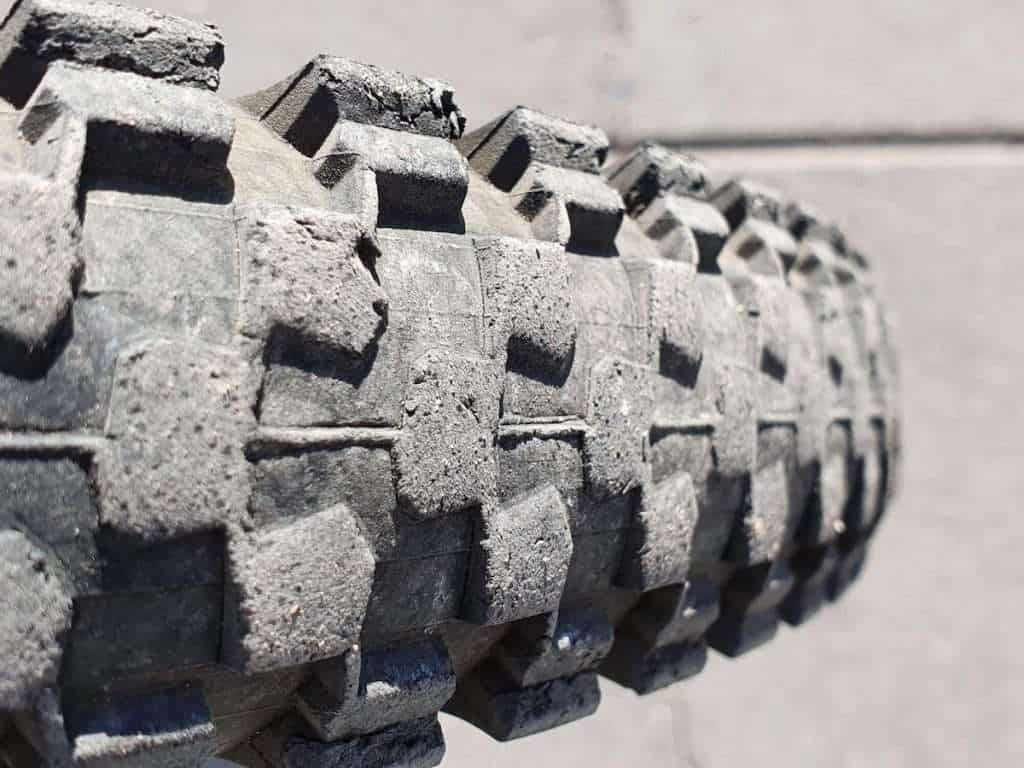
4. Replace tires
How long has it been since you’ve replaced those nubby tires on your bike? If they’re looking a little worn then it’s probably time to swap them out for new rubber.
A couple of quick things to look for when deciding if you need a new tire:
What you’ll need
- New tire
- Tire levers
- Floor pump with air chamber
- Tire sealant
- Rim tape if old is damaged
Videos & tutorials
5. Bleed Your brakes
If you’ve noticed that your brakes are feeling ‘soft’ or ‘squishy’ even though there’s plenty of life left in the brake pads then it’s probably a sign that they need to be bled. What does that even mean?
Bleeding brakes involves removing air bubbles from the brake lines by pumping new brake fluid into and through the lines. These bubbles form after normal use and they need to be ‘bled out’ so that the brakes feel firm again and aren’t contaminated with air.
Bleeding brakes is not as hard as it sounds and after watching a video a few times guaranteed you’ll be able to do it yourself!
What you’ll need
- Shimano brake bleed kit and mineral oil or a SRAM brake bleed kit with DOT fluid
- Rags
- Gloves
Videos & tutorials

6. Lower fork leg suspension service
Like brakes, the front fork shock needs to be serviced every now and then to keep it working smoothly and efficiently. Dirt and grime can get through the seals and the oil that keeps the shock lubricated eventually seeps out or dries up.
Every front fork shock has a suggested service maintenance schedule which is around every 50 hours of riding, but check your shock service manual for actual recommendations.
Servicing the lower fork leg isn’t as complicated or scary as it sounds. You will need to take the fork partly apart, but the process of servicing it is actually pretty easy and straightforward. It involves replacing the seals and adding more suspension oil.
TIP: The process of serving a lower leg is the same for most forks, but the oil that you need varies for different brands. Make sure the oil you have matches the brand of fork you’re working on.
What you’ll need
- Oil (Fox, RockShox, or other)
- Shock pump
- Multi-tool or hex wrench set
- Hammer with plastic or rubber covering
- Pick
- Fork seal kit (depends on brand/shock)
- Fork grease
- Isopropyl alcohol
- Rags
Videos & tutorials
7. Rear shock suspension service
If you do a lower fork leg service you might as well do a rear shock service as well, right? Right 🙂 This is a little more tricky than a fork service, but definitely still doable if you have the right tools and watch a few videos.
Why service the rear shock? For the same reason you want to service the front fork: regular maintenance keeps the shocks feeling smooth and efficient and ensures that your ride feels as fluid as possible.
Note: This is just for air shocks – I’m sure you can self-service coil shocks as well, but I’ve never done it…
What you’ll need
- Rags
- Vice or strap wrench
- Isopropyl alcohol
- Pick
- Rear shock service kit (get the right one for your rear shock)
- Locktite
- Multi-tool or hex wrench set
- Shock pump
Videos & tutorials
Final thoughts
I hope this post inspires you to get your hands dirty and do a few basic (or advanced!) home bike maintenance projects.
Working on your bike isn’t as scary or perplexing as it may first seem. Just take it slow, make sure you have all the tools, and watch some good YouTube videos 🙂
RELATED POSTS
New to mountain bike maintenance? Check out these related blog posts:
Do you do your own mountain bike maintenance at home? What does your maintenance schedule look like and how did you learn those skills? Leave a comment below!


I love hearing from you and appreciate your comments! However, if you leave a rude, unconstructive, or spammy comment, it will be deleted. It’s cool to be kind. Have an awesome day!