
Road-Tripping In Bandit: What We’ve Learned So Far
(Disclaimer: there’s a good chance this article contains affiliate links if you click on one of them I may receive a small commission at no extra charge to you.)
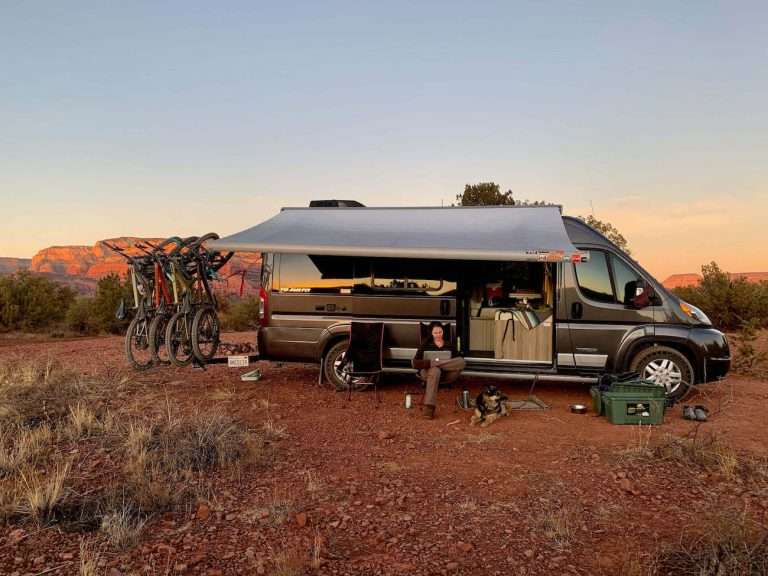
It’s been about six months since we purchased our 2020 Winnebago Travato 59g in Phoenix and I thought it might be interesting to do a little recap on what we’ve learned so far.
This is my first van ever and Andy’s first RV so it has definitely been a learning process. Things like how to organize the kitchen and what we needed to do to upgrade it for our mountain biking needs were more challenging and involved than expected…
But first, let’s learn a little bit more about the story of Bandit because it’s a good one.
The Story of Bandit
We initially made an appointment with La Mesa RV in Phoenix to look at a used 2019 Travato 59g with 25K miles. On paper it looked great – low miles and decent price – but when we rolled up to check it out there was a little bit more wear and tear than we expected like ripped seats, a hole in the driver’s side mirror, a few scratches, etc.
So…
We thought maybe we should just buy a brand new one?! There was a RV show happening in Phoenix right that moment and a brand new 2020 Travato 59g was on demo. We went through all the motions, vacillated back and forth and then ended up driving away that night with our shiny new steed! #stoked.
Fast forward a couple of weeks. Andy had a work trip in Boulder so he drove the van to Las Vegas for some warranty work and then hopped on a flight to Colorado. When he touched down in Denver he got a call from the warranty folks in Vegas and they said:
“Hey man, your VIN number doesn’t match your warranty paperwork.”
What???
Andy promptly called the dealer in Phoenix (who we bought the van from) and they said:
“Um… not only does you VIN not match the paperwork, it doesn’t match your bank loan either.”
Ok…
“Oh, and the vehicle you’re driving – we reported it STOLEN”
And this is where Bandit got the name Bandit.

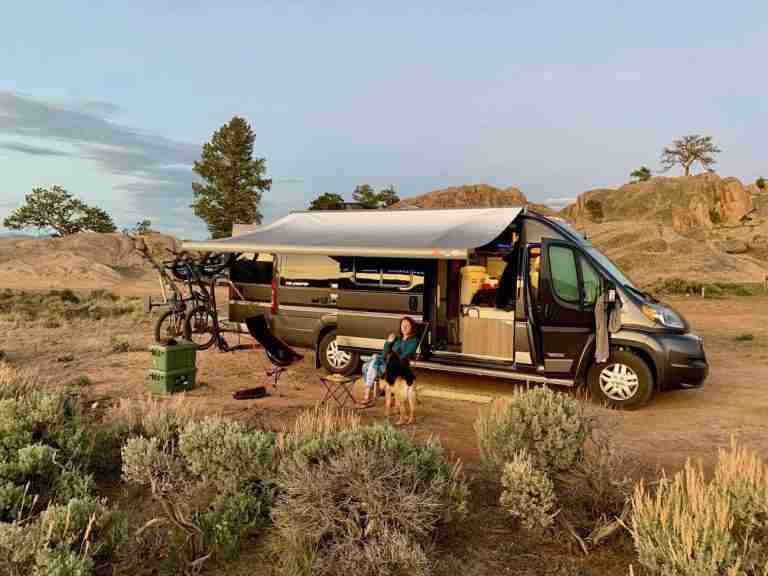
Bandit and Aiko at Hartmans Rocks
Apparently, all the vehicle paperwork and loan details had been drawn up for the USED van that we had originally gone to Phoenix to see. Not the brand new van we drove away with. They had no record of selling us our van.
So that all happened in January/February and then Coronavirus hit in March and all the DMV’s closed (along with the entire world). Now it’s June and we still haven’t been able to get Bandit registered and the original title that was supposed to be sent to our local DMV? 100% MIA.
It’s been a laughable ordeal.
But the good news is that we have a temporary registration until July so we can still – and have been! – out on road trips.
We’ve also been busy outfitting Bandit to our liking and below are some of the changes and upgrades we’ve made.
Even if you don’t have a Travato van, hopefully you’ll find this interesting and helpful for your own road trip travels!

Travato 59g Upgrades
Tires
The original tires that came on our Travato 59g were Nexen Roadian. For pavement, they worked great. For dirt and gravel, not so much. We shredded them trying to get up the steep entrance road to Hartmans Rocks so we decided to upgrade to four CrossClimate Michelin Agilis. Hopefully these will give us more traction off-road and allow us to access trailheads a bit farther off the main routes.
Rear Hitch
The hitch has probably been the biggest saga of all (aside from our van being reported stolen ?). The original hitch that came with the Travato had a 350lb tongue weight rating. But… it started to bend with only 100lbs of bike rack/bike weight loaded onto it. The amount of flex and bounce that we saw from our bike rack with that hitch was frightening (especially since my bike is my most precious possession!)
Googling around and doing a bit of research, we learned that many people have had the same problem with the original Travato 59g hitch even when loaded well-below the rated weight specs. The images below show the massive cracks that developed after less than 8K miles.
So, we ordered a new hitch that is beefier and bolted on to our van more securely. Hopefully it will minimize the flex and bounce of our bike rack ?.

Cracks after only 8K miles!

We were well within the weight load specs
Speaking of bike racks, this is our set up:
-
Recon GEN2 R4 Four Bike Shuttle Rack. We wanted a hanging bike rack because it sticks out less than a platform rack and we wanted to be able to carry at least four bikes. This Recon has worked great so far with a few modifications: we added two ratchet straps on either side to minimize the flex and sway (although hopefully our new hitch will cut way back on the extra movement) and we added a bit of foam to the right-most wheel bucket to protect the rear glass window when opening the back doors. It also works as a bike stand which is super useful, too since we tend to break bikes a lot…
-
Kuat Pivot V2 Swing Away. In order to access the back of the van with a bike rack installed, we needed to add a swing away hitch extender and we went with the Kuat Pivot V2. It’s super easy and works great!

Kuat Pivot allows us to open the back doors with bike rack installed
Generator Resonator
The noise from generator was quite loud and harsh before we attached a resonator to the exhaust pipe. The resonator doesn’t exactly quiet the generator, but it changes to the tone and makes it slightly softer and more bearable. We haven’t had to use the generator to run the AC at night, so I can’t speak to how loud it is while sleeping.
Shower head
The original shower head that comes with the Travato 59g is terrible. It dribbles water onto your head when you go to brush your teeth and it only has one jet-like setting. So we upgraded to an Oxygenics shower head. There’s still a bit of a dribble when you turn the faucet on post-shower, but it’s nothing like the deluge that came out of the original shower head.

So much better than the original
Shower Drain Modification
The first time we took a shower in the van (which as mountain bikers we do daily), the shower drain plugged up after only 5 minutes each. Apparently the engineer who designed the drain was 1) not female with long hair and 2) not outdoorsy.
The dirt and hair clogged up the drain within minutes.
To fix this, we:
1) Removed the stock filter
2) Covered the entire drain assembly with cheese cloth secured by an elastic hair tie
3) Used this filter on top of the cheese cloth
Voila! 10 days in the van and the shower drain didn’t clog once.
Travato 59g Organization hacks
The bathroom
We added a few things to the bathroom to make it more travel and user friendly. We attached a triple dispenser to the wall for hand sanitizer, body wash, and shampoo. It doesn’t rattle like a metal shelf would and there’s no worry about dropping the soap!
We also installed a tension towel rack above the toilet. I was a little worried that it would rattle free on bumpy roads, but so far so good!

Shampoo/soap dispenser

Tension rod towel rack
The kitchen & pantry
This is my main domain. I love cooking so I wanted to set up our Travato 59g kitchen as efficiently as I could. We decided to turn the cabinet to the right of the fridge into a pantry and to do this, we installed metal shelving inside the cabinet. It was a little tricky to put together because we had to install the shelving inside the pantry, but the struggle was worth it. It’s the perfect pantry! To build your own pantry:
1) Buy two of these shelves
2) Unscrew the black feet from each of the legs
3) Go to a local hardware store and buy four double ended studs that look something like this → Be sure to take two of the legs with you so you can make sure the studs fit.
4) Screw two legs together with the double ended stud so that you have four long legs
5) Start building the shelves inside the cabinets. It takes a bit of patience, but the end result is worth it.
(FYI: I only used five of the six shelves)

I’m so proud of this pantry. It works so well!
For cooking, we’ve added a few appliances and cooking/eating ware that have made dining in the van so much more easy and enjoyable.
-
Nesting pots. These are essential! They fit nicely in the overhead cabinet above the stove. There are four pots with one lid that fits them all, one frying pan (the larger pot acts as the lid), and a detachable handle that works with each pot/pan.
-
GSI table set. This table set is great because everything is easy to clean and fits nicely within the mesh bag. The only downside is that they are not microwaveable.
-
Mini toaster. This little toaster works with the inverter and it opens up a whole new world of cooking: toast, mini pizzas, baked fish, etc…
-
Coffee maker. We were using a French press before we got this coffee maker, but it was hard to clean the grains out without wasting water. So, we bought this little coffee maker and it works great with the inverter! We secured it to the table where it stays put and doesn’t rattle around.

Nesting pots, mini toaster, and GSI tableware set all fit nicely above the stove.
Clothes & Gear
I used to travel A LOT when I worked on ships and one of the best travel hacks I learned was to use packing cubes for all my clothes. This system works amazingly well in the van, too. I organize my clothes by type (eg. pants, short sleeved shirts, etc…) and then just shove everything into the cupboards above the bed. The only trick is to me motivated enough to put each piece of clothing back where it belongs at the end of the day ?
Pro tip: use multicolored bags so you know which bag contains which set of clothes.

Keep clothes organized with packing cubes!
Another way we’ve organized our gear – specifically mountain bike gear – is with these Plano Sportsmans trunks. Two of the 56-quart trunks stack on top of each other underneath the bed. They’re easy to pull out and can hold quite a bit of gear.

Two of the 56-quart Plano trunks can fit stacked on top of each other underneath the bed
Recycling
I’m a diehard recycler and we’ve found that recycling on the road is a bit challenging… (the US is so behind the environmental train…) So we’ve installed a Trasharoo bag on the rear of our van for recycling. We just fill it up and then take it to a recylcing center either on the road or when we’re back home.

Trasharoo trash bag
Other Things we’ve learned
In addition to upgrading and organizing, there’s are few things we’ve learned about our travel style and van needs.
- We need to carry extra water. Our van can carry 21 gallons in the main tank which we can comfortably camp with for 3 days if we take a shower each per day (which, if we’re mountain biking, is a definite must). To carry more water, we bought four of these Rotopax 2-gallon tanks so we can carry 8 extra gallons of water. In all, we can camp for about 5 days without filling up.
- Cooking needs to be easy. I love to cook, so I was initially set on making gourmet dinners each night but I quickly realized that this was not sustainable – mainly because of the cleanup at the end and the limited fridge storage space. So instead, I’ve sought out easy (but still healthy) sauces, boxed grains, and simple recipes that don’t require a ton of ingredients or excessive pots/bowls. I plan on doing a van cooking post, so be on the lookout for that!
- How to find campsites:
- Google Maps is our go-to way finding campsites. We just open it up on our phones, turn it to satellite view and find a fire road with a pull out. Almost never fails.
- We’ve also used the website Campendium which is great for boondocking and learning where others have camped.
- The app AllStays has been pretty good… it doesn’t have great dispersed camping locations, but it does have pretty much all state park campgrounds, National Park campgrounds, private campgrounds, etc…
- But my FAVORITE is Harvest Hosts! FREE camping at wineries, brewering, museums, farms, etc… Wine, views, and a cheese plate make my heart melt ?

The best campsite in Hartmans Rocks!
Do you have a Travato or other van that you’re still figuring out? What hacks and upgrades have worked for you? Leave a comment below!


Just wanted to reach out to see if you are still happy with the bike rack and swing away. My wife and I are purchasing a 59K and are avid mtn bikers here in Colorado and plan on taking our bikes with us when we travel. We ride XC and DH, so we have lots of places to visit, just like your adventures. Thanks Robert
Hey Robert! We have had some issues with our Recon rack like one of the baskets breaking (we did get a free replacement) and having to replace the rear hitch since it cracked after a few thousand miles. I don’t have any experience with any of the other vertical hanging racks (like Northshore, Lolo, Velocirax…) but my guess is that you’d still need to replace the rear hitch and use the ratchet straps on either side to take some weight off.
We do really love the Kuat swing away, though. It works really well and gives us easy access to the back. Hope that helps!